

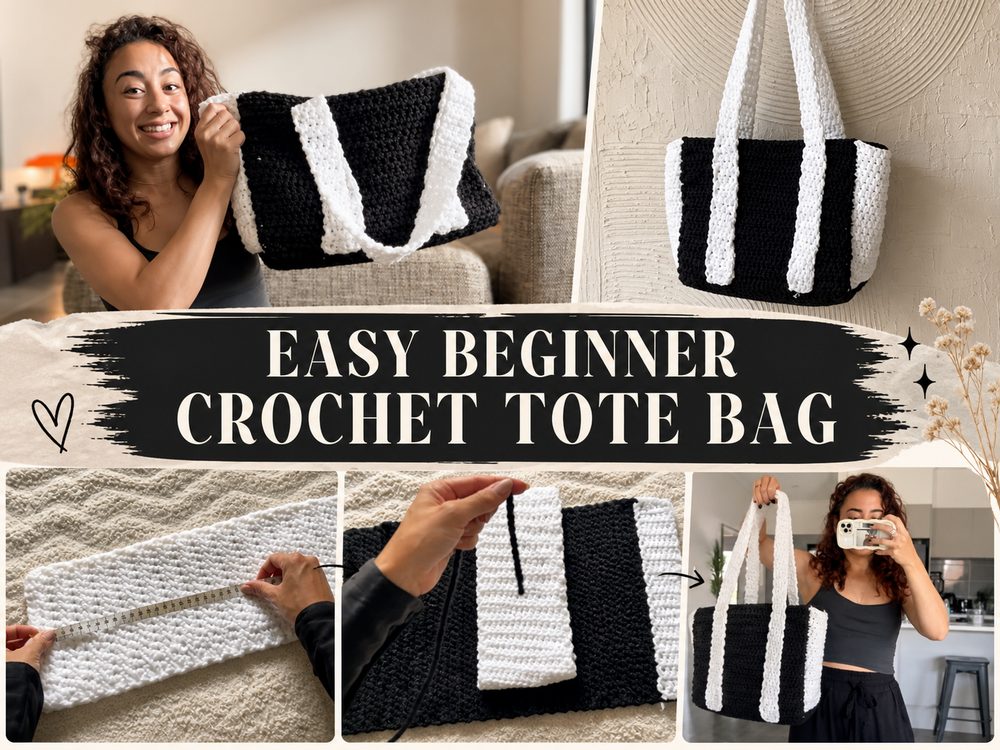
A simple crochet bag is one of those projects that feels useful right from the start. You are not just practicing stitches for the sake of practice. You are making something you can actually carry, wear, and enjoy when it is finished. This beginner-friendly tote is a lovely choice if you want a first bag project that looks neat without feeling too complicated. The design is built in a very approachable way, and the overall shape stays nice and simple, which makes it less intimidating for newer crocheters. In the tutorial, the bag is made from easy rectangular sections worked mostly in half double crochet, so it has a clean, classic look that is easy to customize as you go.
Why You’ll Love This Project
This bag is such a satisfying make because it keeps the construction simple while still giving you a polished finished piece. It is practical, easy to size, and perfect for beginners who want to move beyond scarves or dishcloths and try a wearable accessory that still feels manageable. The tutorial’s rectangle-based construction also makes it easier to understand how the whole bag comes together.
Materials Needed
- Yarn
- Crochet hook
- Scissors
- Yarn needle
- Stitch markers
- Measuring tape
Use a yarn and hook size that matches your desired fit and texture.
Best Yarn for This Project
A smooth, sturdy yarn works best for a crochet bag because it helps the tote hold its shape a little better. Cotton is a great choice if you want a bag that feels practical, breathable, and less stretchy. A cotton blend can also work nicely if you want something a bit softer on the hands while crocheting. If you prefer a more relaxed everyday tote, you can use acrylic, but keep in mind that very soft yarn may make the bag stretch more once it is filled.
Skill Level
This project is beginner-friendly and a great step up from very basic practice pieces. Since the bag is made from simple sections and uses half double crochet, it gives you a chance to build confidence without dealing with overly fussy shaping. The main thing to focus on is keeping your stitches even so the panels stay neat.
Size and Fit Guide
One of the nicest things about this bag is how easy it is to adjust. Since the tutorial uses rectangular panels, you can make the bag wider, taller, or slightly deeper just by changing the size of those pieces as you work.
Measure against a tote bag you already like, or simply hold your panel up as you go. If you want a casual everyday bag, keep it medium in size. If you want more room for books, groceries, or craft supplies, continue adding rows until the dimensions feel right. You can also adjust the strap length to make it sit higher on the shoulder or hang lower for a slouchier look.
Stitches Used
- Chain
- Half double crochet
- Slip stitch
The tutorial clearly centers the design around half double crochet worked into rectangular panels, which keeps the stitch pattern easy to follow and beginner-friendly.
How to Make It
Step 1: Start the Foundation
Begin by making a foundation chain for your first panel. This chain sets the width of the section, so take a moment to decide how wide you want your finished bag to be. For a beginner project, it helps to keep the shape simple and not go overly large on your first try. Count carefully, and try not to make the starting chain too tight.
Once the chain is ready, begin working your first row. This project is especially approachable because the tutorial builds the bag from straightforward rectangular pieces rather than a lot of complicated shaping.
Step 2: Build the Main Panels
The body of the bag is worked mostly in half double crochet, which gives the fabric a nice balance. It is denser than very open stitches, but still easy and quick to work. As you continue row by row, you will start to see a smooth rectangle forming. This is where consistency matters most.
Try to keep your tension steady so the sides do not pull inward or flare outward too much. If the edges start looking uneven, stitch markers can help you spot the first and last stitch of each row. Keep crocheting until the panel reaches the height you want.
Because the tutorial uses rectangle-based construction, you can make each section as large or small as you like. That flexibility is one of the reasons this is such a nice beginner bag.
Step 3: Make the Matching Pieces
After the first panel is finished, make the remaining panel or panels to match, depending on how you choose to follow the construction. The most important thing here is consistency. Check that the width and height match before moving on. Lay the pieces flat and compare them side by side.
If one piece looks slightly larger, it is usually easier to fix it now rather than after joining. A bag always looks cleaner when both sides are even, and this little bit of checking makes a big difference in the finished look.
Step 4: Shape the Bag
Once your rectangles are ready, the bag starts to take shape during assembly. Fold or arrange the pieces according to the tutorial layout and check how the sides and bottom line up. The nice thing about this style is that the shape comes naturally from the panels, so you do not need difficult shaping tricks to get a functional tote.
Before joining everything permanently, hold the pieces together and imagine how deep you want the bag to feel. If you want more room, you can enlarge the panels. If you want a smaller everyday purse-style tote, keep the dimensions more compact.
Step 5: Join the Piece
Join the bag carefully along the edges, making sure the corners line up neatly. You can use slip stitches or seam it with a yarn needle, depending on the finish you prefer. A crochet join can look more structured, while sewing it together can sometimes create a flatter seam.
As you join, keep checking that the bag is sitting evenly. Do not rush this part. A tidy join helps the bag look much more polished, even if the stitches themselves are very simple.
Step 6: Add the Straps
The straps are what turn the finished panels into a real, usable bag, so it is worth taking your time here. Make them long enough to sit comfortably on your shoulder, but not so long that the bag hangs awkwardly. If you like, you can compare the strap length with a tote bag you already use.
When attaching the straps, make sure both sides are placed evenly. Uneven handles are one of those small things that can make a finished bag feel off. Reinforce the attachment area well, especially if you plan to carry heavier items inside.
Step 7: Finish the Edges
Once the bag is assembled, go around and tidy up any loose areas. Weave in all yarn ends carefully so they do not work loose later. If the opening of the bag looks a little wavy, a simple edging round can help neaten it up.
At this point, the tote should look clean, simple, and sturdy, with a nicely textured half double crochet fabric and a classic beginner-friendly shape. The finished style in the tutorial is uncomplicated and practical, which makes it easy to use every day.
Helpful Tips
- Use cotton yarn if you want the bag to feel sturdier and less stretchy.
- Keep your starting chain relaxed so the bottom edge does not pull.
- Check that all panels match before joining.
- Use stitch markers on row ends if you often miss the last stitch.
- Test the strap length on your shoulder before fully attaching it.
- Weave in ends securely because bags get handled a lot.
Common Mistakes to Avoid
- Making the foundation chain too tight
- Accidentally adding or losing stitches at the row ends
- Joining the panels before checking the sizes match
- Making straps too thin for the weight of the bag
- Using very stretchy yarn for a bag that needs structure
- Forgetting to reinforce the handle attachment points
Customization Ideas
You can easily make this bag your own. Try stripe colors for a playful look, or keep it all one shade for something simple and classic. You could make the tote taller for books, wider for shopping, or smaller for a casual shoulder bag. A contrasting border can add a nice finishing touch, and you can also sew in a fabric lining later if you want more structure. Buttons, a magnetic clasp, or even a small inside pocket can make it feel more personalized.
Style Ideas
This type of crochet tote works beautifully as an everyday bag, a light market tote, a book bag, or a relaxed weekend accessory. It also makes a sweet handmade gift. In soft neutral shades it feels timeless, while brighter colors can make it feel fun and youthful. Pair it with simple outfits, summer dresses, jeans, or casual layered looks.
Care Instructions
Hand wash gently in cool or lukewarm water if needed. Reshape the bag and lay it flat to dry. Avoid high heat, especially if your yarn is soft or stretchy. If the bag loses its shape a little after use, light blocking can help freshen it up again.
Time Needed
This may take a few hours depending on your speed, yarn, size, and stitch pattern.
Conclusion
This beginner crochet bag is a wonderful project when you want something simple, useful, and genuinely fun to make. The construction is easy to understand, the shape is easy to adjust, and the finished tote is something you can actually use right away. You can keep it minimal or add your own personality through color, size, and finishing details. It is the kind of project that helps you practice your stitches while still ending with something that feels special.
FAQs
Is this bag beginner-friendly?
Yes. It is a very approachable project because the shape is simple and the stitching is repetitive.
What yarn is best for a crochet bag?
Cotton or a cotton blend is often the best choice because it gives the bag a sturdier feel.
Can I adjust the size?
Yes. You can make the rectangles wider or taller to change the overall bag size.
Will the bag stretch?
Some stretch is normal, especially with softer yarns. Cotton usually helps reduce that.
Can I make this in different colors?
Absolutely. Solid shades, stripes, or color blocking can all work beautifully.