
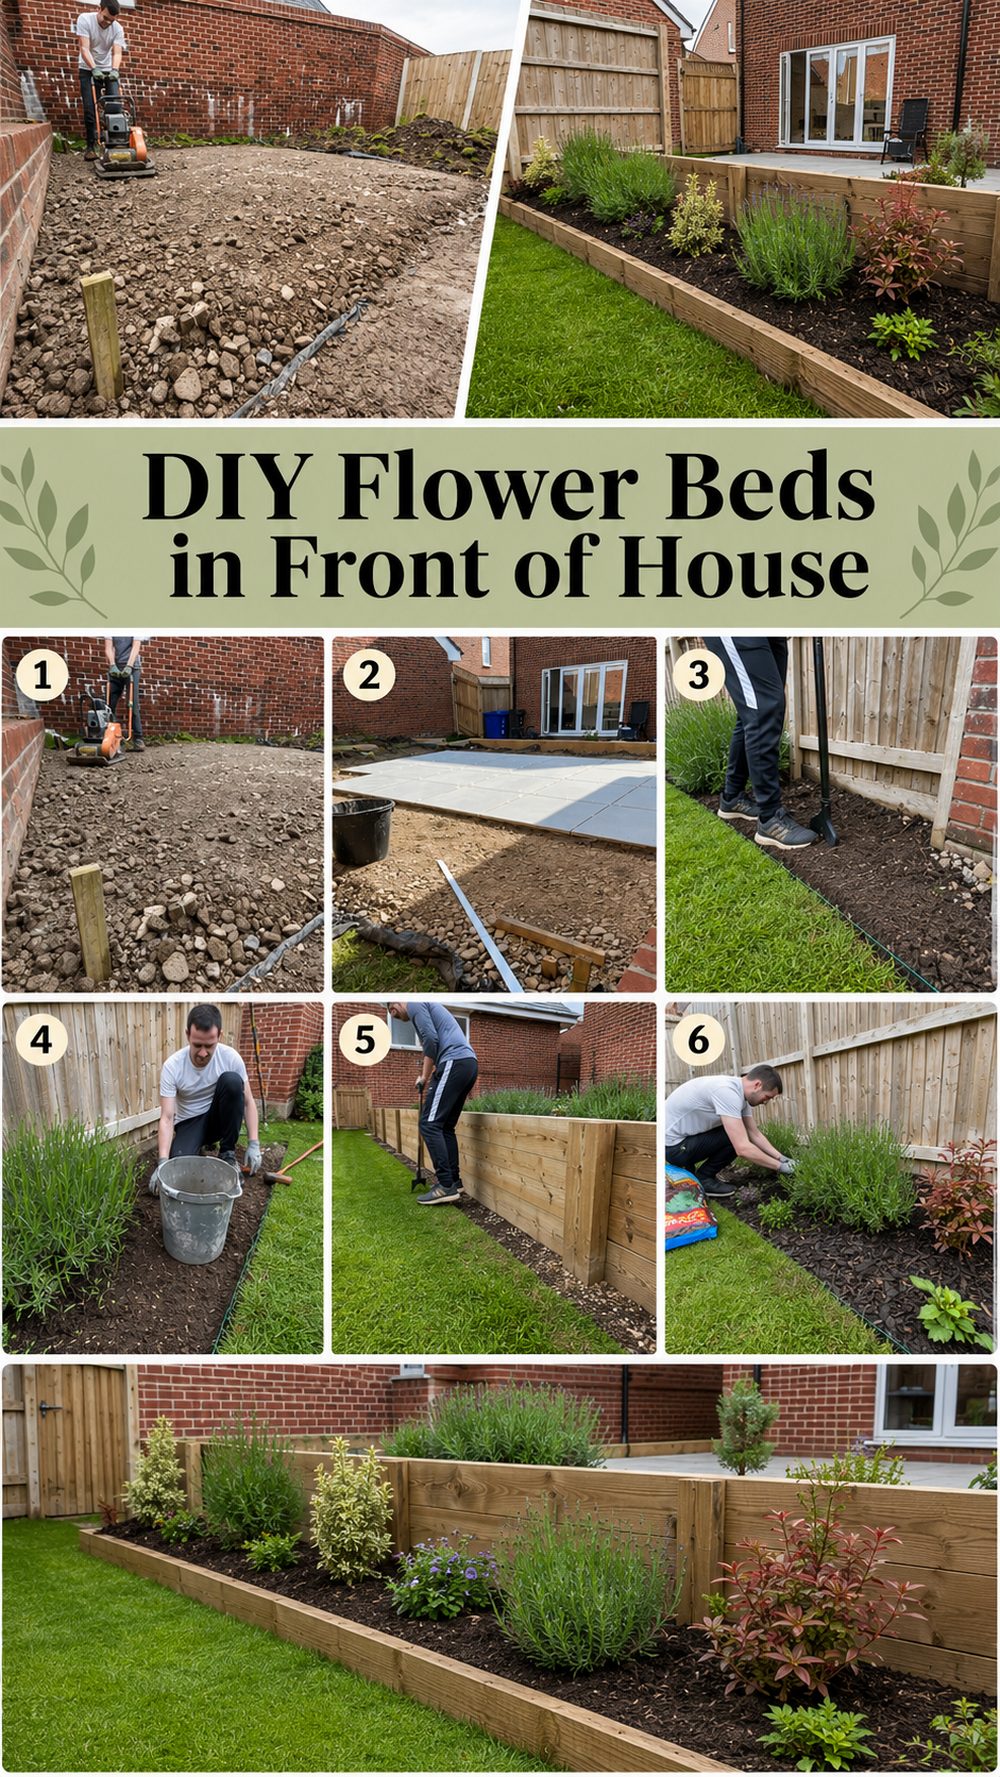
A front flower bed is one of the best ways to make your house more welcoming without undertaking a major outdoor project. It gives colour, shape and texture right at the first point of entry to your home. If your front yard looks plain, your foundation area looks bare, or you want a cleaner, more finished landscape, then this type of project is especially good. I chose a tutorial that walks you through installing a front flower bed in a simple, practical way. It focuses on shaping the bed, preparing the area and planting it out as part of a home landscape project.
Why You’ll Love This Project:
This project will give the front of your home a more polished look, help define the space around the house, and can be tailored to fit almost any garden size or style. It sounds like a lot, but it’s still something you could knock out yourself in a weekend.
What You’ll Require:
Defined bed border or landscape edging
Garden soil or conditioner if needed
Mulching
Shrubs, flowers or small accent plants
Optional stone, brick, or border of your choice
If you prefer to use a weed barrier
Use materials that are similar to match the look, size and style you want.
What you need:
Spade.
Garden spade or border fork
Rake
Trowel hand
Gloves
Wheelbarrow or garden cart if it helps
watering can or hose
Most versions of this project will require basic garden tools.
Materials Well Suited for This Project:
Strong outdoor materials always work best for front flower beds. Choose healthy plants that fit your light conditions, quality mulch to keep the bed looking tidy, and edging that provides a clean finish to the shape. For lower maintenance, consider hardy shrubs, with a few seasonal flowers. Create a softer cottage look with plenty of layered blooms and natural curves.
Skill:
Easy for beginners. It’s a simple process but you’ll find it helps to take your time over the layout, spacing and shaping so that the finished bed looks balanced.
Size and Position Guide:
You can choose to make the bed narrow for a simple foundation border or wider for a fuller landscaped appearance. Curved edges often feel softer and more natural; straighter lines are more formal. Choose plants according to the space available, the amount of sun the site gets and how close the bed is to your walkway, porch or front windows. Use taller plants in the back and lower plants in the front so the bed feels layered and not crowded.
How to Make It:

Prepare base
First find a place in front of the house for the flower bed. First, mark the overall shape so you can step back and see how it looks from the street and from the porch. When the design is satisfactory, clear the area of grass, weeds or other unwanted growth. Make sure the bed is clean properly to get a fresh base to start.
Prepare the bed
Giving a front flower bed a definite shape is one of the most important things in making it look attractive. Define the border with a spade or edging tool. Smooth flowing curves often work particularly well in front-yard landscaping because they soften the line of the house. Keep changing the shape of it until it feels right in relation to the width of the home and the yard.
Amend the Soil
If necessary, clear the area and loosen the ground, adding in fresh garden soil or compost. This helps plants establish better and gives the bed a healthier start. Rake the surface to be nice and even and easy to plant into.
Positioning of Plants
Plant your plants Put your plants in the ground while they are still in their pots. That makes it easier to shuffle things around until the layout is just right. Start with bigger shrubs or anchor plants, then add smaller flowering plants or accents. Don’t pack so close together that the plants can’t grow.
Mount the bed
Dig holes for each of the plants and plant them at the same depth as the container. Firm the soil gently around each one and space them out as needed. Water as you go to help root development.
Add Mulch to Complete the Look
After planting, spread mulch over the bed to help hold moisture and give the whole area a neat, finished look. Avoid getting mulch on plant stems. If you’re using a decorative border, stone edge or other such detail, add that last so the flower bed has a clean front line.
Dress Up the Front of Your House
Walk away and look at the bed from different angles. Repeat the colours of the plants near the porch or match the shape of the bed to a line in the walk. Keep the palette simple for a clean look of curb appeal. This kind of front of house project is aided by the tutorial as it walks you through building the bed step by step and talks you through the install process.
Useful tips:
‘It’s easy to change the shape before you dig it out.
Try out your plant layout before you plant anything
Keep the taller plants in back and the shorter ones in front
Water thoroughly after planting
Let the shape of the bed direct the whole design
Select mulch for a cleaner, lower-maintenance finish
Common mistakes to steer clear of:
Small bed for growing plants
Skip the layout test before planting
Flora of overcrowding
Using plants that don’t match the sunlight
Failing to define the edge clearly
Mulching too near to the stems or trunks
Ideas for Customisation:
This project can be adapted to fit just about any style home. Opt for bright annuals for a cheerful look, evergreens for a more structured design, or soft pastel blooms for cottage charm. Add stone edging for a polished finish, solar lights for evening curb appeal, or a few decorative planters near the entrance to pull it all together.
Ideas on style:
This style of flower bed looks wonderful along the foundation, next to front steps, under windows, or surrounding a small front-yard tree. If you want a modern look, use simple colours and repeat the same types of plants. For a more casual look, pair greenery with seasonal blooms and natural mulch.
Care Instructions:
Water new plants regularly until they get rooted. Pull weeds early before they take over the bed. When the surface of the mulch starts to get thin, add a new layer. Trim plants as needed to keep them neat and out of the way of windows, walkways, or porch areas.
Estimated Time:
Depending on your materials, bed size, soil prep, planting choices and finishing details, this project could take a few hours or just a short afternoon.
Budget Guide:
You can do this on a modest budget by keeping the design simple, using smalller starter plants, reuse edging materials, or spread the project out in stages.
Conclusion:
A DIY flower bed in front of your house is a simple way to make your home feel warmer, cleaner, and more finished. With a well-shaped bed, a few good plants, and a tidy mulch layer, you can create something that looks professionally done while still keeping it personal to your style.
FAQs:
1. Is this beginner-friendly?
Yes. It is a very doable project if you take your time with the shape and plant layout.
2. What plants work best?
Plants that match your sunlight, climate, and maintenance level will work best.
3. Can I make it bigger or smaller?
Yes. The bed can be adjusted to fit a narrow foundation strip or a larger front-yard area.
4. Can I use recycled materials?
Yes. Reused brick, stone, or leftover edging can work well if it is clean and sturdy.
5. Will this work for curb appeal on a budget?
Yes. Even a simple bed with mulch and a few well-placed plants can make a big difference.