
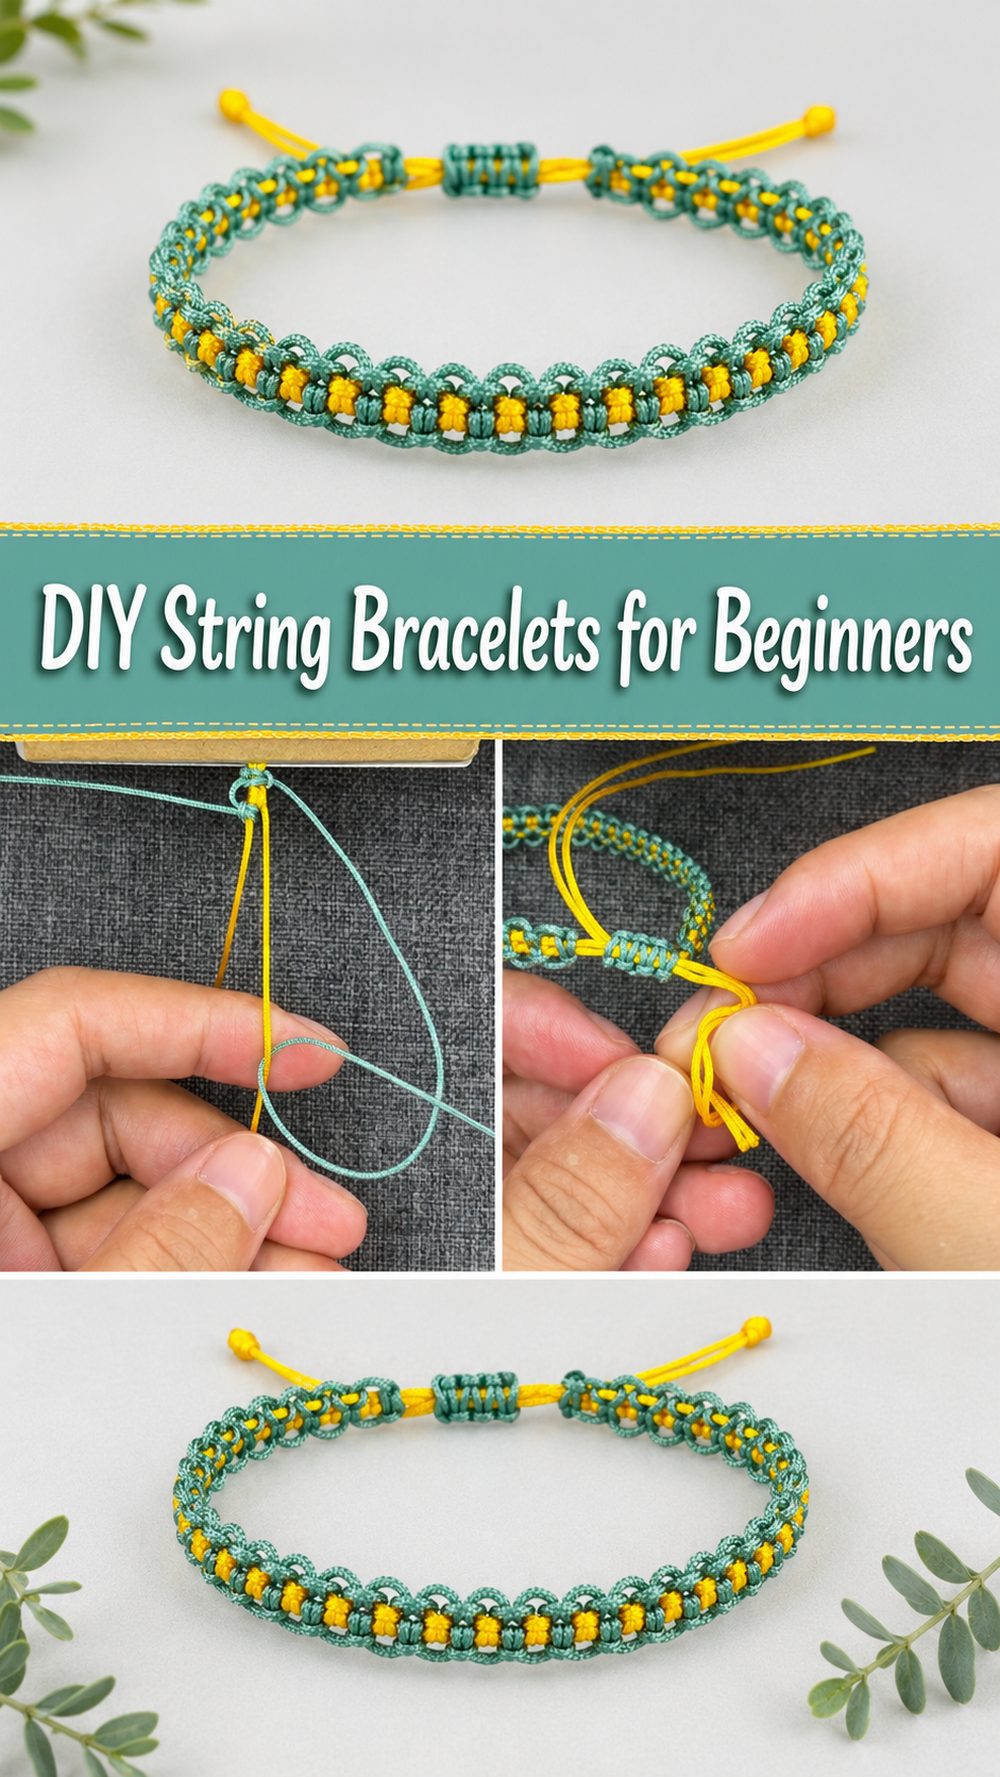
String bracelets are one of those simple little projects that never go out of style. They are fun to make, easy to String bracelets are one of those simple little projects that are timeless. They’re fun to make, simple to customise and a great way to use up colourful thread or cord you already have at home. This style has a nice knotted look that feels handmade in the best way. Whether you want something casual for everyday wear or a small gift for a friend. It’s also a great project for beginners as the process is repetitive, relaxing, and easy to master after the first few knots. You can make one in your favourite colours, stack a few together or size it for kids and adults. If you like easy to make crafts that look adorable but do not require costly materials, then this is a great bracelet project to try.
What you’ll love about this project:
This bracelet is easy and cheap to make and a great way to make something personal with just a few basic materials. The end result is simple, stylish and easily customisable with a variety of colours and knot designs.
Required Materials:
String, cord, thread, etc., for making bracelets
A few colours for a patterned look
Tape or clip or something to hold the bracelet in place while you work on it
Optional beads or small accents for more detail
Find similar materials that are the right size and style.
Tools Required:
Scissor
All you need are basic household or craft tools
The best materials for this project are:
For beginner bracelets, good options of string are soft bracelet cord, embroidery thread or smooth nylon. Choose a material that knots well and is strong enough to hold its shape. If you prefer a softer casual look, thread style material is lovely. Really easy to work with, especially if you want a cleaner, sturdier finish, smooth cord.
Level of skill:
Good for beginners. The process is mostly repeating simple knots so it is a nice first bracelet project.
Size & Placement Guide:
You can thin out this bracelet for a delicate everyday look or make it wider for more colour and texture. Adjust the length to fit comfortably around the wrist, leaving enough at the ends for tying or fastening. Pick colours that coordinate with your wardrobe, friendship sets or seasonal mixes. These bracelets are great for everyday wear, gifts, party favours, or wear them together with other handmade accessories.
How to Make It:

Stage 1: Set the Foundation
Cut your strings to a useful length and lay them out in a straight line. Tie or secure the top so the strands stay in place as you work. Before you start, separate the colours in the order you want the colours to appear in the bracelet.
Step 2: Organise the Pieces
Lay the strands flat and smooth them down so they won’t tangle. This will help you see the pattern clearly before you start knotting. Tape the top to a table or attach it to a cushion or clipboard for better control, if necessary.
Step 3: Make the Shape
Begin the bracelet by tying the working strand over the next strand in a regular knotting fashion. Work the strands in sequence to begin to build up the simple, even pattern of the bracelet. You want the knots to be tight enough to keep the bracelet looking neat, but not so tight that it loses its flexibility.
Step 4: Tie the Knots, Repeat
Repeat the same movement row by row as the pattern grows. This is where the bracelet begins to take shape and the design starts to emerge. Every so often check to see that the tension is still even and the strands aren’t twisting in a weird way.
Step 5: Add Colour and Texture
Let the colour order do most of the decorating. If you are using multiple shades, arrange them so that the bracelet looks balanced. You can add a bead or a small accent too if it suits the design but the knotted texture is just so beautiful on its own.
Step 6: Finalise & Style
Fasten off the end tightly when the bracelet measures the length you want. Leave enough string to go around the wrist, braid the ends or make a simple closure. Trim the ends for a tidy finish and give it one last check before wearing or gifting.
Helpful Hints:
Before finishing, measure against wrist.
Don’t catch your strands while working
Test the order of the colours before you knot too far.
Pull knots evenly for a tidy pattern
Work on a flat surface for best control
If you use decorative glue or added details, allow them to dry thoroughly
Common Mistakes to Avoid:
Cutting the strings too short .
Tying a few knots tighter than the rest
Letting the strands curl and mat
Rushing the pattern without checking placement.
Too decorated for a simple design
Finishing the ends so that the bracelet comes undone in a loose way
Ideas for Customisation:
Go for bright summer colours, soft neutrals, rainbow mixes or school-color combos. Add beads or metallic thread or tiny charms or braid the ends. Also make matching bracelets for friends, thinner versions for layering, or use recycled craft string you have on hand.
Inspiration for Style
Wear one bracelet on its own for a simple handmade touch or layer up several together for a fun layered look. These bracelets also make sweet gifts, friendship sets, party crafts or small handmade additions to gift baskets.
Care Instructions:
Store bracelet flat or loosely coiled when not in use . Keep it dry if you can, especially if you are using thread-based materials. If it gets dusty, gently wipe it with a soft dry cloth. If you have gift or seasonal bracelets, store them in a small box or pouch to keep the strings clean and tidy.
Time to finish:
Depending on your materials, size, and how detailed you want the bracelet to be, this project may take a few hours or a short afternoon.
Budget Guide:
This is an inexpensive craft. Great with leftover thread, simple cord and basic, easy to find supplies.
Conclusion:
If you want a fun, relaxing craft that turns simple string into something wearable, this bracelet is a great place to start. It is easy to personalize, beginner-friendly, and lovely for making in sets. Choose your favorite colors, take your time with the knots, and enjoy creating a bracelet that feels truly handmade.
FAQs:
1. Is this beginner-friendly?
Yes, this is a great bracelet project for beginners because it uses simple repeated knotting.
2. What materials work best?
Embroidery thread, nylon cord, or other smooth string that knots easily and holds well.
3. Can I make it bigger or smaller?
Yes, just adjust the number of strands, thickness, and finished length.
4. Can I use recycled materials?
Yes, clean leftover thread or cord can work beautifully for this kind of bracelet.
5. How do I make it look neat?
Keep the strands organized, pull each knot evenly, and check the pattern as you go.
This article is based on a beginner string bracelet tutorial video on YouTube.