
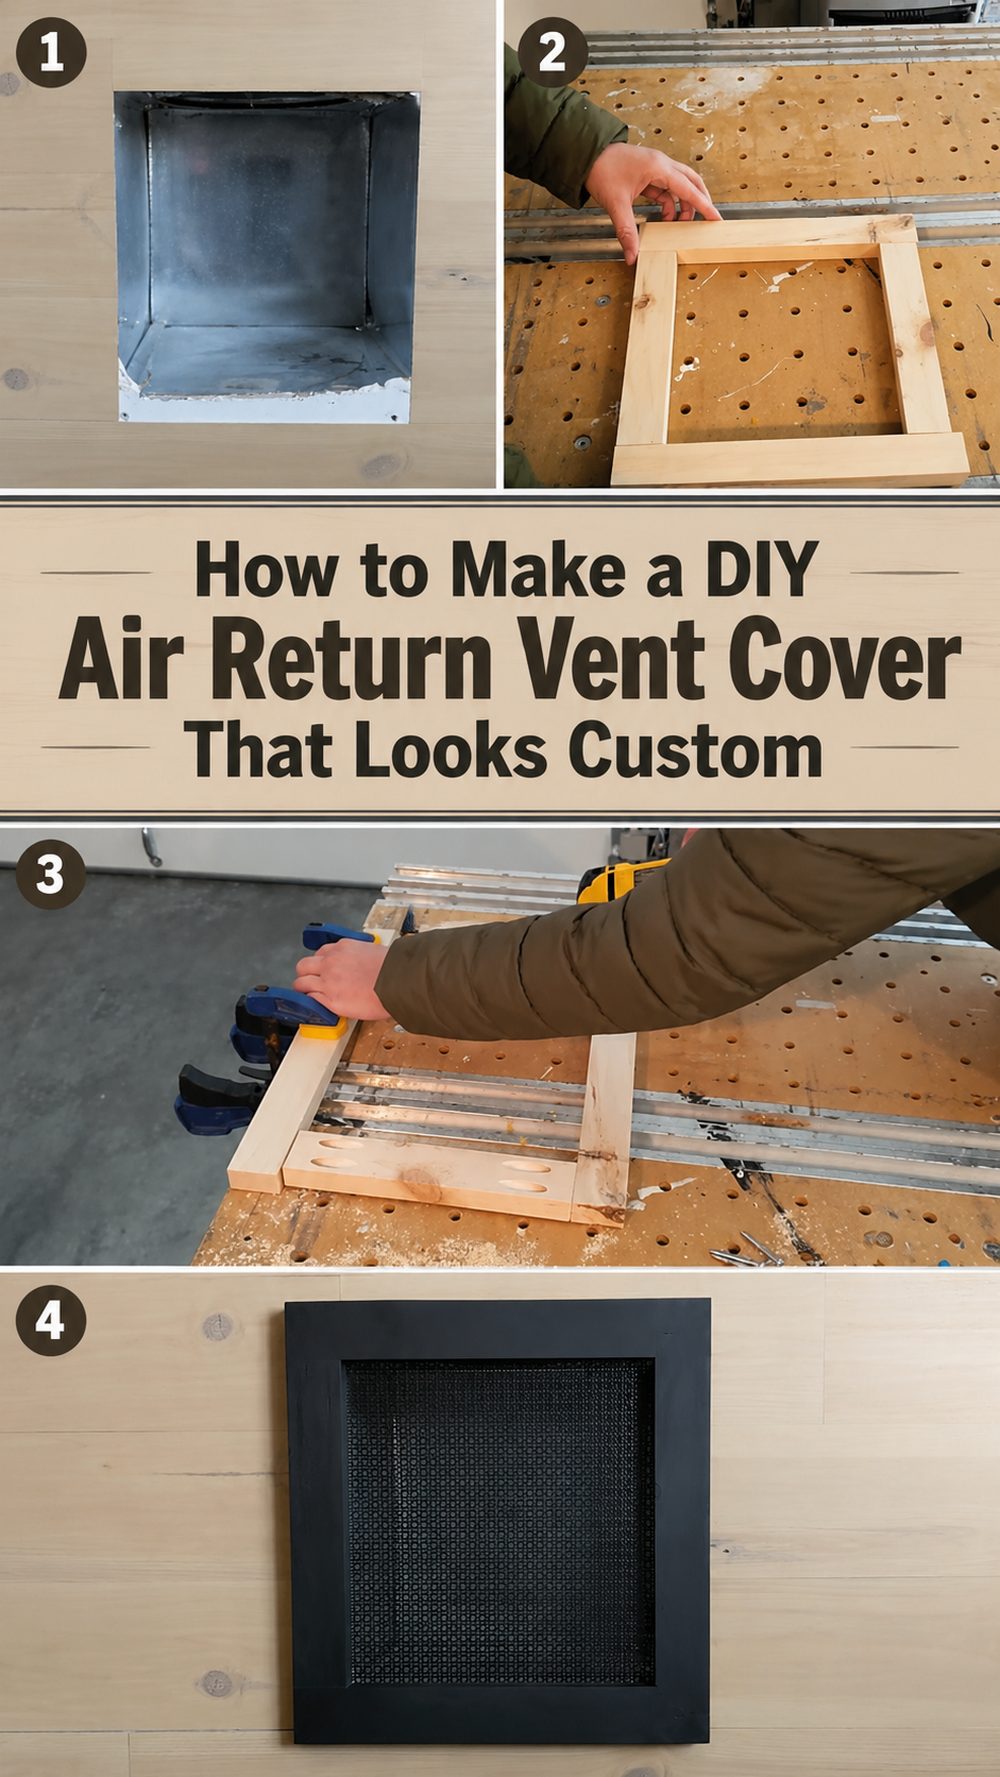
An air return vent cover is one of those little details that can quietly change the entire look of a room. Standard covers can feel plain, bulky or just plain wrong, especially when you’re trying to create a cleaner and more styled space. A DIY version means you can make something that will better blend in with your wall, ceiling, or decor, but still keep the vent functional. This kind of project is perfect for homeowners, renters who are doing removable upgrades, or anyone who loves practical decor with a custom feel. This is especially nice if you want a more finished look without the cost of a custom piece. With a simple build and a little patience, you can make a vent cover that feels intentional, tidy, and a whole lot more attractive than the usual store-bought option.
Why you’ll love this project:
This project takes a basic utility feature and makes it much more refined. It’s functional, cheaper than many custom options, and easy to fit into your room style, whether your preference is for modern, farmhouse, simple, or classic décor.
What You Will Need:
Wood or other hard cover material
Decorative panel, slats or cut out front.
Cut parts for the frame
Strong construction adhesive or wood glue
Fasteners as required
Paint or stain
Sandpaper
Mounting hardware if necessary
Choose materials that match the look, size and style you want.
Required tools:
Measuring tape
Saw for your material
Drill or screwdriver
Sander or a sanding block
Clasps, if available
Roller or paintbrush
You can make some of the designs with basic household DIY tools.
The best materials for this project are:
Lightweight wood is a good material for a vent cover that you want to match to your home decor. It is easy to cut, shape and finish. To get a painted look, the best results come from smooth boards and trim pieces. If you want a stained finish, pick wood with a nice grain pattern. The most important thing is to use something sturdy enough to hold it’s shape, but still allow air flow through the front design.
Skill Level:
From beginner to confident beginner. The build is simple, but careful measuring and neat assembly makes a world of difference in the end look.
Size & Position Guide:
Before you start, measure your return vent opening carefully. You can make the cover tight for a built-in look or a bit larger if you want it to overlap the opening a bit more like a framed feature. Adapt the shape and trim style to fit your room. Keep it simple and clean for a modern space. For a warmer or more decorative room, go for a framed look with more texture. For a subtle finish, match the paint colour to the wall, or use a contrasting stain if you want the vent cover to look intentional and decorative.
How to Prepare:

Step 1: Make the Base
Start by measuring the air return opening and planning out the total size of your cover. Leave a little space for the cover to sit right and good air flow. Cut your primary frame or backing pieces to size. Dry-fit these over the opening to check proportions. This is the point where you want to make any minor adjustments so that the finished piece looks balanced and sits neatly in place.
Step 2: Connect the Dots
Before attaching anything, lay out the frame pieces and the decorative front section. This lets you see the spacing, shape and overall look beforehand. If your design has trim or layers, try laying it out on a flat surface first. A simple trial layout can save you from crooked lines or uneven gaps down the road.
Step 3: Construct Shape
Add the decorative center section or slatted front, beginning with the outer frame. Work slowly and keep corners and edges in line. If using glue, press the pieces together well and allow to set properly. If it does use fasteners, add them neatly so that the front is secure but not bulky. The idea is to create a cover that is solid but still looks light and finished.
Step 4: Add Colour / Texture
Build the frame and sand the surface and edges smooth. Then paint or stain the vent cover in your favourite finish for your room. Painted finish blends better into the wall, while stain can make it feel more like a furniture-style detail. Do not handle too much until the finish is thoroughly dry or you will mark the surface.
Step 5. Decorate
If your tutorial design requires a more decorative front, this is where you polish the look. Ensure the front pattern is balanced, spacing is consistent and nothing is obstructing airflow too heavily. Don’t overcrowd, keep the details clean. Usually a clean simple design looks more custom than one with too many extra things.
Step 6: Finalise and Style
“Place or mount the cover over the return vent securely. Check to see that it is straight, and doesn’t wiggle or move. Step back and see how it looks from across the room. This is a small upgrade, but when installed it makes the entire wall or ceiling feel more intentional and finished.
Helpful Hints:
Be sure to measure more than once before you cut anything.
Lay out the layout before you glue or fasten.
Keep in mind air flow when thinking about the front design.
Sanded edges lead to a cleaner finished look.
Let paint, stain or glue dry completely before mounting.
Coordinate the finish with surrounding trim, walls or furniture for a coordinated look.
Mistakes to Avoid:
Cutting pieces and checking size of vent again
Decorative front is too closed off for air to flow through
Using weak glue for structural parts
Omitting sanding, which can make the project look rough
Working the paint or stain before it is dry
Choosing a design that is too bulky for the room
Ideas for customisation:
Keep the cover simple and modern, or add trim for a more classic look. Stain it for warmth, or paint it to blend into the wall. Alternatively, you can alter the pattern style to be more farmhouse, minimal, or decorative to suit your space. If you like subtle detail, try a soft contrast between the section in the centre and the frame.
Style Tips:
This style of cover is good for use in living rooms, hallways, bedrooms and entry ways where a plain metal cover may be too conspicuous. It’s great in rooms with custom trim, built-ins, wood accents or a clean neutral colour palette. Connecting other DIY upgrades in the same area can also be helpful.
Care Instructions:
Dust the vent cover regularly so the airflow stays clear and the surface stays neat. Wipe gently with a soft dry or lightly damp cloth as necessary. Don’t soak finishes on wood, and check the cover now and then to make sure it’s secure and not build up.
Time Required:
This project can take a short afternoon, or a few hours depending on materials, size, drying time, and detail.
Budget Guide
Usually this can be done with inexpensive materials, especially if you use scrap wood, basic trim, or simple finishing supplies you already have on hand. It is a smart way to get a custom-style look without the higher cost of buying one ready-made.
Conclusion:
A DIY air return vent cover is a simple upgrade that can make a surprising difference in how finished a room feels. It is useful, customizable, and approachable for beginners who want a cleaner and more attractive look. With careful measuring, a simple build, and a finish that suits your space, you can turn an overlooked vent into a detail that actually adds to the room.
FAQs:
Is this beginner-friendly?
Yes, it is a good project for a beginner who is comfortable measuring, cutting carefully, and assembling simple pieces.
What materials are best?
Lightweight wood and trim are usually the easiest and most attractive choices for indoor vent covers.
Can I make it bigger or smaller?
Yes, the design can be adjusted to fit your vent opening and the look you want in your room.
Can I use recycled materials?
Yes, as long as they are clean, sturdy, and suitable for a neat finished result.
Can I use it outdoors?
This style is best suited for indoor air return vents unless you use outdoor-safe materials and finishes for another type of vent project.