
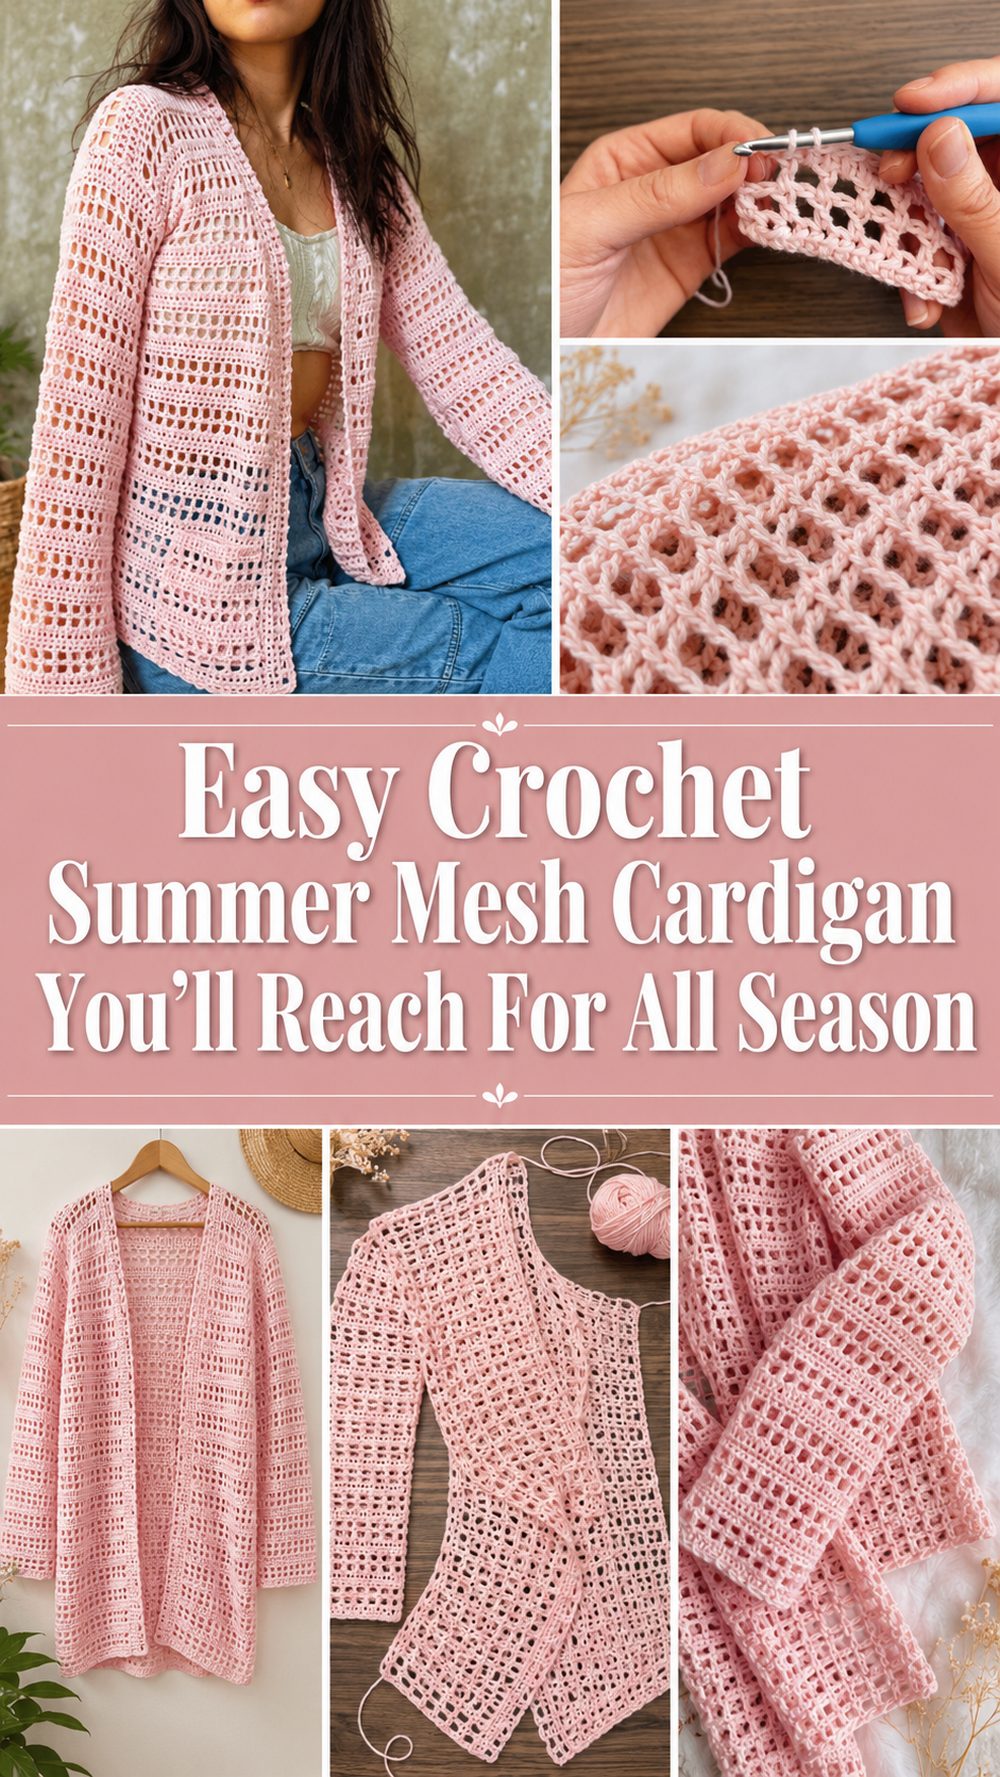
A light crochet cardigan is one of those pieces that feels useful the moment you finish it. It gives you a little extra coverage without feeling heavy, and it works beautifully over tanks, dresses, swimsuits, and simple tees. This summer style has a soft, open look that feels airy and relaxed, which makes it especially nice for warm weather layering. The tutorial I chose walks through a mesh cardigan in clear sections, so the project feels much less intimidating than it sounds. Instead of trying to shape everything at once, you build it piece by piece and then bring it together into a wearable cardigan. That makes it a great option for crocheters who want to move into garments without jumping into anything too thick, fitted, or complicated.
Why You’ll Love This Project
This cardigan has that easy summer feel that makes handmade clothing so enjoyable to wear. The mesh texture keeps it breathable, and the step-by-step layout makes the construction feel approachable because you work through separate sections instead of wrestling with a confusing all-in-one pattern.
Materials Needed
- Yarn
- Crochet hook
- Scissors
- Yarn needle
- Stitch markers
- Measuring tape
Use a yarn and hook size that matches your desired fit and texture.
Best Yarn for This Project:
For a summer cardigan like this, lightweight cotton, bamboo blends, or other soft breathable yarns are the nicest choice. They help the mesh stay airy and comfortable, and they give the finished cardigan a cleaner drape for warm weather layering. If you want something softer and a little more flowing, a smooth light acrylic blend can also work, but breathable fibers are especially lovely for summer wear.
Skill Level:
This is a good project for confident beginners or easy-level garment makers. The tutorial is broken into clear parts, which makes it easier to follow, especially if this is one of your first cardigans.
Size and Fit Guide:
To adjust the size, measure across your shoulders, bust, and preferred cardigan length before you begin. Since this is a mesh cardigan, it helps to hold the work up against your body as you go. You can make the panels wider or narrower, add more length, and adjust the sleeves until the fit feels right. For a relaxed summer look, leave a little ease so the cardigan hangs comfortably instead of pulling across the body.
Stitches Used:
- Chain
- Slip stitch
- Mesh-style open stitch pattern
- Simple edging/joining stitches
The video clearly focuses on a mesh cardigan construction, but it is still explained in manageable sections rather than in a complicated advanced format.
How to Make It

Step 1: Start the Back Panel
The cardigan begins with the back panel, which gives you the main width and shape of the body. This is a nice place to settle into the stitch pattern because you can get used to the open mesh texture before dealing with the front shaping and sleeves. Work the foundation to the width you want for your back, then continue in the stitch pattern until the panel reaches the desired body length. For a summer cardigan, a slightly loose and drapey feel works especially well because it lets the mesh stay open and breathable.
Step 2: Make the Two Front Panels
After the back is finished, the tutorial moves into the two front panels. These are worked separately, which makes it easier to control the opening at the front of the cardigan. Each front piece should mirror the other, so it is a good idea to count rows or at least keep checking that both pieces are the same length and width. This part is where the cardigan starts to look like an actual garment rather than just flat crochet pieces, and that is always a satisfying stage in a wearable project.
Step 3: Shape the Body and Check the Fit
Before joining everything permanently, lay the back and front panels flat together and check the overall width. This is the best time to decide whether you want a more fitted cardigan or a looser, floaty layer. A summer cardigan usually looks best when it has easy movement, so do not be afraid to leave a little room. If you want more coverage, keep the body panels longer. If you want something more casual and beachy, stop earlier for a shorter shape. The nice thing about a project like this is that the fit can be adjusted through panel size rather than relying on strict stitch counts.
Step 4: Join the Panels
Once the front and back sections are ready, the pieces are joined to create the body of the cardigan. Take your time here so the seams stay neat and the arm openings remain even on both sides. Stitch markers can help you line things up before you sew or crochet the seams together. Because the stitch pattern is open and airy, clean joining makes a big difference in the finished look. A tidy seam helps the cardigan keep that soft, polished shape instead of looking twisted or uneven.
Step 5: Add the Sleeves and Cuffs
The tutorial then moves on to the arms and cuffs. This is where the cardigan becomes fully wearable. Work the sleeves so they feel comfortable through the arm and wrist, and keep trying the cardigan on if you can. For summer, sleeves do not need to feel bulky. A lighter sleeve with room to move will suit the cardigan much better than anything too tight or heavy. If you prefer, you can keep them a little shorter or more relaxed for an even breezier feel. The cuffs help finish the sleeve edge and give the cardigan a more complete shape.
Step 6: Add the Button Band
After the main cardigan is assembled, the tutorial adds a button band. This step frames the front opening and helps the piece look more finished. Even if you want to wear it open most of the time, this border gives structure to the front edges and makes the cardigan hang better. Work evenly along the edge so the band does not pull or ripple. If you are adding buttons, space them carefully and check the look before committing.
Step 7: Finish with the Collar
The final section is the collar, which gives the cardigan that extra finished touch. A collar can soften the neckline and make a simple mesh cardigan feel more styled and intentional. Keep your stitches even around the neck area, since that part sits close to the face and tends to show every little change in tension. Once the collar is complete, weave in all ends and give the cardigan a gentle block if needed. The finished result should look light, open, and easy to layer through warmer weather.
Helpful Tips
Use breathable yarn if you want the cardigan to feel truly summery. Keep checking the fit before joining the panels. Use stitch markers to match both front pieces neatly. Make sure the sleeves are the same length. And if the mesh looks a little uneven at first, blocking can make a big difference in helping the stitches open up and relax.
Common Mistakes to Avoid
One common mistake is making the back panel too narrow, which can make the cardigan feel tight across the shoulders. Another is forgetting to mirror the two front panels. Uneven seams can also throw off the shape, especially around the arm openings. Try not to crochet the edging too tightly, or the front may pull inward. It also helps not to rush the sleeves, because even a small difference in length can show once the cardigan is worn. Finally, always check the drape before finishing, since a summer cardigan should feel light and comfortable rather than stiff.
Customization Ideas
You can easily change the look of this cardigan with color and length. Make it in a neutral shade for everyday wear, or go with soft pastels for a fresh summer feel. You can keep it open-front, add buttons, make the sleeves shorter, or lengthen the body for more coverage. A contrast border can also look beautiful on a mesh cardigan, especially if you want the edges and collar to stand out a little more.
Style Ideas
This kind of cardigan looks lovely over a tank top and jeans, over a sundress, or as a beach cover-up layer. You can also wear it with linen trousers or shorts for a simple warm-weather outfit. Because the fabric is open and airy, it works especially well as that light extra layer for evenings, travel, or air-conditioned spaces.
Care Instructions
Hand wash gently when possible, especially if you use a soft summer fiber. Lay it flat to dry so the shape stays neat. Avoid high heat, and do not hang it while wet, since that can stretch the mesh out of shape.
Time Needed
This may take a few hours depending on your speed, yarn, size, and stitch pattern.
Conclusion
If you have been wanting to try a crochet garment without diving into anything too heavy or complicated, this summer cardigan is a lovely place to start. The mesh design keeps it light, the section-by-section construction makes it easier to manage, and you can adjust it to suit your own size and style. Once you make one, it is easy to imagine another in a different color for the next warm season.
FAQs
1. Is this beginner-friendly?
Yes, it is a good choice for confident beginners because the cardigan is taught in clear sections.
2. What yarn is best for this project?
Lightweight cotton or bamboo-blend yarn is a great choice for a breathable summer finish.
3. Can I adjust the size?
Yes. You can change the panel width, cardigan length, and sleeve length as you work.
4. Is this good for summer weather?
Yes. The mesh texture gives it a light and airy feel that suits warm weather layering.
5. How do I make it more comfortable to wear?
Choose a soft breathable yarn, keep the fit relaxed, and try it on as you go so it does not end up too tight.