
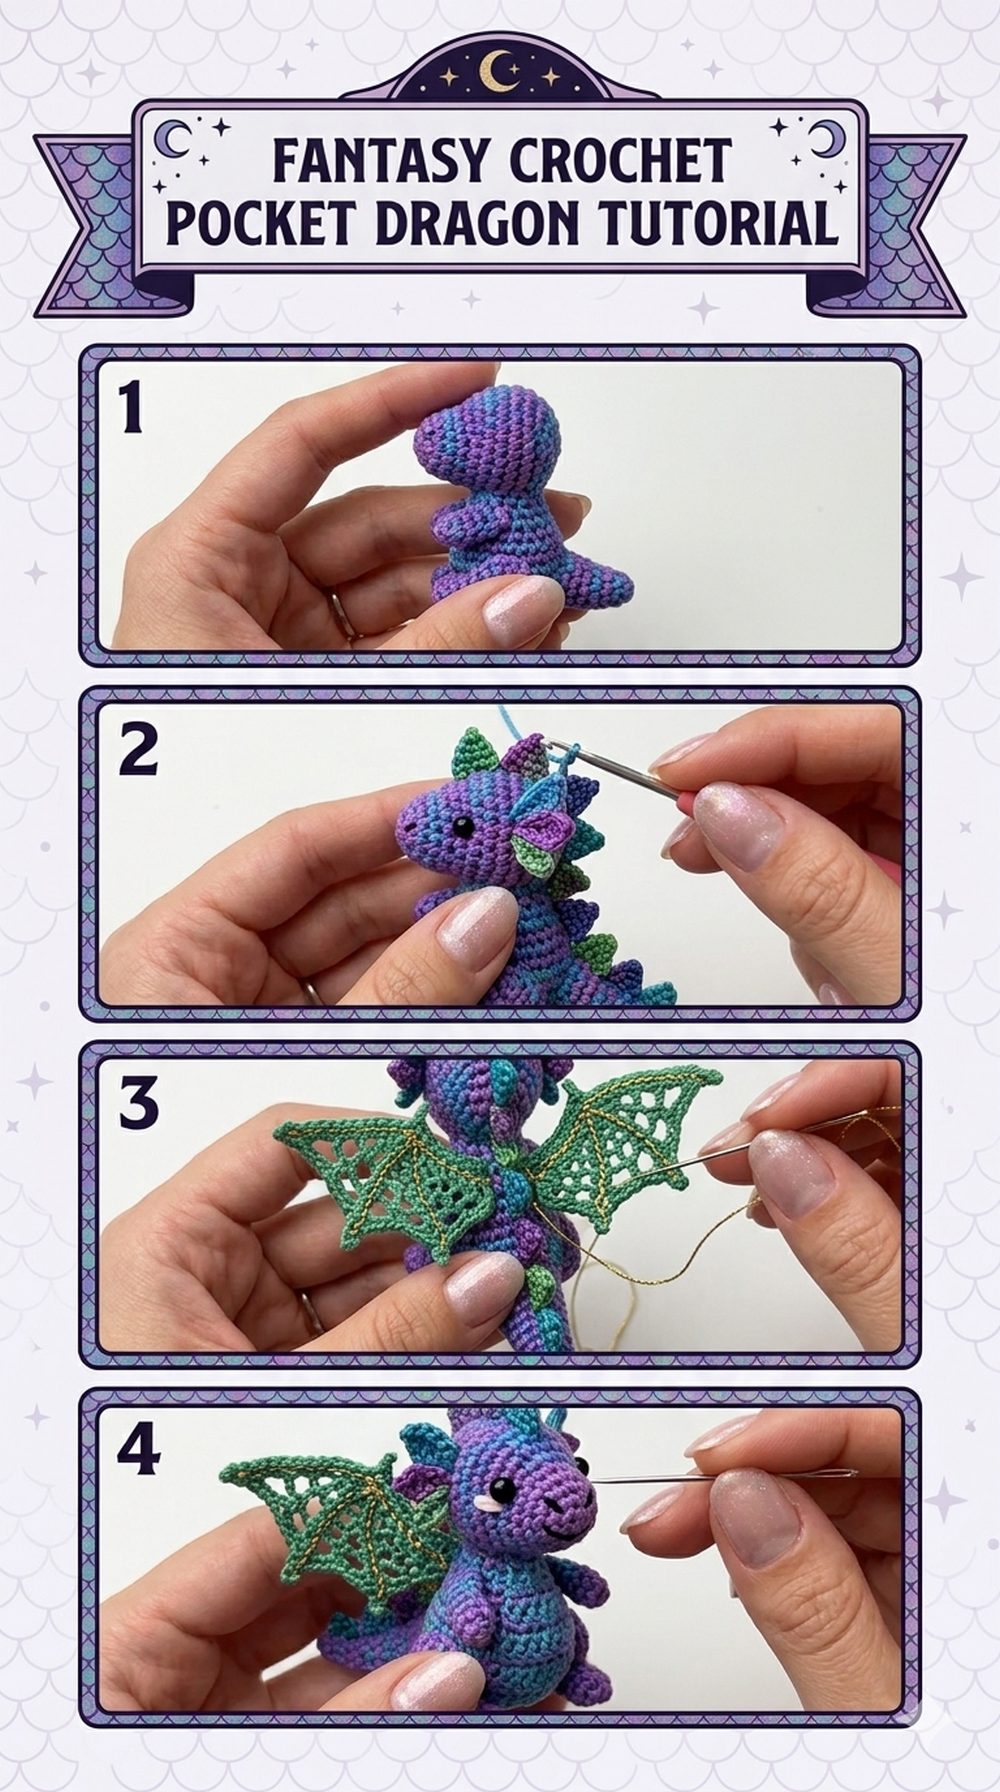
A crochet pocket dragon is the kind of tiny handmade project that feels playful, comforting, and a little magical all at once. It is small enough to sit in your palm, tuck into a bag, or keep on a shelf, but it still has all the personality you want in a dragon, from its little body shape to its wings and sweet fantasy charm. This project is especially fun for anyone who loves amigurumi but does not want something huge or overly complicated. It is also a lovely choice when you want to use up yarn from your stash and make a gift that feels personal and memorable. If you enjoy cute creatures, beginner-friendly shaping, and projects that come together fairly quickly, this little dragon is a really satisfying make.
Why You’ll Love This Project:
This pocket dragon is fun because it gives you the adorable look of a fantasy creature without turning into a giant, complicated project. It feels achievable, cute, and giftable, and the smaller size makes it perfect when you want something creative but manageable.
Materials Needed:
- Yarn for the dragon body
- Contrasting yarn if you want wing or detail accents
- Crochet hook
- Stuffing
- Yarn needle
- Scissors
- Stitch marker
- Safety eyes or embroidery thread for the face
Use a yarn and hook size that matches your desired fit and texture.
Best Yarn for This Project:
A smooth yarn that shows stitches clearly works especially well for a pocket dragon. If you want a soft little toy with a classic amigurumi look, a light acrylic or cotton blend is a nice choice. Cotton can give the stitches a neat, crisp shape, while acrylic often feels a bit softer and slightly more forgiving for beginners. Since this is a small project, you can also have fun with special colors like sage green, dusty blue, plum, charcoal, or bright fantasy shades.
Skill Level:
This project feels suitable for confident beginners to easy intermediate crocheters. The tutorial is presented as beginner-friendly and quick, and the construction is mostly no-sew, which makes it less intimidating than many detailed amigurumi creatures.
Size and Fit Guide:
Because this is a pocket dragon, the finished size will depend a lot on your yarn, hook, and tension. The easiest way to control the size is to keep your stitches tight and choose a hook that gives you a firm fabric so the stuffing does not show through. If you want a slightly larger dragon, use thicker yarn and a larger hook. If you want it smaller, go down in yarn weight and hook size. Keep checking the overall proportions as you work so the wings and body still look balanced together.
Stitches Used:
- Magic ring
- Single crochet
- Increase
- Decrease
- Slip stitch
- Simple joining and finishing techniques
Since the tutorial is built like a small amigurumi project, the shaping comes mainly from working in rounds and using increases and decreases to build the dragon’s form. The video is described as mostly no-sew, with the wings attached separately.
How to Make It:
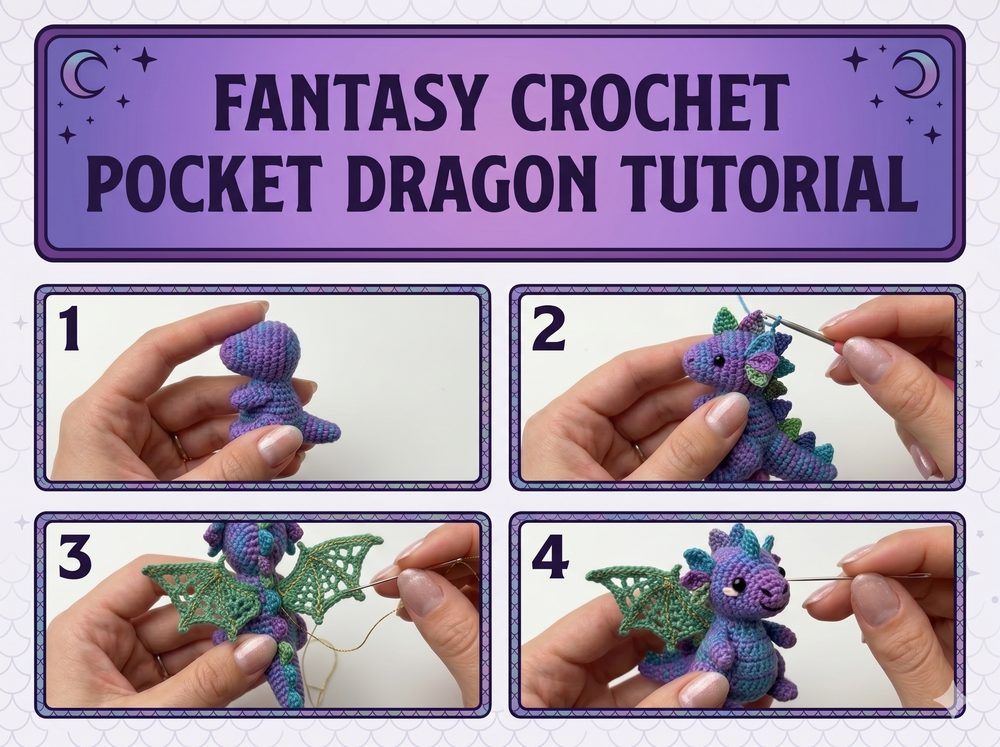
Step 1: Start the Foundation
The dragon begins the way many amigurumi projects do, by creating a small starting round and then building outward with gradual shaping. This gives you a tidy, rounded beginning and helps the body form naturally. Keep your tension even right from the start, because small toys look best when the stitches stay consistent and snug.
If you are using a stitch marker, place it in the first stitch of each round right away. That makes it much easier to follow the shaping without losing your place, especially on a compact project like this.
Step 2: Build the Main Body
The body is the heart of the project, and this is where the dragon starts to look adorable very quickly. You will continue crocheting in rounds, increasing where needed to create fullness and then working even rounds to give the body some depth. Later, decreases shape the piece back down so it feels compact and rounded instead of flat.
Because this pocket dragon is meant to stay small and cute, it helps to pause every so often and lightly stuff the piece as you go. Do not overfill it too early. A firm but squishy body usually looks best, and it gives the dragon that nice palm-sized form.
Step 3: Shape the Head and Little Features
In a small dragon project, the charm often comes from the shaping rather than complicated extra parts. As the rounds continue, the dragon’s body and head develop through simple increases and decreases rather than lots of separate pieces. This is one reason the project feels approachable and satisfying.
If your tutorial version includes facial placement with safety eyes, add them before the opening gets too small. Take a moment to look at the face from the front and from both sides before locking them in. Even moving the eyes a tiny bit can change the dragon from sleepy and sweet to bright and playful.
Step 4: Keep the Dragon Pocket-Sized
This design works well because it stays compact. As you crochet, keep checking that the body still looks small enough to fit comfortably in your hand. That is part of what gives a pocket dragon its charm. If your stitches are turning out looser than expected, you can adjust by using a slightly smaller hook next time or stuffing more gently so the fabric does not stretch open.
A small dragon also looks better when the stuffing is distributed smoothly. Roll tiny bits of stuffing between your fingers and place them gradually instead of pushing in one large lump.
Step 5: Make the Wings
The tutorial is described as mostly no-sew, with the wings being the main part attached separately. That makes the wings an important finishing detail even though the overall project stays simple.
Work the wings carefully and try to make them match in size and tension. Even if they are tiny, they add a lot of personality. If one wing comes out slightly larger, it is worth redoing it while the project is still fresh in your hands. Matching details make a big difference on small creatures.
Step 6: Attach the Wings
Before sewing the wings on, place them against the dragon and test a few positions. Slightly higher placement can make the dragon look perkier and more playful, while lower placement can give it a softer, more relaxed look. Pinning them in place first with stitch markers or scraps of yarn can help you decide.
When you attach them, use small neat stitches and check both sides often so they sit evenly. Since the tutorial is largely no-sew apart from this part, taking a little extra care here helps the whole dragon look polished.
Step 7: Finish and Close
Once the shaping is done and the dragon is stuffed to your liking, close the opening neatly and weave in the yarn tail securely. Run your fingers over the whole piece to smooth the stuffing and adjust the shape a little. Sometimes just pinching the snout, rounding the belly, or straightening the wings slightly is enough to bring the dragon to life.
The final piece should look tiny, rounded, cute, and easy to hold, with a simple fantasy feel that makes it great for gifting, collecting, or displaying on a desk or shelf.
Helpful Tips:
- Keep your stitches tight so the stuffing does not show through.
- Use a stitch marker from the first round to stay on track.
- Stuff gradually instead of all at once.
- Check the wing placement before sewing.
- Use smooth yarn if you want the shaping to stand out clearly.
- Make a second dragon in a different color once you finish the first one, because these are great stash-busters.
Common Mistakes to Avoid:
- Crocheting too loosely and ending up with gaps in the fabric
- Overstuffing the body so the dragon loses its neat shape
- Forgetting to place eyes before the opening gets too small
- Making the wings uneven in size
- Sewing the wings on without checking placement first
- Losing track of rounds because you skipped the stitch marker
Customization Ideas:
You can make this dragon feel completely your own with just a few small changes. Try a bold fantasy color, pastel shades, or a speckled yarn for a more magical look. You can embroider tiny nostrils, add a little blush, or give the wings a contrasting edge. If you want an especially cute result, make a whole set in different colors so they look like a tiny dragon family.
Style Ideas:
A pocket dragon is sweet as a desk buddy, a bookshelf decoration, a fantasy-themed gift, or a small comfort plush to carry in a bag. It also makes a lovely handmade surprise for kids, gamers, book lovers, and anyone who enjoys whimsical things.
Care Instructions:
Hand wash gently if needed and avoid rough twisting. Press out extra water with a towel and lay the dragon flat to dry. Try not to use high heat, especially if you used acrylic yarn or safety eyes. A little reshaping while it dries will help it keep its cute form.
Time Needed:
This may take a few hours depending on your speed, yarn, size, and stitch pattern. The selected tutorial presents it as a quick project, which makes it a nice choice for a relaxed afternoon make.
Conclusion:
If you want a crochet project that feels fun, magical, and manageable, a pocket dragon is such a lovely one to try. It gives you all the charm of a fantasy creature in a small, giftable size, and you can easily make it feel personal with your own colors and finishing touches. Once you finish one, it is very easy to imagine making another.
FAQs:
Is this beginner-friendly?
Yes, it looks approachable for confident beginners, especially if you already know how to crochet in rounds and do simple shaping.
What yarn is best for a pocket dragon?
A smooth cotton or acrylic yarn works well because it helps the stitches look neat and makes the shape easier to see.
Can I adjust the size?
Yes. Your yarn weight, hook size, and stitch tension will all affect the finished size.
Is this mostly no-sew?
Yes. The selected tutorial describes the project as mostly no-sew, with the wings attached separately.
Can I make more than one easily?
Definitely. Small projects like this are great for making in sets, especially if you want gifts or different dragon
colors.