
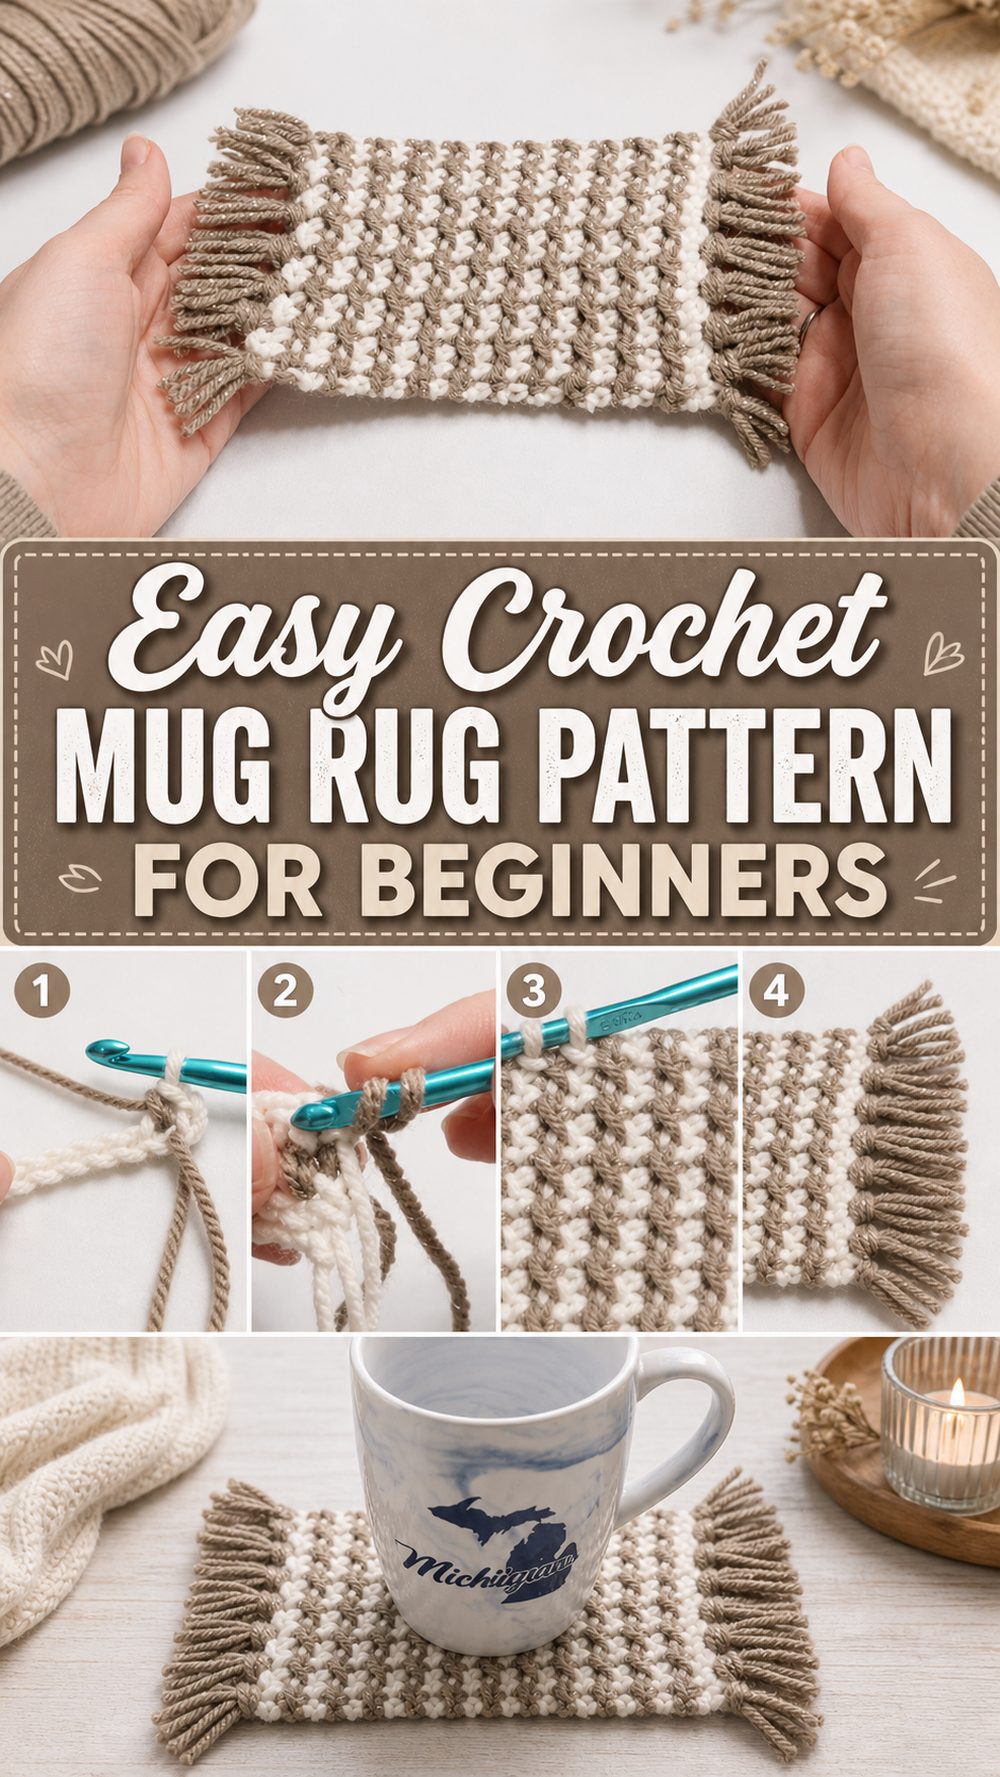
A crochet mug rug is one of those small projects that feels instantly useful. It gives your mug, cup, or small bowl a soft place to rest, helps protect surfaces, and adds a cozy handmade touch to a desk, coffee table, or kitchen corner. The tutorial I selected teaches a simple rectangular mug rug that is beginner-friendly, practical, and quick to finish, making it a lovely choice for relaxed crochet time, gift-making, or using up a small amount of yarn. The finished piece is designed as a neat little rectangle that works well under a mug and a snack, so it feels a bit more special than a basic coaster. In the video, it is made with medium worsted yarn and an H hook, and the sample is described as measuring about 4 by 6 inches.
Why You’ll Love This Project:
This project is easy to enjoy because it is small, useful, and not overwhelming. It is the kind of crochet piece you can finish without committing to a huge project, and it still gives you something pretty and practical at the end. The selected tutorial presents it as an easy beginner project, which makes it especially nice for newer crocheters or for anyone wanting a quick handmade win.
Materials Needed:
- Medium worsted yarn
- H crochet hook
- Scissors
- Yarn needle for weaving in ends
- Measuring tape
- Stitch markers if you like using them for cleaner edges
The tutorial specifically mentions medium worsted yarn and an H hook for the sample mug rug. If you want to change the size or texture, you can also use a yarn and hook size that matches your desired fit and finish.
Best Yarn for This Project:
For a mug rug, cotton or a cotton-rich blend is usually the most practical choice because it feels sturdy, holds its shape nicely, and handles everyday use well. If you want a softer decorative version, a smooth worsted yarn can also work beautifully. Since the tutorial uses medium worsted yarn, staying in that yarn weight is a simple way to get a similar thickness and overall look.
Skill Level:
Beginner-friendly. The selected tutorial presents this as an easy and practical project, so it suits newer crocheters well. It is a nice way to practice keeping your edges neat, building even rows, and finishing a small item cleanly.
Size and Fit Guide:
The sample in the tutorial is described as about 4 by 6 inches, which is a very handy mug rug size. You can easily make yours wider or longer by adjusting your starting foundation and continuing rows until it looks right for your mug, cup, or mini snack plate. It helps to place your mug on the fabric as you work so you can check the size before finishing.
Stitches Used:
The tutorial teaches a simple beginner-friendly approach rather than a complicated stitch pattern. Work with the basic stitches shown in the video and repeat them evenly to build the rectangle. Keep your tension soft and consistent so the mug rug lies flat and looks tidy.
How to Make It:
Step 1: Start the Foundation
Begin by making your starting chain for the width of the mug rug. Since this is a rectangular design, your foundation chain sets the short side of the piece. Keep the chain relaxed rather than too tight, because a tight foundation can pull the edges inward and make the mug rug curl. If you are customizing the size, lay the chain against a mug or measure it against the width you want before moving on. The tutorial’s sample finishes as a small rectangle, so you do not need a very wide starting chain for this project.
Step 2: Work the First Row Carefully
The first row is where the shape really begins, so take your time placing stitches evenly across the chain. This part is worth doing slowly, especially if you are still getting used to finding the right loops in the foundation chain. Once the first row is complete, the project becomes much easier because you will be working into clear stitches from there. Try counting as you go if that helps you keep the edges straight and avoid accidentally adding or dropping stitches. The overall tutorial style is simple and approachable, which makes this a comfortable first rectangular project.
Step 3: Build the Main Body
After the foundation is done, continue working row by row to build the body of the mug rug. This is the relaxing part. You will repeat the same basic motion across each row, turning your work at the end and continuing until the rectangle reaches the length you want. Because the project is small, it is a great chance to focus on even tension and neat edges without feeling like the project drags on. A mug rug should feel sturdy enough to sit flat on a table, but still soft enough to look cozy and handmade. If your stitches start feeling too tight, loosen your hands a little on the next row.
Step 4: Adjust the Size as You Go
One of the nicest things about a mug rug is how easy it is to customize. You can stop earlier for a more compact coaster-style piece, or continue longer if you want room for both a mug and a spoon or biscuit. The tutorial sample is around 4 by 6 inches, but your own version can be adjusted based on how you plan to use it. Place your cup, mug, or even a small plate on top every few rows to check whether the proportions feel right. That simple test helps you decide whether to keep going or finish off.
Step 5: Keep the Edges Neat
As you continue, pay attention to the first and last stitch of each row. Clean edges make a huge difference on a simple project like this because the whole beauty of the mug rug comes from its tidy shape and pleasant texture. If you notice one side starting to slope, you may be missing the turning stitch or placing an extra stitch at the edge. A stitch marker on the first or last stitch of each row can really help, especially for beginners. Since this is a practical tabletop piece, a neat square or rectangle helps it sit nicely and look polished.
Step 6: Finish the Piece
When the mug rug reaches your preferred length, fasten off and cut the yarn, leaving enough tail to weave in securely. Use a yarn needle to hide the ends neatly on the back. Then smooth the piece out with your hands and check that it lies flat. If needed, you can gently shape it or lightly block it so the edges look more even. The final result should be a tidy rectangular mug rug with a clean handmade texture, ready to use under your favorite mug.
Helpful Tips:
Use a yarn that feels durable enough for everyday use, keep your foundation chain loose, and check the width early so you do not have to undo rows later. If you are making a pair or a small set, count your rows so each mug rug matches. A quick light block at the end can make the finished piece look even neater and more gift-ready.
Common Mistakes to Avoid:
A very tight starting chain can make the mug rug pull inward. Uneven row counts can leave the edges slanted. Forgetting to check the first and last stitch may accidentally change the width. Using yarn that feels too stretchy can make the piece less stable on a tabletop. Finishing too early can leave the rug too small for an actual mug, while weaving in ends loosely can make them work out over time.
Customization Ideas:
You can make this mug rug in soft neutrals for a calm home look, bright colors for a cheerful kitchen set, or seasonal shades for gifting. Add a simple border if you want a more finished frame around the rectangle. You can also make a longer version for a cup-and-snack mat or create a matching set in different colors for guests. Since the shape is straightforward, it is an easy project to personalize without making it harder.
Style Ideas:
This little project looks lovely on a work desk, coffee station, bedside table, or breakfast tray. It also makes a sweet handmade gift when paired with tea, coffee, a mug, or a candle. If you crochet several in coordinated colors, they can become a simple home set that feels both decorative and useful.
Care Instructions:
For best results, wash gently and reshape while damp. Lay flat to dry so the rectangle keeps its shape. Avoid very high heat, especially if your yarn blend is sensitive. A quick smoothing or light re-blocking after washing can help the mug rug look fresh again.
Time Needed:
This may take a few hours depending on your speed, yarn, size, and stitch pattern. Because it is a small project, it is a nice option for a single relaxed crochet session.
Conclusion:
If you want a crochet project that is useful, simple, and genuinely enjoyable, a mug rug is a lovely one to try. It is small enough to feel manageable, but still gives you a finished item you can use every day. You can keep it classic, change the size, play with colors, or make a whole set once you get into the rhythm. This is the kind of project that reminds you how satisfying simple crochet can be.
FAQs:
1. Is this project beginner-friendly?
Yes. The selected tutorial presents it as an easy beginner project with a practical rectangular shape.
2. What yarn works best for a mug rug?
Medium worsted yarn matches the tutorial sample, and cotton is a great everyday choice for a sturdy tabletop piece.
3. Can I change the size?
Yes. You can adjust the starting width and keep adding rows until the length suits your mug or table setting. The tutorial sample is about 4 by 6 inches.
4. Do I need exact stitch counts to make it?
Not necessarily. Since this is a simple rectangle, you can focus on the shape and size you want, then repeat evenly until it looks right.
5. Is this good for gifts or craft fairs?
Yes. Mug rugs are quick, useful, and easy to make in sets, which makes them a lovely handmade gift idea.