
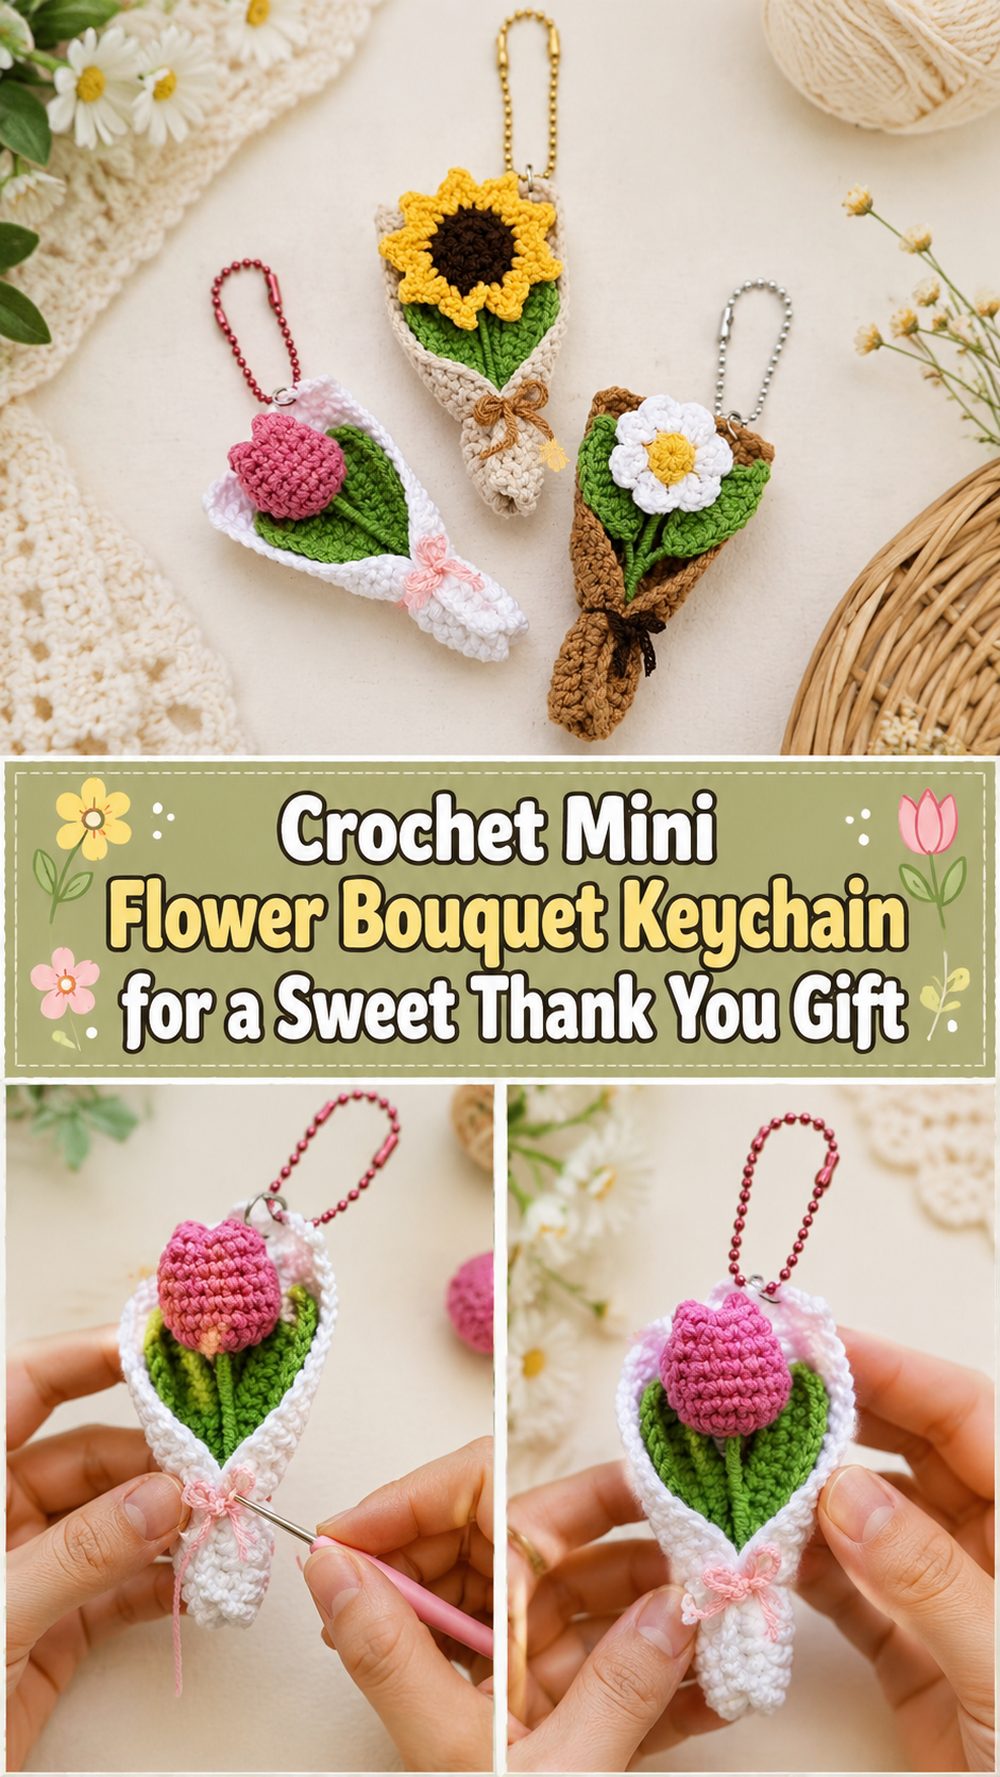
A crochet thank you gift does not have to be large to feel meaningful. Sometimes the loveliest handmade gifts are the small ones that carry a lot of thought. The YouTube tutorial I selected teaches a crochet mini flower bouquet keychain, and it makes such a charming thank you gift because it feels cheerful, practical, and personal all at once. A tiny bouquet has that soft handmade beauty people naturally love, while the keychain style makes it useful for keys, bags, pouches, or zipper pulls. The selected video presents it as a quick and easy crochet mini flower bouquet keychain and describes it as a gift idea, which makes it a very good fit when you want to make something warm and thoughtful without taking on a huge project.
Why You’ll Love This Project
This project is easy to love because it feels special right away. A little crochet bouquet has a sweet gift-like look before it is even wrapped, and the keychain finish makes it more practical than a purely decorative item. The selected YouTube tutorial specifically presents the project as a quick and easy mini flower bouquet keychain and describes it as a DIY gift, which makes it especially suitable for a thank you present.
Materials Needed
- Yarn in flower colors and a color for wrapping or stems
- Crochet hook
- Scissors
- Yarn needle
- Stitch markers if you like using them for small pieces
- Keyring or keychain hardware
- Optional ribbon or small tag for gifting
If the exact yarn weight or hook size is unclear, use a yarn and hook size that matches your desired fit and texture.
Best Yarn for This Project:
A smooth yarn works beautifully for a mini bouquet keychain because it helps the flower shapes stay clear and neat. Cotton or a cotton blend is a lovely choice if you want the tiny flowers to hold their shape well. Soft acrylic can also work nicely if you want something lightweight and colorful. Since the selected tutorial is for a small keychain gift, yarn that is not too fuzzy usually gives the cleanest and prettiest finish. This is an inference based on the project type shown in the selected video.
Skill Level:
Beginner-friendly to easy. The selected tutorial describes the mini flower bouquet keychain as quick and easy, which makes it a nice project for crocheters who know the basics and want a small giftable make.
Size and Fit Guide:
Because this is a keychain-style thank you gift, the best size is usually small enough to feel cute and portable while still letting the flower bouquet shape show clearly. If you want a slightly bigger keepsake, use a thicker yarn or larger hook. If you want it daintier, choose finer yarn and keep the bouquet compact. A little project like this should feel light in the hand and easy to attach to a bag or set of keys.
Stitches Used:
Follow the exact stitch flow shown in the selected video, but a small flower bouquet keychain like this typically uses:
- Slip knot
- Chain
- Slip stitch
- Basic shaping stitches for petals and bouquet form
- Joining and finishing stitches
The main thing clearly supported by the selected video listing is that it teaches a crochet mini flower bouquet keychain as a quick gift project.
How to Make It

Step 1: Start the First Flower
Begin with your starting loop and make the first flower of the bouquet. Since this project is made from small decorative parts, the first flower teaches you the rhythm for everything else. Take your time with it. Small motifs show every tension change, so a calm start helps the finished bouquet look much neater.
This is also a lovely point to think about color. Soft pink, cream, yellow, lavender, peach, blue, or even white all work beautifully for a thank you gift. If you want something more classic, you can keep the flowers all one color. If you want a cheerful handmade look, mix two or three gentle shades together.
Step 2: Shape the Petals
Once the center or starting section is ready, work the petals or flower shape carefully. This is where the little bouquet starts to come alive. Keep your stitches as even as you can so the petals sit nicely and the flower looks balanced.
Do not worry if your first one is not perfect. Tiny floral pieces often get easier very quickly. By the second or third flower, your hands usually settle into the shape and the work starts to feel much smoother.
Step 3: Make the Rest of the Bouquet Pieces
Continue making the flowers needed for the bouquet. Because the selected tutorial is for a mini flower bouquet keychain, the finished gift is built from several small flower elements rather than one large crochet piece. This is one of the nicest parts of the project because each little flower feels like a mini finish on its own.
As you go, place the flowers side by side and check that they feel fairly similar in size. They do not have to be absolutely identical, but a balanced group will make the finished bouquet look much more polished.
Step 4: Arrange the Mini Bouquet
Once the flower pieces are finished, bring them together into a bouquet shape. This is the really sweet part. Suddenly the project stops looking like separate crochet flowers and starts to feel like a tiny handmade gift. Arrange the flowers so the bouquet looks full but not crowded.
If one flower is larger than the others, place it in a way that feels intentional, like a focal bloom. If the flowers are close in size, keep the arrangement soft and balanced so the bouquet feels natural.
Step 5: Add the Wrapping or Base
A mini flower bouquet usually needs a little wrapping section or base that helps gather the flowers together. This step gives the project that bouquet look instead of just a cluster of flowers. Keep it neat and snug, but not so tight that it squashes the blooms.
This part matters a lot in a thank you gift because it gives the finished keychain that sweet present-like feel. Even before you add the ring, it already starts to look like a little token of appreciation.
Step 6: Attach the Keychain Hardware
Now attach the keyring or keychain hardware. This is what turns the bouquet into a practical thank you gift rather than just a decorative crochet piece. Make sure the attachment is secure so it can be used on keys, bags, pencil cases, or pouches.
Since the selected video specifically presents the finished project as a mini flower bouquet keychain, this step is part of what makes the item feel both cute and useful.
Step 7: Finish One Before Making More
Before making extras, finish one bouquet keychain all the way to the end. Weave in the ends neatly and check how it looks in your hand or attached to a bag. This first completed piece becomes your sample for the rest.
That is especially helpful if you want to make several thank you gifts for teachers, friends, bridesmaids, coworkers, or guests. Once one is finished, the next ones usually come together much more easily.
Step 8: Gift and Style the Finished Thank You Present
Once the bouquet keychain is complete, you can present it in a simple but lovely way. Tie it onto a thank you card, place it in a tiny gift bag, tuck it into a box with sweets, or add it to a handwritten note. The selected tutorial frames the project as a DIY gift, so the finished keychain naturally suits this kind of meaningful small present.
The final result should feel sweet, neat, and handmade in the best way, with enough charm to stand on its own even as a very small gift.
Helpful Tips
- Use smooth yarn so the flower shapes show clearly
- Keep your tension even because tiny petals can show uneven stitches quickly
- Finish one full bouquet first and use it as your guide
- Choose soft colors for a gentle thank you gift feel
- Make sure the keyring attachment is secure
- Add a small tag or ribbon if you want the gift to feel extra polished
Common Mistakes to Avoid
- Using yarn that is too bulky for a mini bouquet keychain
- Pulling the petal stitches too tightly
- Making the flowers noticeably different in size
- Wrapping the bouquet too tightly and crushing the flower shapes
- Attaching the keyring too loosely
- Skipping neat finishing on a gift project
Customization Ideas
This project is very easy to personalize. You can match the flower colors to the recipient’s favorites, use soft pastels for a delicate look, or pick bright cheerful shades for something playful. You could also add a tiny ribbon around the bouquet or include a small charm on the keyring. For a more elegant thank you gift, keep the palette simple with one or two flower colors and a neutral bouquet wrap.
Style Ideas
A crochet mini flower bouquet keychain works beautifully as a thank you gift for teachers, neighbors, friends, bridesmaids, clients, coworkers, or anyone who has done something kind for you. It can be gifted on its own, added to a gift bag, attached to a card, or paired with chocolates, tea, or a notebook. Because it is small and handmade, it feels thoughtful without being too formal.
Care Instructions
If needed, hand wash gently and lay flat to dry. Reshape the flowers while damp so the bouquet keeps its neat outline. Avoid high heat, especially if you used acrylic yarn. Store finished keychains flat or loosely arranged in a small box until you are ready to gift them.
Time Needed
This may take a short amount of time depending on your speed, yarn, hook size, and how many bouquet keychains you want to make. Since the selected video presents the project as a quick and easy mini flower bouquet keychain, it is well suited to a small handmade gift project rather than a long or complicated make.
Conclusion
A crochet thank you gift feels especially meaningful when it is small, personal, and made with care. This mini flower bouquet keychain is a lovely choice because it combines the sweetness of flowers with the usefulness of a keychain, so it feels both pretty and practical. The selected YouTube tutorial is a strong match because it specifically teaches a quick and easy crochet mini flower bouquet keychain and presents it as a DIY gift idea.
FAQs
Is this beginner-friendly?
Yes. The selected tutorial describes it as a quick and easy crochet mini flower bouquet keychain, which makes it a nice project for beginners with basic crochet experience.
Is this a good thank you gift?
Yes. It works very well as a thank you gift because it is small, handmade, and useful. The selected video also presents it as a gift idea.
Can I make more than one?
Yes. This is a great project for making several small gifts because the finished piece is compact and gift-focused. That is supported by the tutorial’s quick DIY gift framing.
What colors work best?
Soft floral shades are lovely, but you can also use the recipient’s favorite colors for a more personal touch.
How do I make it look neater?
Keep your tension even, compare the flowers as you make them, arrange the bouquet carefully, and finish the keyring attachment securely.