
Uneven Crochet Edges: One of the most common problems beginners have. You can start a project with straight sides, but after a few rows, the fabric starts to taper, expand, bend, or create small bumps along the edges.
This is usually due to missed stitches, accidental increases, tension changes or confusion over turning chains. The good news is that you can avoid uneven crochet edges once you learn where the first and last stitches of each row are.
In this guide you will discover why crochet edges become uneven, how to identify the root of the problem, and what steps you can take to create more even, straighter sides.
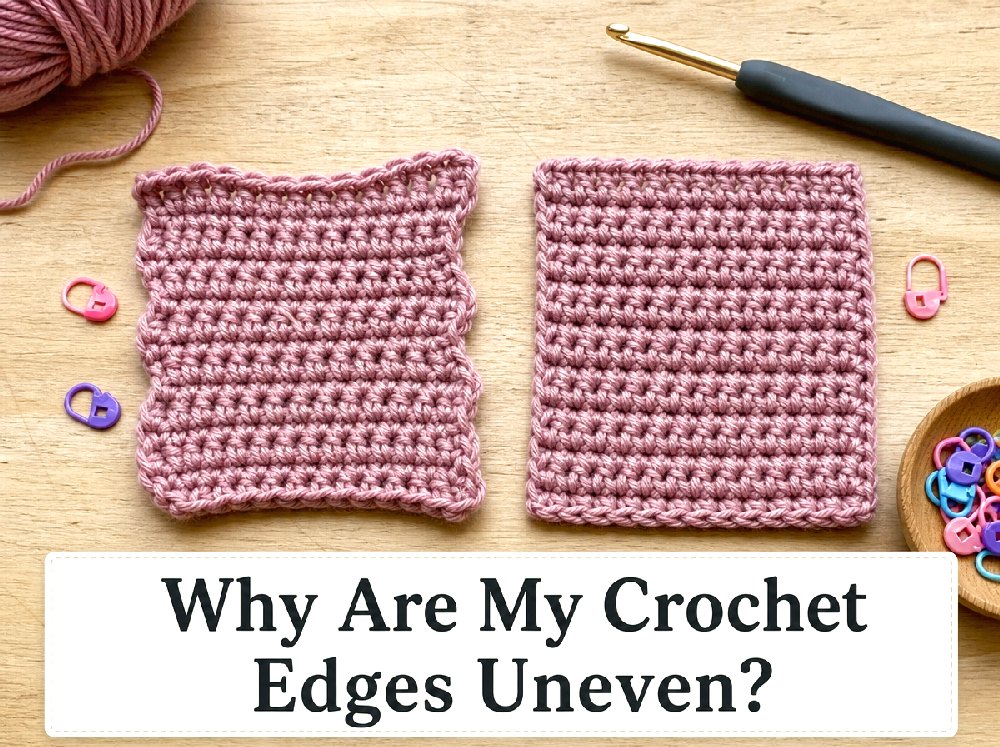
And this is what uneven crochet edges look like:
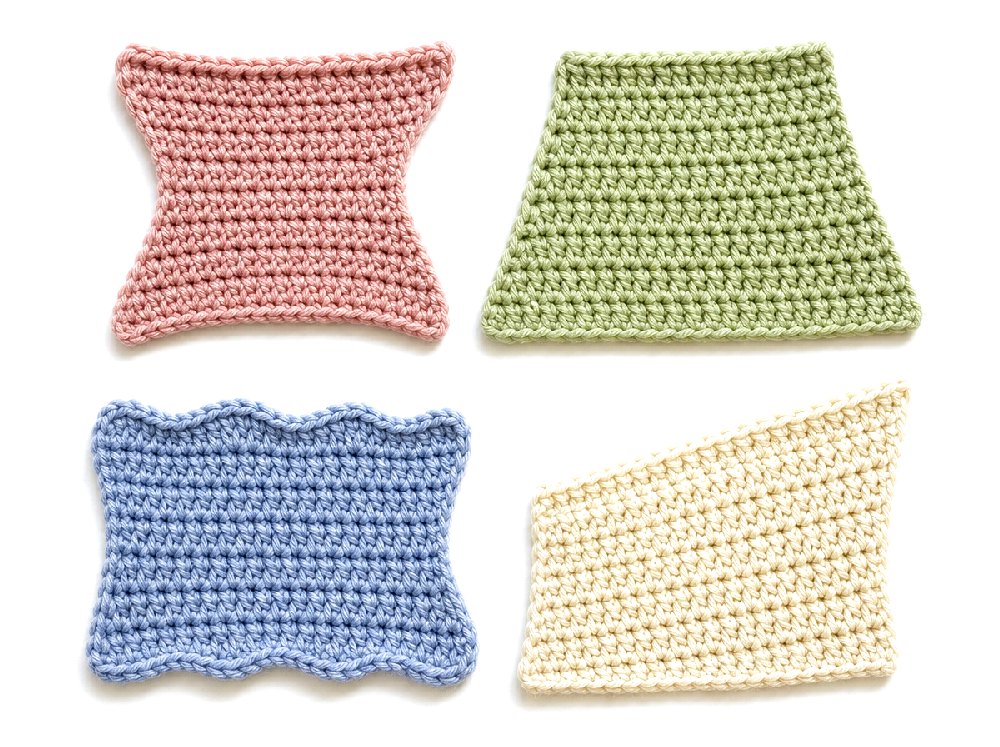
Uneven edges may be created in a variety of ways. Your crochet project could:
Become narrower with each row
Grow wider as you go on
Have little gaps or bumps on the sides
Tilt one side over
form undulating or arcuate margins
One side straight and the other uneven
You can often tell what is going wrong by the shape of the problem. When a project becomes narrow, it usually lacks stitches. Incidental increases are usually part of a larger project.
You have dropped the first or last stitch.
The most common cause of uneven crochet edges is missing the first or last stitch of a row.
The last stitch is often hard to see, since it is usually right next to the turning chain. Missing it means the stitch count decreases and the project slowly gets narrower.
How to repair it
Count the stitches at the end of each row. Keep the same number of stitches unless the pattern tells you to increase or decrease.
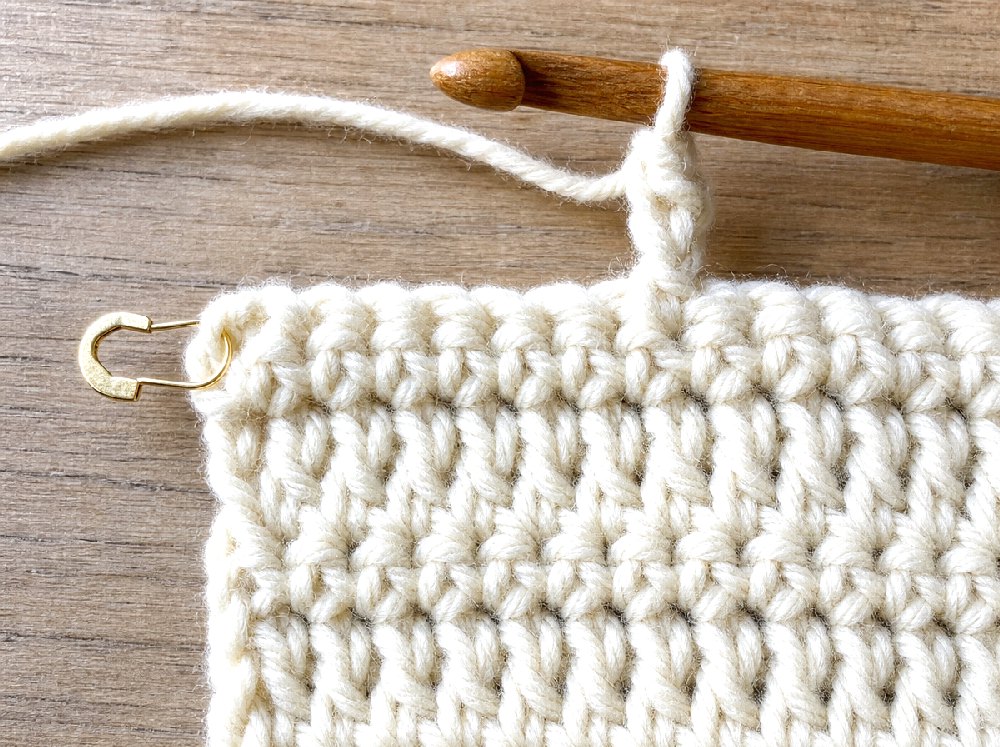
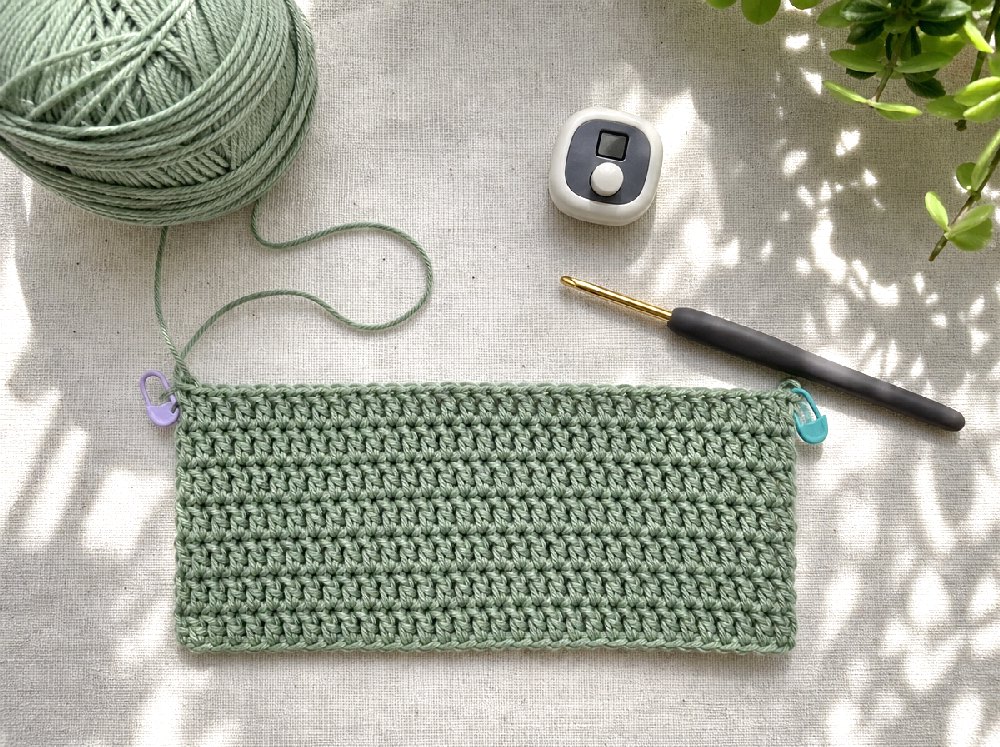
Place a stitch marker in the first and last stitch of every row. Every time you finish a new row, move the markers up. Now both edge stitches are super easy to find.
You’re Overworking Your Knitting Machine.
If your work keeps getting wider, you may be putting two stitches into the same space, or working into the turning chain when it shouldn’t be counted as a stitch.
It can happen easily at the beginning or end of a row, as the turning chain can resemble a normal stitch.
How to fix this
Check your pattern to see if the turning chain counts as a stitch. Some patterns include it, others do not.
Be consistent with one method:
If you count the turning chain as a stitch, work into it at the end of the next row.
Do not work into it if it does not count as a stitch.
Make sure you count every row you completed before you go on.
You are confused about turn chains.
A turning chain lifts the hook to the right height for a new row to begin. Different stitches generally have different chain heights.
Common amounts for turning chains are:
single crochet: ch 1
Half double crochet: 1 or 2 double crochet stitches
Double crochet: chain 2 or 3
double crochet ch 3 or 4
The exact number can differ between patterns. Too many chains can cause loose loops and gaps. Using too few can pull the edge down.
How to fix it :
Follow the directions to change the chain in your pattern. If you’re working without a pattern, make a small swatch to see which chain height gives the neatest edge for your yarn and tension.
You can also try a standing stitch or stacked single crochet instead of a regular turning chain. Often, these techniques give more linear double-crochet edges.
Your Stitch Tension Is Changing
Crochet tension is the amount of pressure you put on your yarn as you make your stitches. If your tension is inconsistent from row to row, your fabric may be wider, narrower, tighter, or looser.
Beginners crochet tightly when they are concentrating but loosen up when they are comfortable. Plus, tension can shift when you stop and restart a project.
How to repair it
Do not change your hold of the yarn or hook at any time during the project. Don’t pull the working yarn tight after each stitch.
Make a practice swatch before you start a big project. This allows your hands to find a comfortable beat.
If your hands get tired take regular breaks. Fatigue in your hands can lead to a tighter grip or less control.
You Switched Your Crochet Hook
Even a small change in hook size can alter stitch height and width. You can make the rows look very different by switching to another hook after starting with one.
Hooks that are the same labelled size can also feel different if they are from different materials or brands.
How to fix it
Use the same crochet hook for the whole project. Save your work with the project.
If you need to change hooks, compare the new hook with the original and knit a short test row before you continue.
Your chain of foundation is too tight
A tight starting chain can pull the bottom edge in. The top rows may be wider so the project looks uneven even if you have the right number of stitches.
A tight chain can also cause the fabric to curl or create a curved shape.
How to fix this?
Make the foundation chain with a hook one size larger, then back to the right hook for the first row.
Or you can use a foundation crochet stitch like foundation single crochet or foundation double crochet. These methods build the chain and first row at the same time and often produce a stretchier edge.
Choosing the wrong loop for the hook
Working into different loops changes the shape and the texture of a project. In some rows you may work under one loop and in others under two loops.
This inconsistency can pull the stitches apart in different directions and make the edges look uneven.
How to fix it
Look at the top of each stitch before you put in your hook. For a normal crochet stitch , you generally have 2 loops . They make a small “ V ” .
Insert the hook under both loops of the stitch unless the pattern instructs otherwise
Your Stitches Aren’t Even Height-wise
Some stitches may be pulled up taller than others, especially at the beginning and end of a row. This results in bumps, loose loops or uneven spaces on the sides.
Turning the fabric can stretch the first stitch as well.
How to solve it
After turning your work, bring the first stitch close to the hook. Do not raise the working loop too high.
When doing yarn-over and pull throughs, try to make them all with the same tension.
How to Crochet Straight Edges
The following routine will avoid most edge problems:
Count the stitches in each row.
Place a stitch marker on the first and last stitch.
Determine whether the turning chain is a stitch.
Keep the same tension on the hook and yarn.
Every few rows, check the edges.
Stop, catch errors, and correct them immediately.
Don’t wait for the project to be finished to check the shape. It is much easier to delete one or two wrong lines than to fix a whole project.
Does Blocking Work on Uneven Edges?
Wavy, curled or uneven edges can be made straight with blocking. The stitches will loosen and the fabric will settle into a more even shape.
However, blocking cannot completely fix missing or extra stitches. If the project has turned out much wider or narrower, you may need to take out the wrong rows and crochet them again.
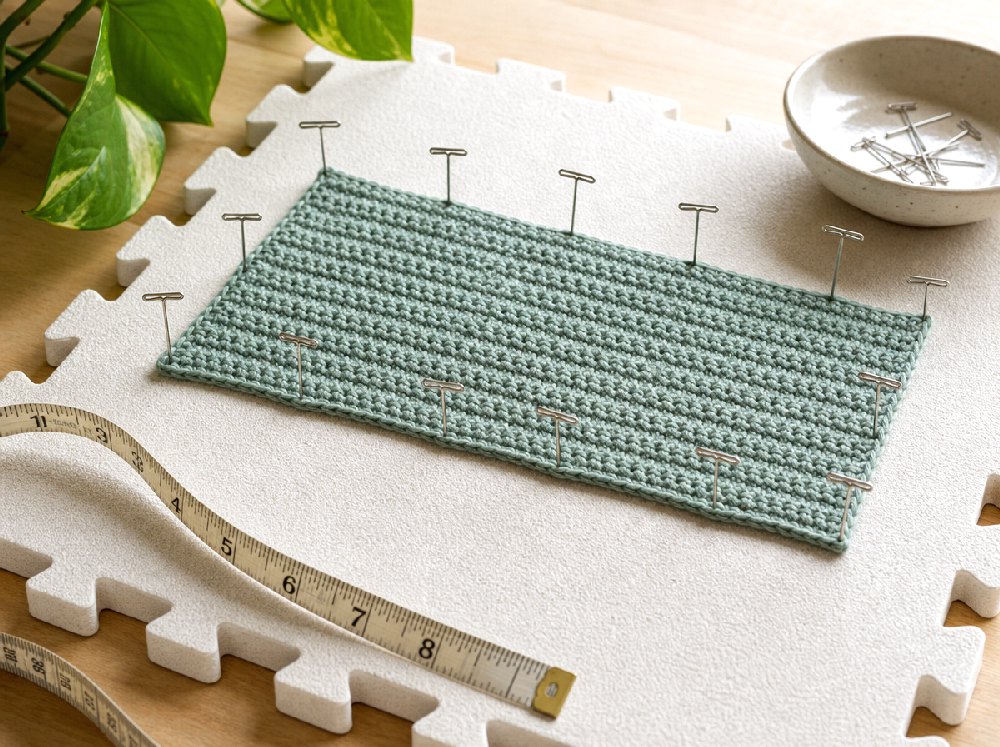
How To Finish A Crochet Project
Spray lightly with water on the finished piece or use the blocking method suggested for the yarn.
Place it flat on a blocking mat or clean towel. Pin the edges of the fabric in straight lines and carefully shape it. Let it dry all the way and then take out the pins.
Always check the label on the yarn before using heat or steam. High temperatures can damage some synthetic fibres
Can a Crocheted Edge Cover Up Imperfect Edges?
A border can help to smooth out slightly uneven sides and give a project a cleaner finish. A single crochet is a good option as it makes a firm and simple edge.
Spread the stitches evenly on each side before adding a border. The edge will ripple if you have too many border stitches. Not enough will cause it to pull in.
If the edges are very uneven, the best result is usually achieved by fixing the wrong rows first, rather than trying to hide them with a thick border.
When to Rotate the Rows?
When to consider dropping the rows:
- stitch count is incorrect
- The project is becoming way more broad or narrow
- One side is noticeably tilted
- Big gaps close to the turning chains
- The size or shape at the end will be affected
It can be frustrating to undo crochet work, but catching your mistake early will save you time in the long run. Before you pull the yarn back, put a stitch marker in the last correct row. This will have you stop in the right spot.
Quick Troubleshooting Guide
The project is getting narrower
You are probably missing the first or last stitch. Count your stitches and mark both edge stitches.
The project is getting wider
You may be adding stitches near the turning chain or placing two stitches in one space.
The sides have large gaps
The turning chain may be too tall, or it may be counted incorrectly.
The bottom edge is curved
The foundation chain may be too tight. Try using a larger hook for the chain.
The edges are wavy
There may be too many stitches, loose tension, or unevenly spaced border stitches.
The project leans to one side
The first or last stitch may be placed incorrectly, or your stitch tension may be uneven.
Frequently Asked Questions
Why does my crochet lose stitches every row?
You are most likely skipping the final stitch because it is hidden beside the turning chain. Use a stitch marker and count every row.
Does the turning chain count as a stitch?
It depends on the pattern and the type of stitch. Always read the pattern notes carefully and use the same method throughout the project.
How do I get straight double-crochet edges?
Use the correct turning-chain height, mark the first and last stitches, and consider replacing the turning chain with a stacked single crochet or standing double crochet.
Can I fix uneven edges without undoing my work?
Small waves may improve with blocking or a simple border. Major changes in width usually require removing and remaking the incorrect rows.
Why is one side straight and the other uneven?
You may be finding the first stitch correctly but missing or adding stitches at the opposite end. Mark both sides instead of marking only the beginning of the row.
Conclusion
Uneven crochet edges are usually caused by missed stitches, extra stitches, turning-chain mistakes, or changing tension. These problems become much easier to control when you count each row and mark the first and last stitches.
Check your work regularly instead of waiting until the project is complete. With a little practice and a consistent routine, your crochet edges will become straighter, cleaner, and more professional-looking..