
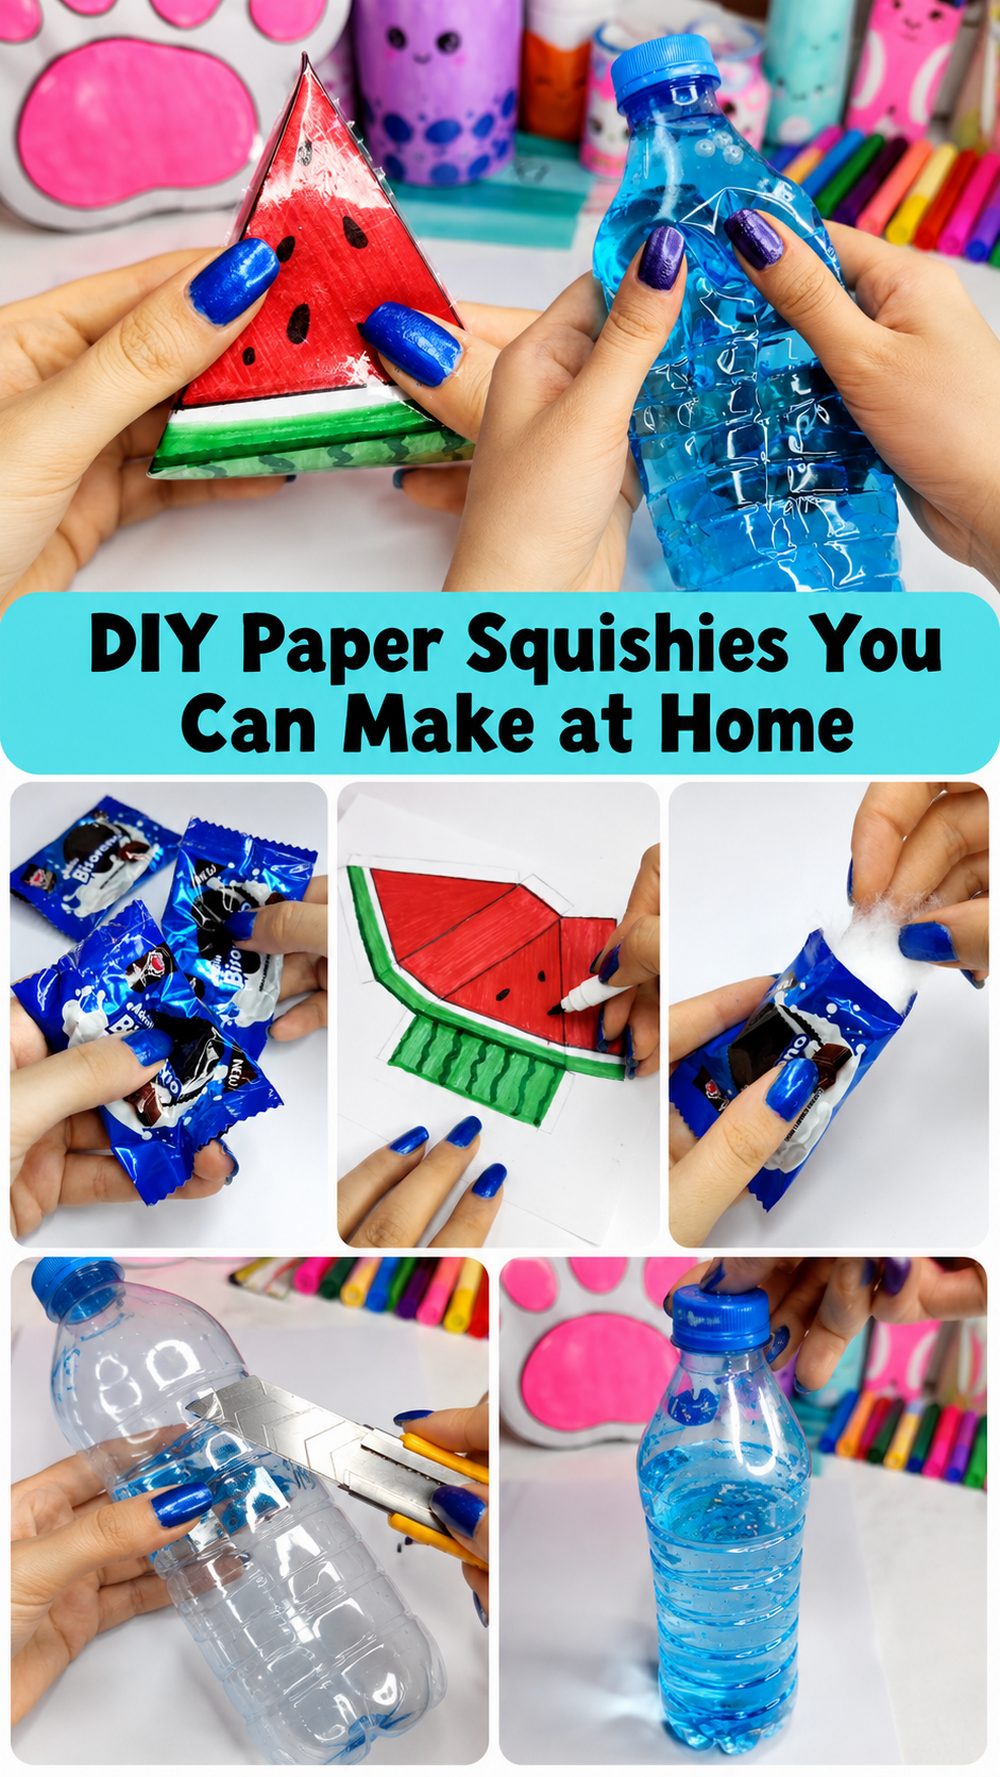
DIY squishies are such a fun little craft when you want to make something cute, soft-looking, and easy to personalize. This version uses simple paper-based materials to create playful squishy shapes you can decorate any way you like, from sweet treats to fun characters and mini novelty designs. It is a lovely project for kids, teens, crafters, and anyone who enjoys handmade desk decor, pretend play items, or small gifts for friends. What makes this project especially appealing is that you can keep it simple or get more creative as you go. The tutorial this guide is based on shows beginner-friendly paper squishy ideas with a clear step-by-step process, making it a nice starting point if you are new to squishy crafts.
Why You’ll Love This Project:
This project is cute, affordable, and easy to adapt with your favorite colors, faces, themes, and shapes. It is a relaxing craft that lets you turn basic supplies into fun handmade squishies for display, gifting, or collecting.
Materials Needed:
- Paper or printed design sheets
- Clear tape or similar covering material
- Soft filling material
- Glue
- Markers, pens, or colored pencils
- Scissors
Use similar materials that match the look, size, and style you want.
Tools Needed:
- Scissors
- Pen or pencil
- Ruler if you want cleaner shapes
- Basic household or craft tools are enough
Best Materials for This Project:
Smooth paper is a great choice because it is easy to draw on and easy to cut. Clear tape helps protect the surface and gives the squishy a shinier finish. For filling, use something soft and lightweight so the finished piece stays puffy without feeling bulky. If you want a neater result, choose paper that is not too thin and a glue that dries clean.
Skill Level:
Beginner-friendly. The process is simple, repetitive, and easy to learn, especially if you start with basic rounded shapes.
Size and Placement Guide:
You can make these squishies small for party favors, pencil cases, and mini collections, or larger for shelf decor and playful room accessories. Adjust the design to match your style with soft pastel shades, bright cartoon colors, dessert themes, animal faces, or seasonal details. They look cute on desks, shelves, craft carts, or inside gift bags.
How to Make It:

Step 1: Prepare the Base
Start by choosing the squishy design you want to make. Simple shapes are easiest, especially for beginners. Lightly sketch the front shape first, then create a matching back piece. Keep the outline smooth so it is easier to tape, cut, and assemble later.
Step 2: Arrange the Pieces
Before attaching anything, check that both pieces match in size and shape. This is a good time to plan the face, pattern, or decorative details. If you want a polished look, finish most of the drawing before assembly so the design stays neat and easy to control.
Step 3: Build the Shape
Cut out the front and back pieces carefully. Cover the surfaces if needed to help protect the design and give the squishy a finished look. Once both sides are ready, line them up and begin sealing around the edges, leaving a small opening so you can add filling.
Step 4: Attach or Fill the Squishy
Add the soft filling little by little. Do not overstuff it. You want it to feel gently puffy, not too tight. When the shape feels balanced, close the opening and press the edges firmly so everything stays together.
Step 5: Add Color or Texture
Now refine the details. You can add tiny highlights, cute facial expressions, sprinkles, fruit seeds, icing lines, or other simple decorations depending on the theme you choose. Keep the details clear and spaced nicely so the squishy still looks clean.
Step 6: Decorate
This is where the project becomes personal. Add blush cheeks, mini patterns, bows, hearts, stars, or themed accents. If you are making more than one, try a matching collection so they look coordinated together.
Step 7: Finish and Style
Check the edges, smooth down any loose areas, and make sure the shape feels even. Once finished, display your squishies in a tray, clip them near your study space, use them as playful decor, or tuck them into a handmade gift set.
Helpful Tips:
- Sketch lightly first so you can fix the shape easily
- Test the design before sealing the edges
- Add filling gradually for a softer finish
- Keep decorations balanced for a neat look
- Choose colors that work well together
- Press edges carefully so the squishy stays closed
Common Mistakes to Avoid:
- Cutting before checking that both sides match
- Overfilling the squishy until it loses shape
- Using weak sealing or loose edges
- Adding too many details that make the design look messy
- Choosing very thin paper that wrinkles too easily
- Rushing the decorating stage without planning the layout
Customization Ideas:
Try dessert shapes, fruit themes, animals, mini drink cups, clouds, stars, or character-inspired designs. Change the colors to match your room, favorite season, or party theme. You can also add names, tiny labels, glittery accents, or recycled paper elements for a more personal touch.
Style Ideas:
Display a group of matching squishies in a small basket, use them as cute desk decor, include them in birthday gift bags, or make themed sets for holidays and school crafts. They also look sweet in a craft corner or on a shelf with other handmade items.
Care Instructions:
Keep paper squishies away from water and rough handling. Wipe gently with a dry cloth if needed. Store them flat or upright in a dry space so they keep their shape. For seasonal designs, place them in a box or pouch when not in use.
Time Needed:
This project may take a short afternoon or a few hours depending on your materials, size, drying time, and detail level.
Budget Guide:
This can be made with affordable, easy-to-find supplies and is a great way to use leftover craft materials you may already have at home.
Conclusion:
DIY paper squishies are a cheerful, low-cost craft that lets you be as simple or as creative as you want. Once you make one, it is easy to keep going and create a whole cute collection in your own colors and style. It is a fun project for relaxing, decorating, and making something playful with your hands.
FAQs:
1. Is this beginner-friendly?
Yes, it is a great project for beginners, especially if you start with simple shapes.
2. What materials are best?
Smooth paper, clear covering material, soft filling, and clean-drying glue usually work best.
3. Can I make it bigger or smaller?
Yes, you can scale the design to fit your display space or intended use.
4. Can I use recycled materials?
Yes, clean leftover paper and basic craft supplies can work well for this project.
5. How do I make it look neat?
Match the front and back carefully, do not overfill it, and keep the decorations simple and balanced.