
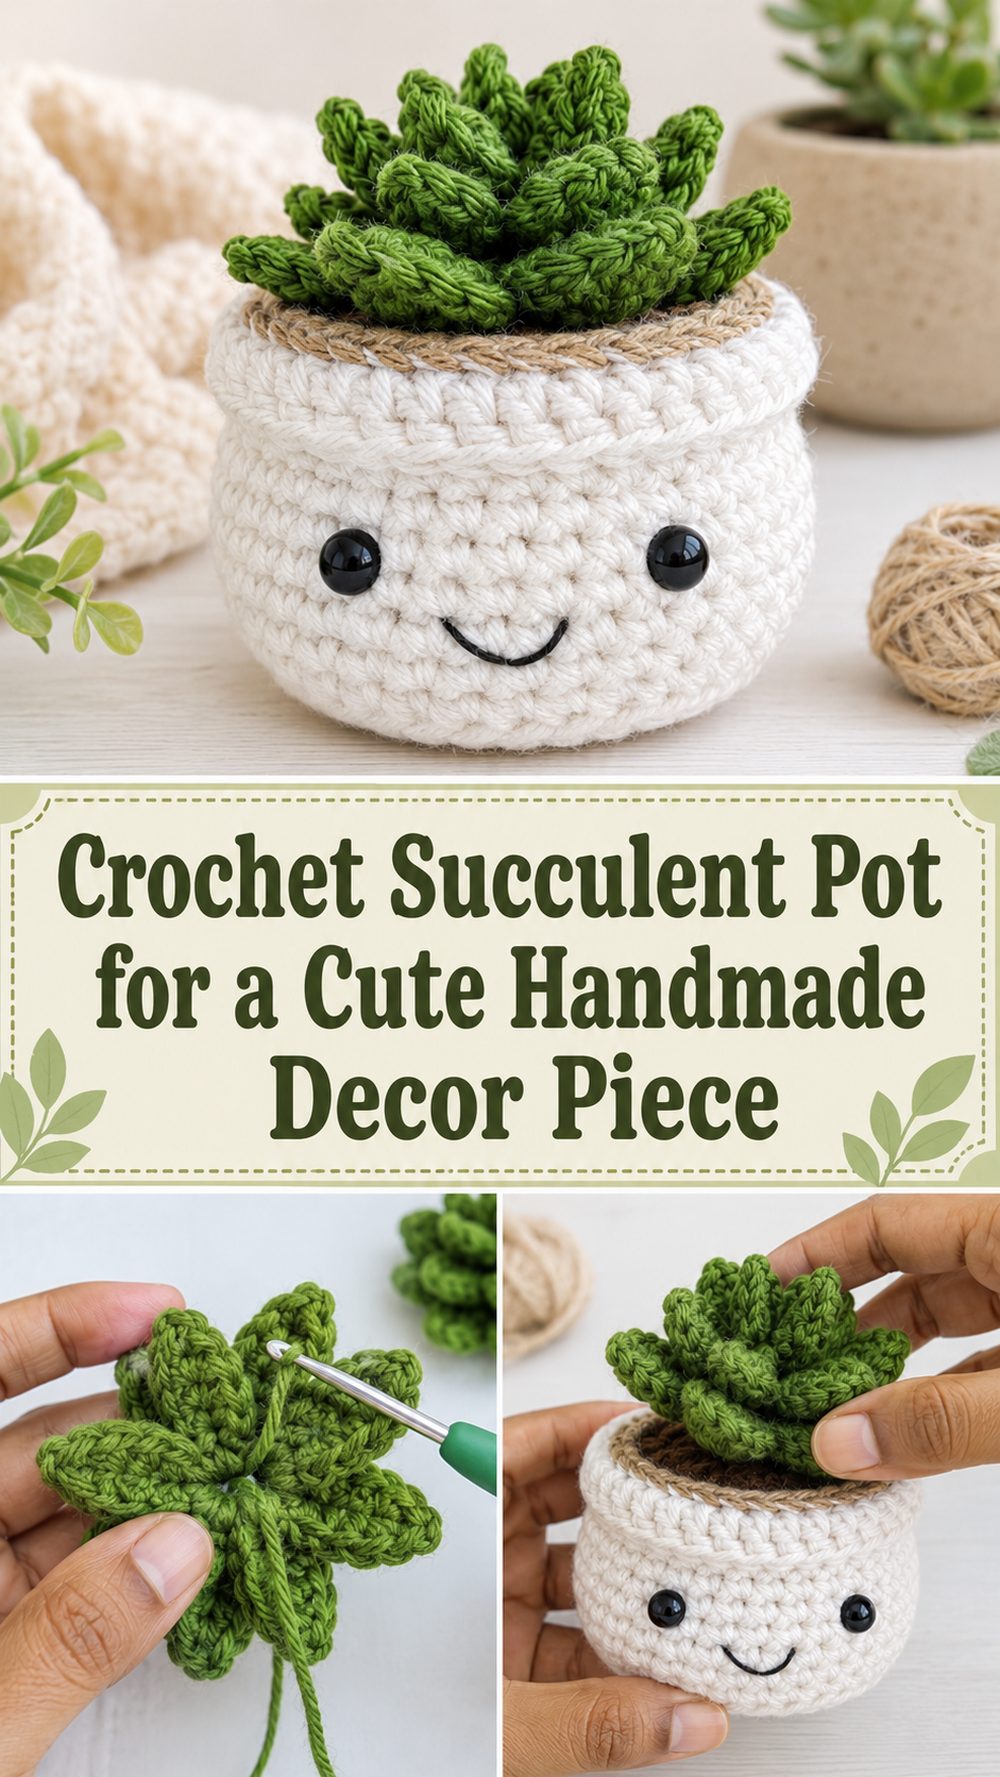
A crochet succulent pot is such a cheerful little project to make when you want something decorative, low-stress, and full of handmade charm. It gives you the look of a sweet little plant without any watering or maintenance, and it is the kind of piece that works beautifully on a desk, shelf, windowsill, or bedside table.
The tutorial I selected teaches a mini crochet succulent pot plant and presents it as an easy beginner-level pattern that works up fairly quickly, which makes it a lovely choice for relaxed crafting or gift-making. It is especially nice if you enjoy amigurumi-style home decor but want something smaller and more manageable than a big toy project.
This kind of crochet piece feels fun from the start because you get to shape both the pot and the plant, then bring them together into one adorable finished display.
Why You’ll Love This Project
This project is especially appealing because it is small, decorative, beginner-friendly, and quick to make. The selected tutorial describes it as a cute little crochet succulent and an easy beginner-level pattern, so it is a nice fit for anyone who wants a simple project with a charming result.
Materials Needed
- Green yarn for the succulent
- Pot-colored yarn such as brown, clay, terracotta, or beige
- Crochet hook
- Scissors
- Yarn needle
- Stitch marker
- Stuffing
Use a yarn and hook size that matches your desired fit and texture.
Best Yarn for This Project
For a crochet succulent pot, a smooth yarn with clear stitch definition is usually the easiest choice. Since this kind of project has shaping and small details, it helps when the stitches are easy to see. A soft acrylic yarn is a great option if you want something beginner-friendly, easy to find, and available in lots of colors.
Cotton can also work really well if you want the pot or leaves to hold a slightly firmer shape. It often gives small decor projects a tidy finish. Try to avoid very fuzzy yarns for this one, because they can hide the shaping and make the details harder to see.
Skill Level
Beginner-friendly to easy.
The selected YouTube tutorial specifically describes the project as an easy beginner-level pattern and says it works up pretty quickly. That makes it a very approachable choice for newer crocheters who want to practice simple shaping and assembly in a small decorative project.
Size and Fit Guide
Because this is a decorative succulent pot, the exact size can stay flexible. If you use thinner yarn and a smaller hook, the finished piece will come out smaller and a bit more delicate. With thicker yarn, it will look fuller and softer.
What matters most is keeping the proportions balanced. The succulent should sit comfortably in the pot without looking too tiny or too oversized. If the pot feels too narrow, keep building it a little longer. If the succulent starts to look too bulky, use less stuffing or shape the leaves more gently so the whole piece stays neat.
Stitches Used
The chosen tutorial is presented as a beginner-friendly mini succulent pot plant project, so it is best approached as a simple shaped crochet make. The safe stitch list for a project like this includes:
- Chain
- Slip stitch
- Single crochet
- Increases
- Decreases
- Joining and finishing techniques
These are the standard stitches most often used in small amigurumi-style decor pieces and suit the easy beginner level described in the tutorial.
How to Make It
Step 1: Start with the Pot
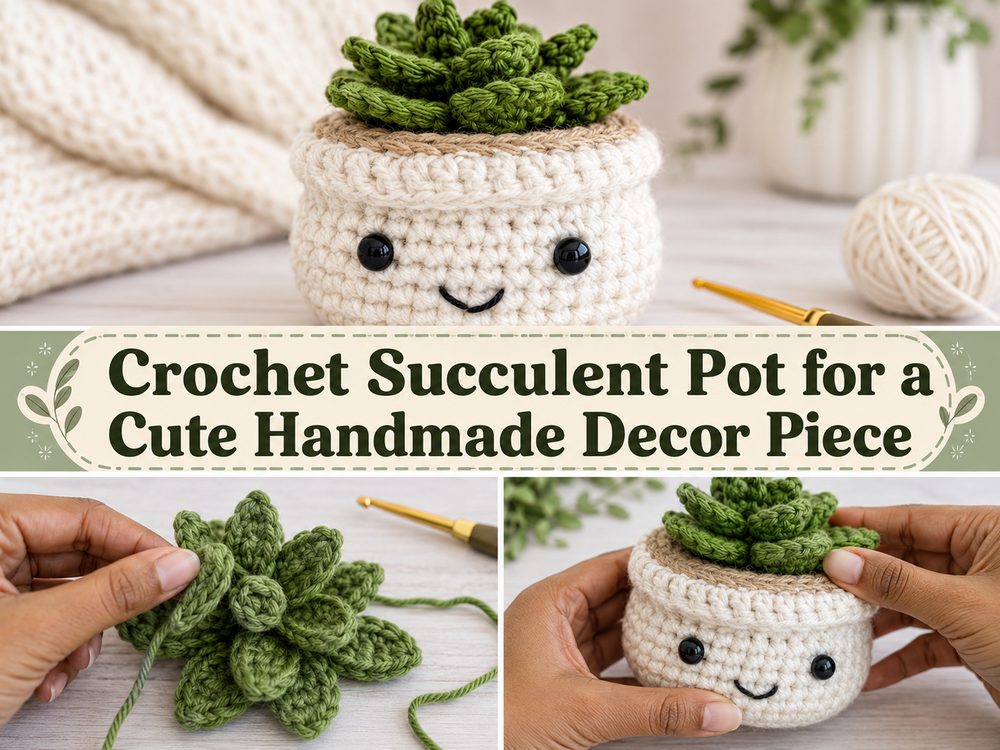
A crochet succulent pot usually begins with the little pot itself or one of the main base pieces. Starting with the pot is a nice way to begin because it gives the project structure right away and helps you picture how the finished piece will look. Work with even tension so the pot shape feels tidy and balanced.
For a small decorative piece like this, it helps if the stitches are fairly firm. A neater, closer fabric will make the pot hold its shape better and give the finished project a more polished look.
Step 2: Shape the Pot Body
As the rounds build up, the little pot starts to take shape. This stage is all about creating a stable base for the succulent. Keep checking that the sides look even and that the shape feels balanced instead of leaning too much in one direction.
If you are adding stuffing, do it gradually. Too much stuffing can stretch the stitches and make the pot look puffy instead of neat. A small amount is usually enough to help the shape sit nicely.
Step 3: Crochet the Succulent
Once the pot is ready, move on to the succulent itself. This is the part that gives the whole project its personality. A crochet succulent usually looks best when the shape feels soft, full, and gently layered rather than overworked.
Since the selected tutorial presents this as a mini succulent pot plant, keep the overall shape cute and compact. Focus on making the plant look balanced in relation to the pot. Small decorative projects often look best when they stay simple and tidy.
Step 4: Build the Leafy Shape
Succulents are known for their soft, layered leaf shapes, so this is where the project begins to come alive. However the selected tutorial forms the plant, the key is to keep the shaping even and pleasant to look at. Arrange the parts carefully so the succulent feels full without becoming messy.
This is also a good stage to pause and check how the plant will sit in the pot. If it looks too tall, too wide, or too crowded, adjust the shaping before assembly. A balanced silhouette will make the final piece look much more polished.
Step 5: Join the Succulent to the Pot
After both main parts are finished, bring them together carefully. Position the succulent in the center of the pot and check how it sits before attaching it permanently. This step makes a big difference, because a centered and balanced placement will help the whole piece look much neater.
Take your time here. Even a simple beginner project can look really lovely when the final assembly is done with care. If the succulent leans, adjust it before finishing so the pot display looks stable and intentional.
Step 6: Finish and Shape
Once everything is attached, weave in the yarn ends neatly and shape the piece with your hands. Smooth the pot, arrange the succulent, and make sure nothing looks uneven. The finished crochet succulent pot should feel cute, compact, and decorative.
Because the selected tutorial describes the pattern as quick and beginner-friendly, this is the kind of project that gives you a satisfying result without feeling too demanding. It is a nice reminder that even small crochet makes can have a lot of charm.
Helpful Tips
- Use a stitch marker so you do not lose track of rounds.
- Keep your stitches tight enough that stuffing does not peek through.
- Add stuffing gradually for a smoother shape.
- Check the balance of the succulent before sewing it into the pot.
- Choose a smooth yarn so the shaping stays easy to see.
- Take your time with the final assembly for a neater finish.
Common Mistakes to Avoid
- Crocheting too loosely and leaving visible gaps
- Overstuffing the pot or succulent
- Making the plant too large for the pot
- Attaching the succulent off-center
- Rushing the finishing and leaving loose ends visible
- Ignoring the overall balance of the piece
Customization Ideas
This is such an easy project to personalize. You can use soft green shades for a natural succulent look, or go for brighter greens if you want something playful. The pot can also be changed to suit your decor. Try terracotta tones for a classic plant-pot look, or use cream, mustard, sage, or dusty pink for something more decorative.
You can also make a few in slightly different sizes or shapes and group them together on a shelf. A tiny collection of crochet succulents looks especially cute in craft rooms, home offices, or sunny corners of the house.
Style Ideas
A crochet succulent pot looks lovely on a desk, bookshelf, windowsill, side table, or entryway shelf. It adds a handmade touch without needing any care, so it is a nice decor piece for small spaces.
It also makes a sweet gift. Because the selected tutorial describes it as a quick and easy beginner project, it is a great option when you want to make a little handmade present without starting something too time-consuming.
Care Instructions
Dust it gently now and then to keep it looking fresh. If it needs cleaning, spot clean first. For a deeper clean, hand wash gently in cool water with mild soap, then reshape it and let it dry completely. Avoid high heat, especially if the piece is stuffed or made with acrylic yarn.
Time Needed
This may take a few hours depending on your speed, yarn choice, and how much time you spend shaping and assembling the succulent neatly.
Conclusion
A crochet succulent pot is a lovely little project when you want something cute, decorative, and beginner-friendly. It is small enough to feel relaxing, but it still gives you the satisfaction of finishing a complete handmade piece for your home or for gifting. The selected tutorial presents it as an easy mini succulent pot plant that works up quickly, which makes it especially appealing for simple, enjoyable crochet time. Pick colors you love, keep the shaping soft and balanced, and enjoy making a crochet succulent pot that can brighten any little corner.
FAQs
Is this project beginner-friendly?
Yes. The selected tutorial describes it as an easy beginner-level pattern.
Does it work up quickly?
Yes. The tutorial snippet says the project works up pretty quickly.
What yarn works best for a crochet succulent pot?
A smooth acrylic or cotton yarn is usually a good choice because it shows the stitches clearly and helps the shapes stay neat.
Can I change the colors?
Yes. You can easily change both the succulent color and the pot color to suit your own style or home decor.
Is this a good gift project?
Yes. A crochet succulent pot makes a sweet handmade gift because it is decorative, cheerful, and easy to display.