
Create a chic crochet bucket hat with a soft, wavy brim to add a fun, modern touch to the classic shape of the hat. This is a great project for sunny days, casual outfits, festivals, beach looks or for anyone that loves handmade accessories.

WHY YOU’LL LOVE THIS PROJECT
It’s a simple bucket hat shape with a fun looking brim that can still be worn. It is easily customizable with different colors, and the wavy edge gives it that extra trendy look.
WHAT YOU’LL NEED
- Hat yarn
- Crochet hook
- Tapestry needle
- Scissors
- Stitch marker
Select a yarn and hook size that will produce the fit and texture you want.
BEST YARNS FOR THIS PROJECT
Cotton or a cotton blend yarn is ideal as it helps the hat hold its shape while remaining comfortable. For a softer look, acrylic yarn works too, but keep tension firm so the brim doesn’t flop.
SKILL LEVEL
Simple for beginners.
SIZE & FIT GUIDE
The hat is worked from the top down so the crown and body can be adjusted as you go. Keep trying it on your head and continue with the side section until it is as deep as you want. The wider or shorter you make the brim will determine how dramatic the waves appear.
STITCHES EMPLOYED
- Magic ring
- Slip stitch
- Single crochet
- Double crochet
- Increases
HOW TO DO IT
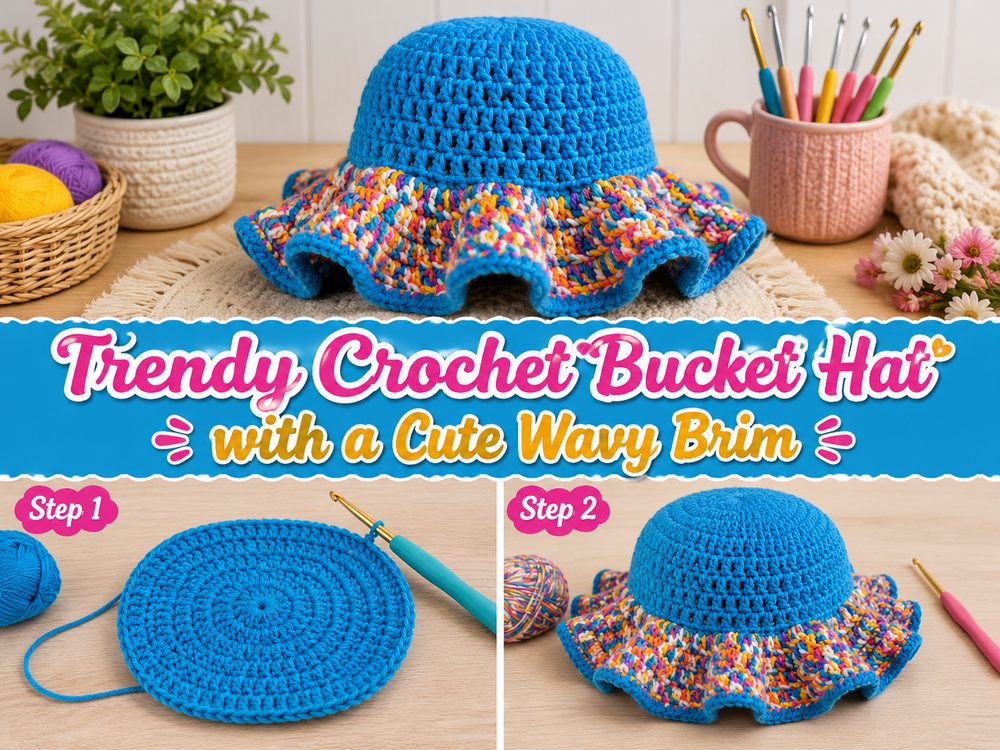
The Crown Begins
Start with a magic ring at the top of the hat. Work in rounds, increasing evenly so the crown grows flat and round.
Making the Hat Body
Once the crown is large enough, continue working around with fewer increases so the sides take shape, forming the bucket hat silhouette.
See How It Fits
Try it on as you go or compare with a hat that fits you. Add rounds to lengthen the body if desired.
Creating the Wavy Brim
Work around the bottom edge and add increases to create a soft ripple effect. Continue until you have the wave and width you like.
Complete the Edge
Finish with a tidy last round using a slip stitch. Fasten off, weave in ends, and gently shape the brim with your hands.
USEFUL TIPS
- Mark the beginning of each round with a stitch marker.
- Keep the tension even for a smooth crown.
- Adjust the number of increases in the brim to control waviness.
THINGS TO AVOID
- Starting sides with a crown too small
- Skipping fit checks
- Crocheting the brim too tight
- Adding too many increases too fast
- Using stretchy yarn that doesn’t hold shape
PERSONALIZATION CONCEPTS
Pick pastel colors, bold stripes, checker accents, or a solid neutral. Add a flower applique, scalloped edging, charms, beads, or a contrasting color on the brim.
STYLE IDEAS
Pair this wavy brim bucket hat with summer dresses, jeans, crochet tops, beachwear, or festival attire. Makes a cute handmade gift too.
HOW TO CARE
Wash gently in cool water if the yarn allows. Reshape crown and brim while damp, lay flat to dry. Do not hang wet.
TIME REQUIRED
A few hours depending on speed, yarn, size, and stitch pattern.
SUMMARY
A crochet bucket hat with a wavy brim adds playful style to a practical accessory. Once you have the basic shape, you can make it in many colors and textures.
FREQUENTLY ASKED QUESTIONS
Is this beginner-friendly?
Yes, if you are comfortable working in rounds and making increases.
How to make the brim not wavy?
Use fewer increases in the brim section for a softer wave.
Can I adjust for a larger head?
Yes, increase the crown until it fits, then work the sides down to the desired depth.
What yarn is best?
Cotton or cotton-blend yarn for better structure.
Can I add color changes?
Yes, stripes or a contrasting brim color look great.