
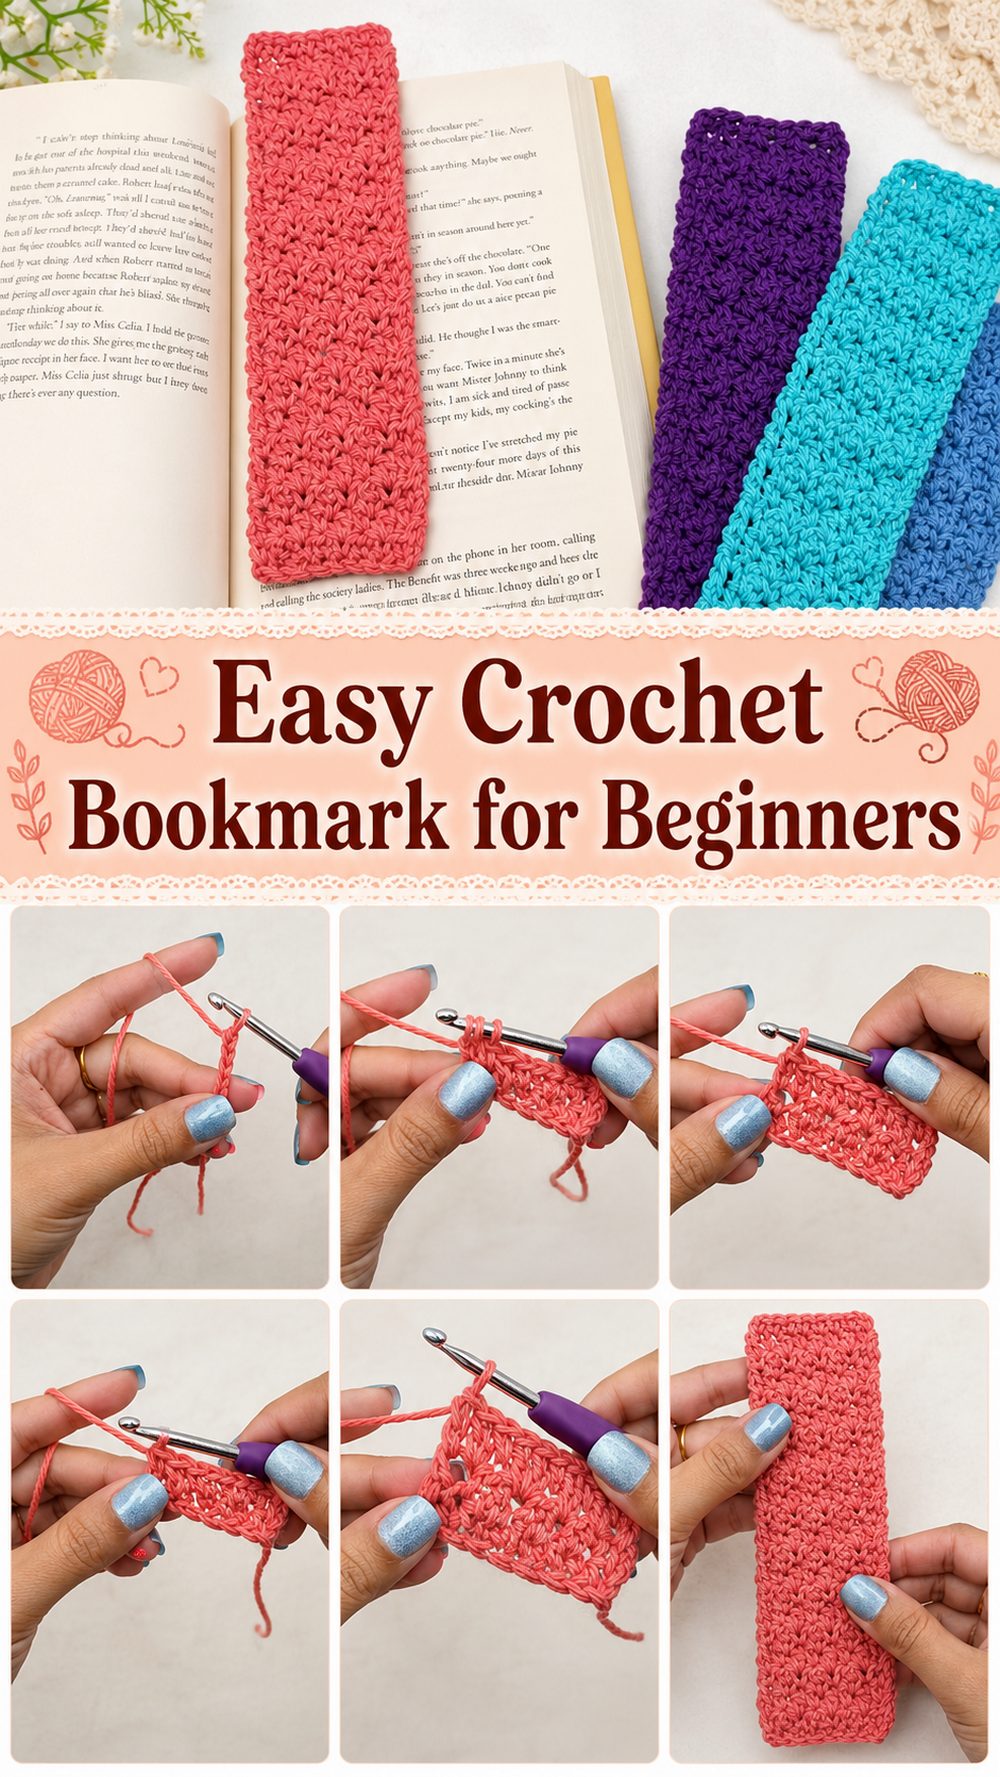
A crochet bookmark is one of those quick projects that seems so gratifying. It’s quick, practical and a lovely way to use up a small amount of yarn without committing to a big make. I chose a tutorial that teaches a simple, neat bookmark. It’s great for beginners because it focuses on the basics and you can gain confidence row by row. It has that clean handmade look that will go nicely into a favourite novel, journal, planner or gift book. This type of project is also perfect when you want something calm and easy in between larger crochet pieces. You can keep it simple and classic, or make a few in different colours for gifts, reading buddies or your own growing stack of books.
Reasons You Will Love This Project
This bookmark is the sort of project that gives you a quick win. It’s small, useful, beginner-friendly and it’s easy to personalise. You can make one in a short sitting, learn to do steady tension, and come away with something pretty that you will actually use.
What you’ll need
Thread.
Crochet needle
scissors.
Needle for yarn
Choose the yarn and hook size for the fit and texture you want.
Best Yarn For This Project
A smooth lightweight yarn is especially good for bookmarks as you want the finished piece to stay fairly flat and slide easily between pages. Cotton is a good choice, it has some structure to it, and helps the bookmark hold its shape. If you want something softer, a cotton blend can work nicely as well. Avoid very fluffy or bulky yarns as they can make the bookmark too thick for a book.
Skill Level:
Level: beginner.
This is a nice project to start with as it is taught step by step and is all about simple row work. It’s great for practicing neat edges, counting stitches and getting used to turning your work.
Size & Fit Guide:
Compare it to the sort of book you intend to use it in. The bookmark should be long enough to extend just a little beyond the top or bottom of the pages but not so thick that it will pull on the book. If you want to adjust the size you can make your starting chain longer or shorter for width . You can just keep adding rows till the length looks right . Hold it against a book as you go so you can decide when it feels done.
Number of Stitches:
Slip-knot
Chain.
SC (single crochet)
Chain Turning
The tutorial starts with a slip knot and chain (very clearly) then walks you through Row 1 (with counting stitches) and Row 2 in a very beginner-friendly way.
Getting ready
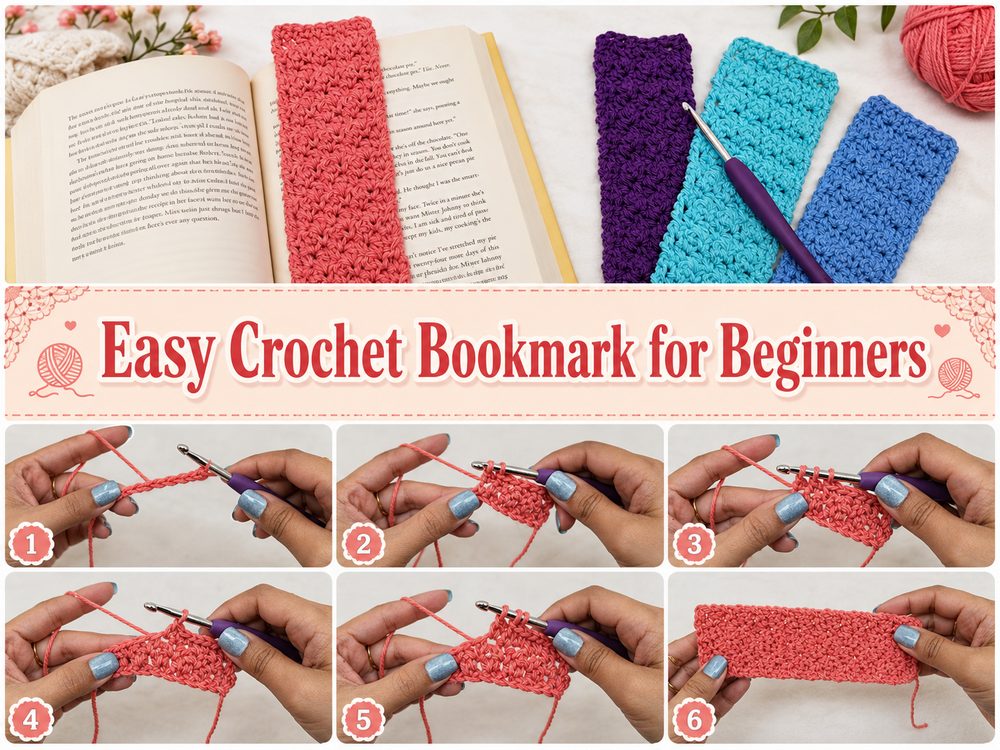
Step 1: Set up the Foundation
You will begin with a slip knot, and make your foundation chain. This is a bookmark so you want a narrow strip rather than a wide panel. Make your chains loose and even. The first row can be disheartening if the chain is too tight so it’s good to loosen your hands a little and let the hook move naturally. This tutorial takes the time to show this beginning stage which makes it helpful for new crocheters.
Lay the chain flat before you go any further and make sure it is not twisted. That simple check makes the rest of the project a lot easier.
Step 2: Make the First Row
When the chain is complete work back into the foundation chain and work your first row. This is where the bookmark starts to take the shape of a slim, neat strip. Take it slow. Beginners often find the first row to be the trickiest part as the chain can be more difficult to see than normal stitches. If necessary, use your fingers to move the chain towards you, to make it easier to see each space.
The tutorial also discusses counting stitches and is a HUGE help on a small project like this. If you forget how many stitches you have, the bookmark might begin to widen or narrow. When you complete the first row, count before you turn to ensure you are staying on track.
Step 3: Building the Main Body.
After row 1 the bookmark is very relaxing. Turn your work, chain as needed and continue working the same basic stitch pattern across each row. It’s a simple design, so this is a good time to work on consistency. Neaten the first stitch in each row and do not leave out the last stitch at the end. Those tiny edge details really make a huge difference in how polished the bookmark feels.
As the rows build up you will begin to see a clean textured strip form. The charm is in the simple look. It’s not fussy, but it feels handmade and thoughtful. This kind of repetitive crochet is perfect when you need something mindless that you can complete in one sitting. This straightforward back-and-forth construction matches the video which shows the bookmark as a simple, beautiful and pretty quick project.
Step 4: Monitor Length During Process
Books come in different sizes, so for the final length, it’s best to use your judgement. Hold up the bookmark to a paperback, journal or planner and decide how far you want it to stick out. Some prefer a subtle short bookmark, others prefer a longer one that hangs down from the pages a little more.
If you are making this as a gift, go for a practical everyday length, not something oversized. The nice thing about a row-based bookmark is how easy it is to change. Just keep adding rows until it looks okay.
Step 5: Complete the Last Row
When the bookmark is the desired length, finish the last row neatly. Fasten off leaving enough yarn to sew in the end securely. Bookmarks are used a lot, so it’s worth spending an extra minute here. Weave the yarn tail back and forth through the stitches in more than one direction so it won’t move.
No worries if the edges look a little wobbly. That’s usually taken care of once the piece is gently shaped. You can smooth it out with your hands or give it a little block if need be.
Step 6: Add the Finishing Touches.
This style of bookmark is lovely left plain but if you like you can add a simple finishing detail. A little tassel on one end makes it feel extra special. Light and not too bulky so it still fits comfortably inside a book. You can also use a different colour of yarn for the last row or edge to add a little detail, without changing the overall simplicity.
The finished product should be a skinny, flat, flexible bookmark with tidy rows and a tidy handmade look. It fits easily inside a book without straining the pages.
Tips & Tricks
Choose cotton yarn if you want a bookmark that hangs flatter and feels crisp.
Count your stitches, at the end of each row, especially at the beginning of each row.
Leave your beginning chain a little loose to make Row 1 easier to work.
If you tend to lose the edges, use a stitch marker in the first or last stitch.
At the end, smooth or lightly block the bookmark for a neater finish.
Make a few at a time while the steps are fresh in your mind.
Mistakes To Avoid
Too tight a foundation chain.
Drop the last stitch on a row
Accidentally adding an extra stitch on the turning edge
Using yarn that is too thick for a flat bookmark
forgetting to compare the length with a real book
Weaving the ends too loosely
Customisation Ideas
It is a simple design that can be a lot of fun to make. Try soft neutrals for a classic reader’s bookmark or bright colours for a cheerful and easy-to-spot bookmark. Change yarn colours every few rows to add stripes. Make one longer for bigger novels or keep it shorter for planners and journals. It will also look more gift-worthy with a small tassel, bead or decorative end detail.
Style Ideas
This bookmark makes a great addition to a novel, cookbook, journal, devotional or sketchbook. It’s also a sweet handmade extra when gifting a book to a friend. If you are in a book club making a little stack in different colours would be such a thoughtful touch.
Care Instructions:
If necessary, hand wash gently. Dry flat. Steer clear of high heat, especially if your yarn is delicate or blended. If it gets out of shape, gently smooth it or block it flat again.
Time Required
This can take a few hours depending on your speed, yarn, size and stitch pattern. The tutorial suggests it as a quick beginner project so it’s a nice choice for an easy afternoon make.
Conclusion
If you want a simple crochet project that is useful, relaxing, and easy to personalize, this bookmark is a lovely one to try. It gives you a chance to practice the basics without pressure, and the finished piece is something you can keep, gift, or remake in lots of colors. Once you finish one, it is very easy to want to make another.
FAQs
Is this beginner-friendly?
Yes. It is a step-by-step bookmark tutorial aimed at newer crocheters.
What yarn is best for a crochet bookmark?
Lightweight cotton or a smooth cotton blend works very well because it stays flatter and feels neat inside a book.
Can I adjust the size?
Yes. Change the starting chain and add or reduce rows until it suits your book.
How do I make it more comfortable to crochet?
Keep the foundation chain loose, work slowly on the first row, and count stitches often.
Can I sell the finished bookmark?
In many cases, handmade finished items are fine to sell locally or in small quantities, but check the video creator’s pattern terms first if you plan to sell regularly.