
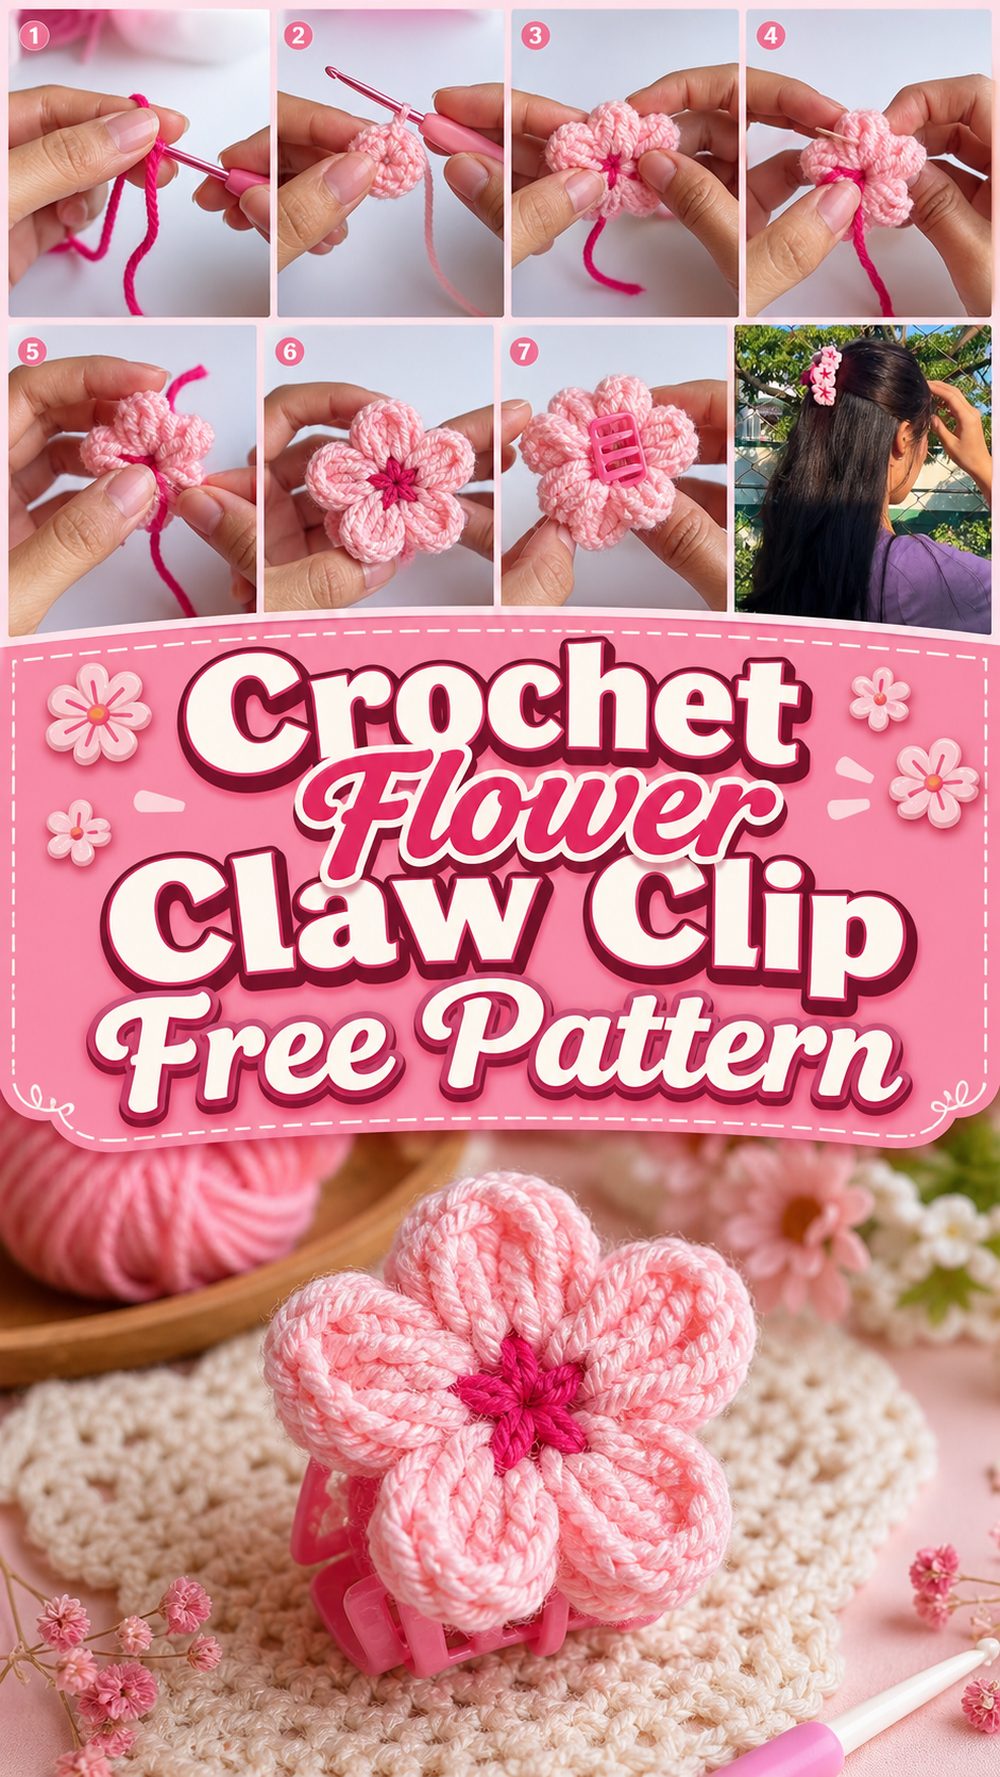
A crochet claw clip is such a fun little project when you want to turn a simple hair accessory into something softer, prettier, and more personal. Instead of making a separate clip from scratch, this kind of project lets you decorate or crochet directly into a claw clip design so the finished piece feels both practical and handmade. The YouTube tutorial I selected teaches an easy beginner flower hair claw clip and clearly highlights that it is no-sew and no-glue, which makes it especially appealing if you want a tidy finish without extra fuss. That also makes it feel much more approachable for beginners or for anyone who enjoys quick creative projects with a pretty result. A flower claw clip like this can be worn casually, dressed up for special outfits, or made as a sweet handmade gift.
Why You’ll Love This Project
This project is easy to love because it gives you a wearable result without needing a large amount of yarn, time, or finishing work. The selected tutorial specifically presents it as an easy beginner tutorial with no sewing and no glue, so it feels simple, clean, and very manageable.
Materials Needed
- Yarn
- Crochet hook
- Scissors
- Yarn needle if needed for tidying ends
- A claw clip to attach or crochet around
Use a yarn and hook size that matches your desired fit and texture.
Best Yarn for This Project
A crochet claw clip usually looks nicest in a yarn that shows the flower shape clearly and does not feel too bulky on the clip. Cotton is a lovely choice because it can help the petals look crisp and neat. A soft acrylic can also work if you want the flower to feel a little softer and gentler. Since this is a small accessory project, smooth yarn often gives the cleanest result and helps the flower detail stand out more clearly.
Skill Level
Beginner-friendly.
The selected tutorial clearly describes this as an easy beginner tutorial, so it should feel approachable for crocheters who know the basics and want a quick accessory project with a pretty finish.
Size and Fit Guide
The finished size of your crochet claw clip will depend on the size of the claw clip you start with, the yarn you choose, and how full you want the flower to look. If you want a delicate everyday clip, use a smaller claw clip and lighter yarn. If you want a more noticeable accessory, choose a slightly larger clip or fuller yarn.
It helps to hold your crochet against the clip as you work so the flower feels balanced. You want the design to decorate the clip nicely without making it too bulky to wear comfortably in the hair.
Stitches Used
The visible YouTube result confirms that this is a flower hair claw clip tutorial and that it is easy, beginner-friendly, no-sew, and no-glue, but it does not clearly list every stitch by name in the search result. To stay accurate, it is better not to invent exact stitch names, stitch counts, or row totals that are not clearly confirmed in the visible source.
How to Make It
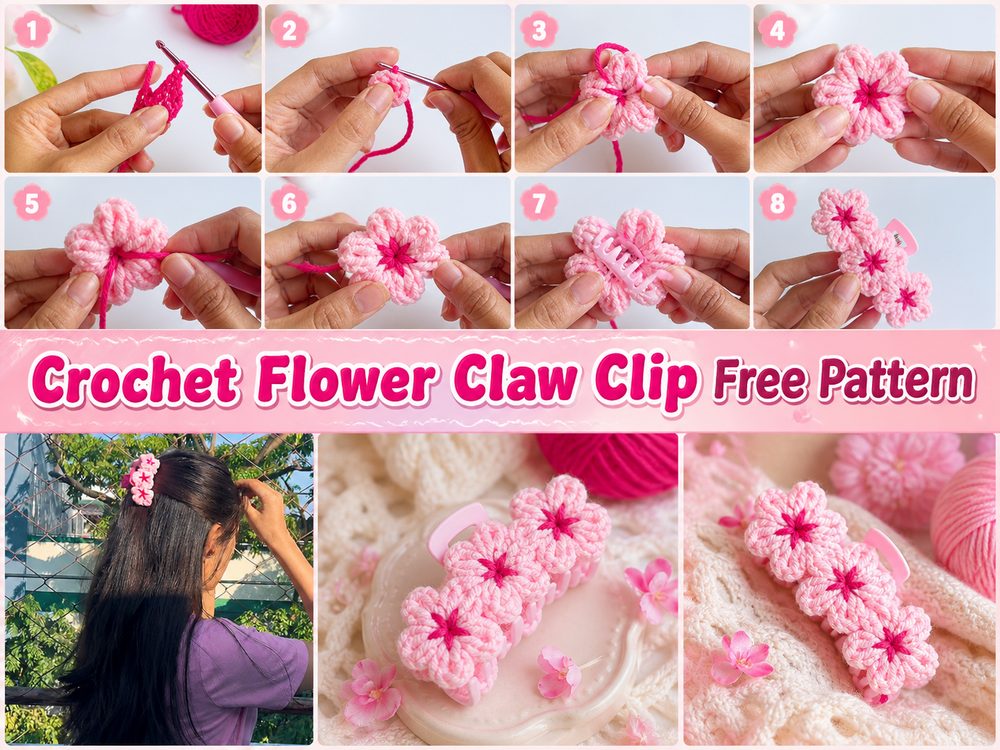
Step 1: Start With the Flower Design
Begin by focusing on the flower part of the project. Since the selected tutorial is specifically for a flower hair claw clip, the floral section is the main decorative feature and what gives the clip its charm. At the beginning, keep your stitches neat and even so the flower shape starts off balanced.
Because this is a small accessory, neatness matters a lot. Tiny crochet projects show every little detail, so taking a bit of care early on helps the final clip look much more polished.
Step 2: Build the Petals
As the flower begins to grow, the petals are what make the design come alive. This is the part where the project starts feeling fun very quickly. A few rounds or sections of crochet can suddenly turn into a pretty flower that already looks like a finished accessory piece.
Try to keep the petals fairly even in size so the flower looks balanced once placed on the clip. They do not need to be absolutely perfect, but a similar size across the petals usually gives the nicest result.
Step 3: Keep the Design Light Enough for a Clip
Since this is going on a claw clip, it helps to keep the flower decorative without making it too heavy or bulky. A clip accessory should still feel comfortable in the hair, so this is not the kind of project where you want the flower to become overly thick.
As you work, check how the piece looks against the claw clip. A good crochet clip design should enhance the accessory, not overwhelm it. This makes it easier to wear and gives it a cleaner everyday look.
Step 4: Attach or Form It on the Clip
This is the stage that makes the selected tutorial especially appealing. The visible description clearly says no sewing, no glue — just your hook and yarn, which means the design is intended to come together without extra adhesives or stitched-on finishing methods. That gives the project a cleaner and simpler feel.
As you reach this step, take your time to make sure the flower sits centered and looks balanced on the clip. Because the goal is a neat finished accessory, placement matters. You want it to look secure, pretty, and comfortable all at once.
Step 5: Tidy the Finish
Once the flower is attached and the shape looks right, fasten off and tidy any loose ends carefully. Since this is a visible hair accessory, finishing details really stand out. A neat back and a smooth front make the whole clip feel more intentional and gift-worthy.
If the flower looks slightly uneven, gently shape the petals with your fingers. This small adjustment can make a big difference, especially in a floral accessory.
Step 6: Make More in Different Colors
This type of project is perfect for repeating in several shades. Once you understand the basic flower shape and how it works with the clip, it becomes very easy to imagine making a whole little set. Soft pastels look sweet and delicate, brighter shades feel playful, and neutrals can give the clip a more simple and elegant look.
Because the selected tutorial is described as easy and beginner-friendly, it suits making more than one without feeling like a big commitment.
Helpful Tips
- Use smooth yarn if you want the flower detail to show clearly.
- Check the flower against the clip while working so the size feels balanced.
- Keep the design light enough for comfortable wear.
- Shape the petals gently with your fingers at the end.
- Choose a claw clip size that matches the fullness of your crochet flower.
- Make a few in different colors for easy gift sets.
Common Mistakes to Avoid
- Making the flower too bulky for the clip
- Crocheting too tightly so the petals lose softness
- Letting the flower become too loose and floppy
- Forgetting to check how the flower sits on the clip
- Leaving ends untidy on such a visible small project
- Choosing very fuzzy yarn if you want clear petal definition
Customization Ideas
This crochet claw clip is very easy to personalize. You can make it in soft pinks, creams, lavender, yellow, or classic white for a floral look that feels sweet and fresh. You could also make the flower smaller for a delicate everyday accessory or fuller for a more noticeable statement piece. If you enjoy seasonal accessories, try spring pastels, summer brights, or warm autumn tones.
Style Ideas
A crochet flower claw clip looks lovely with loose hair, half-up styles, simple twists, or easy everyday buns. It can add a soft handmade detail to a casual outfit or work as a sweet finishing touch for a dressier look. It also makes a charming handmade gift for anyone who likes simple hair accessories with a personal touch.
Care Instructions
If needed, gently spot clean or hand wash with care and let it air dry fully before wearing again. Shape the petals while damp if needed. Since this is attached to a clip, handle it gently and avoid rough pulling so the flower keeps its shape.
Time Needed
The visible source does not give an exact time, but it clearly presents this as an easy beginner tutorial with a no-sew, no-glue finish, which suggests a small and manageable project rather than a long or complicated one.
Conclusion
A crochet claw clip is such a sweet little project when you want something wearable, handmade, and quick to enjoy. The selected YouTube tutorial teaches a flower hair claw clip in an easy beginner style and clearly says it uses no sewing and no glue, which makes it especially appealing for a clean, simple finish. It is a lovely way to turn an ordinary claw clip into a cute handmade accessory with just yarn, a hook, and a bit of creativity.
FAQs
Is this beginner-friendly?
Yes. The selected tutorial clearly describes it as an easy beginner tutorial.
Do I need to sew or use glue?
No. The visible source specifically says no sewing, no glue — just your hook and yarn.
What kind of design is it?
It is a flower hair claw clip tutorial.
What yarn works best?
A smooth yarn with good stitch definition, such as cotton or soft acrylic, usually works very well.
Can I make it in different sizes?
Yes. You can change the overall look by using a different clip size, yarn weight, and flower fullness.