
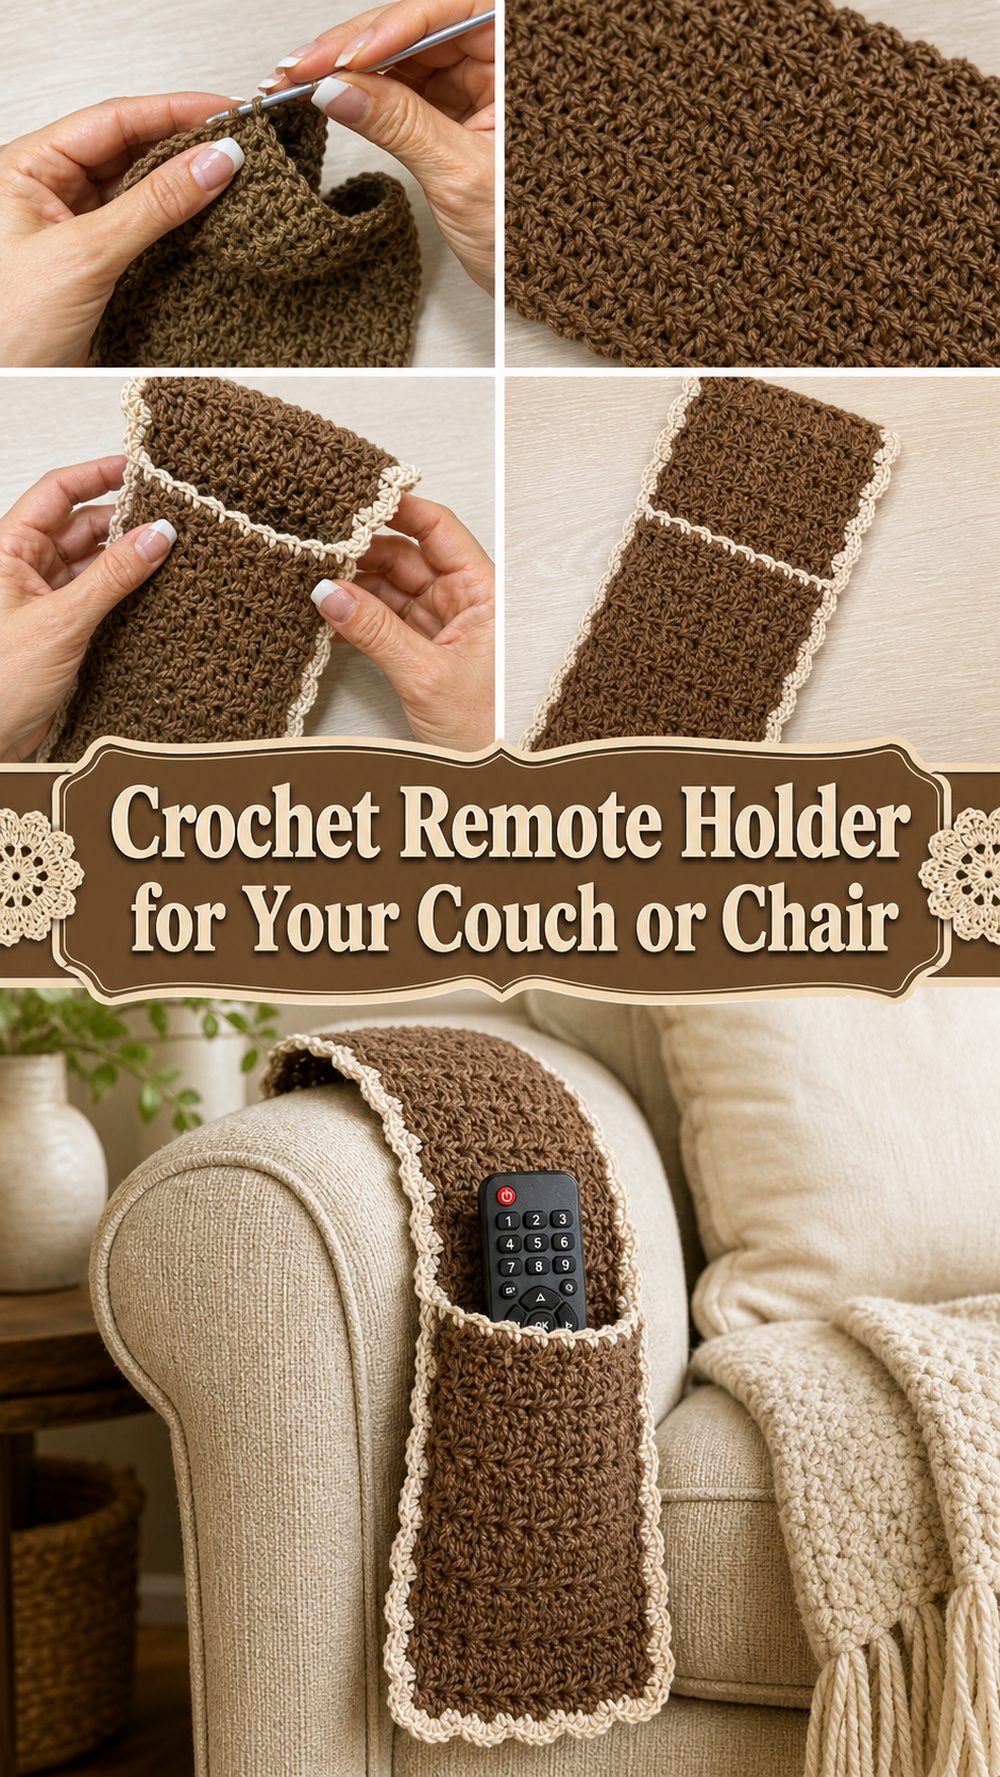
A crochet remote holder is one of those home projects that feels useful from the very beginning. Instead of letting remotes slide between cushions or disappear under blankets, you get a neat handmade spot to keep them close by. The tutorial I chose teaches a simple crochet couch caddy style holder that can be used for remotes and even a few other small items, which makes it especially practical for everyday use. It is the kind of project that adds comfort to a living room without feeling too fussy or overcomplicated. Because it is meant to hang over the side or arm of furniture, it is also easy to adjust while you work so it suits your own chair, sofa, or bedside setup. It has that satisfying mix of function and handmade charm that makes small crochet projects so enjoyable.
Why You’ll Love This Project
This project is useful, simple, and easy to enjoy. The selected tutorial presents it as a cool couch caddy that holds remotes and other small accessories, so it is not just decorative, it actually helps keep things tidy. It also appears to be taught step by step in an easy, fast style, which makes it a nice choice when you want something practical without starting a huge project.
Materials Needed
- Yarn
- Crochet hook
- Scissors
- Yarn needle
- Measuring tape
- Stitch markers if you like extra help keeping edges straight
- Your sofa arm, chair arm, or table edge nearby for fit checking
Use a yarn and hook size that matches your desired fit and texture.
Best Yarn for This Project
A yarn with a bit of structure works very well for a remote holder because you want the pockets and body to keep their shape. A medium yarn is often a comfortable choice for home projects like this because it gives enough body without becoming too stiff or bulky. Cotton or a cotton blend can be great if you want a firmer, cleaner finish that holds up well with daily use. Soft acrylic can also work if you want a warmer and slightly cozier feel. Since this is a practical organizer, a yarn that shows the texture clearly and does not stretch too much will usually give the nicest result.
Skill Level
Easy to confident beginner.
The selected tutorial describes the project as easy and step by step, which makes it approachable for crocheters who already know the basics and want to make something useful for the home. It also looks like a good project for practicing even edges, rectangular shaping, and simple assembly.
Size and Fit Guide
The easiest way to size a crochet remote holder is to think about two things: the width of the furniture arm or hanging section, and the size of the items you want the pockets to hold. Measure across the chair arm, sofa arm, or the place where the holder will sit. Then think about your remotes, phone, glasses, or other small items and make the pockets wide and deep enough to hold them comfortably.
As you work, lay the crochet piece over the furniture and check how it drapes. You want enough length so it stays in place and enough pocket depth so the remotes feel secure. If you want a larger organizer, simply keep going a little wider or longer before joining the final sections. If you prefer a slimmer holder for one remote only, make it more narrow and keep the pocket simple.
Stitches Used
The YouTube search result clearly confirms that this is a step-by-step crochet remote holder tutorial, but it does not reliably list every stitch used by name. For that reason, it is best not to assume exact stitch names, stitch counts, or row counts unless you can directly check them in the video yourself. Based on the format of the project, this is best treated as a straightforward crochet organizer made from simple shaped sections rather than a highly technical stitch-heavy pattern.
How to Make It
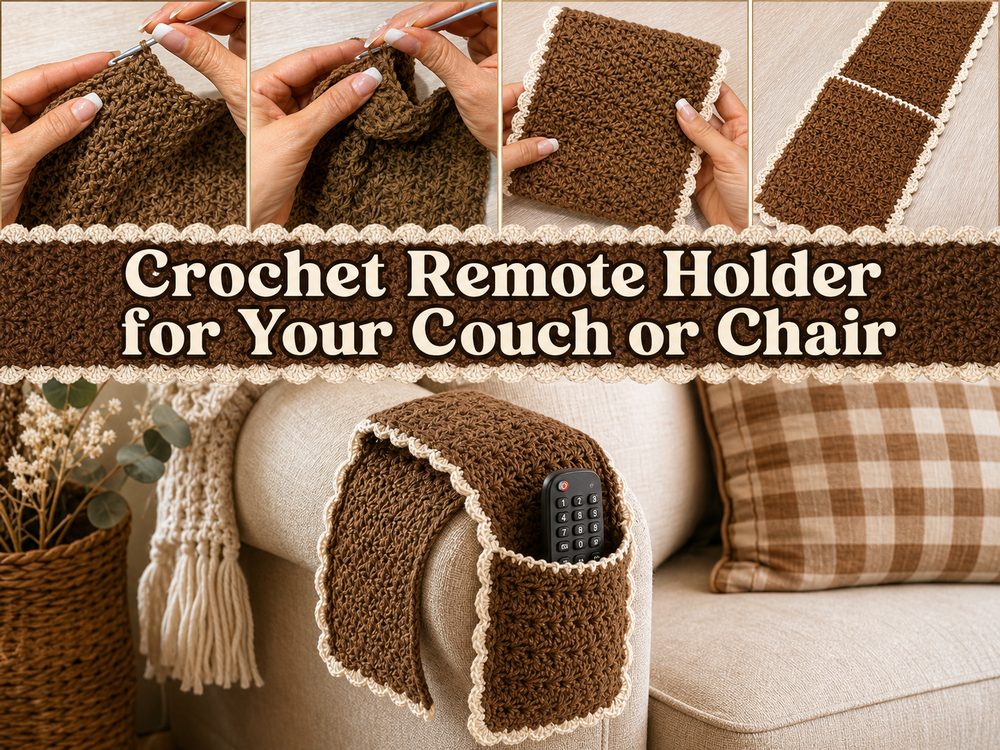
Step 1: Plan the Shape
Before you begin, decide how you want your remote holder to sit. This tutorial teaches a couch caddy style remote holder, so the finished piece is meant to rest over furniture and keep remotes or small accessories close at hand. That means the overall shape needs a section that lies across the furniture and one or more areas that become storage pockets.
This is a good time to think practically. Do you want to hold one remote, two remotes, or a mix of small items? A TV remote holder for daily use can stay fairly simple, but if you want to use it for a phone, glasses, or notepad too, it helps to give yourself a little more room.
Step 2: Crochet the Main Body
Start by making the main piece that will form the long body of the holder. This is the part that will drape over the sofa arm, chair arm, or other surface. Keep your stitches even and check the width from time to time. You want it wide enough to feel stable, but not so wide that it bunches awkwardly.
Because this is a practical home project, a tidy rectangle usually works best. Try to keep the edges straight and the tension consistent so the finished holder looks neat. If your crochet becomes too loose, the organizer may sag when you place items inside. If it becomes too tight, it may feel stiff and not drape nicely over the furniture.
Step 3: Make the Pocket Section
Once the main body is large enough, build the section that will hold the remotes. The selected tutorial describes the finished item as a couch caddy for remotes and other accessories, so the pocket area is really the heart of the project.
You can think of the pocket part as a front section attached to the main body. Keep checking the size against your remote control as you go. The pocket should be deep enough that the remote sits securely, but not so deep that it becomes hard to grab. For a larger holder, you can create a roomy pocket for mixed items. For a neater, more fitted version, size it more closely to the remote itself.
Step 4: Check the Fit and Function
Before you finish the project, test it where it will actually be used. Drape the main section over the sofa or chair arm and place a remote into the pocket area. This simple test will tell you a lot. If the holder slips too easily, make the body a little longer so the back section helps anchor it. If the pocket feels too loose, adjust before final assembly.
This is one of the most useful habits in home décor crochet. A project like this does not just need to look nice. It also needs to work well in real life. Taking a minute to test the shape now can save you from redoing finishing later.
Step 5: Sew the Pieces Together
One of the search results for this tutorial specifically mentions sewing the parts together for the final result and notes that the sewing is not complicated. That strongly suggests the project is assembled from sections rather than being completely seamless, so neat joining is an important part of the finish.
When you reach this stage, line up the edges carefully and join them in a way that keeps the pocket smooth and usable. Avoid pulling too tightly while sewing, because that can make the pocket pucker. A gentle, neat seam usually works best. Since this is a visible home project, clean assembly helps it look polished and intentional.
Step 6: Finish and Shape It
After the pieces are joined, weave in your ends carefully and lay the holder flat. Then place it over the furniture again and check the final look. The body should drape smoothly, and the pocket should feel useful without sagging too much.
If you want a slightly more structured finish, smooth the fabric with your hands and shape the edges a little. A simple organizer like this does not need lots of decoration to feel complete. The beauty is really in the practicality: a handmade crochet piece that keeps important little items in one easy place.
Helpful Tips
- Measure your furniture arm before you begin so the body sits nicely.
- Check your remote size while making the pocket.
- Keep your tension even so the holder does not sag.
- Choose a yarn with some structure for everyday use.
- Sew the pieces together neatly for a cleaner finish.
- Test it on your sofa or chair before weaving in all the ends.
Common Mistakes to Avoid
- Making the main body too short so it slips off the furniture
- Making the pocket too shallow for the remote to sit securely
- Crocheting too loosely so the organizer stretches too much
- Pulling seams too tight during assembly
- Forgetting to test the fit before finishing
- Choosing very slippery yarn if you want the holder to stay firmly in place
Customization Ideas
This kind of project is very easy to personalize. You can make a narrow version for one remote, or a wider one for several remotes and a phone. You could add extra pocket sections, create separate compartments, or make one side plain and the other side more textured. Neutral shades look lovely in a calm living room, while brighter colors can make it feel playful and easy to spot. It would also be cute in colors that match a favorite blanket or sofa cushion.
Style Ideas
A crochet remote holder works beautifully over the arm of a sofa, recliner, reading chair, or even beside the bed if you want to hold a remote, glasses, or a phone. It is especially useful in cozy spaces where little items tend to wander. You can pair it with a crocheted pillow, blanket, or basket to create a soft handmade corner that still feels practical.
Care Instructions
Gently hand wash or follow the care needs of your yarn. Lay flat to dry so the organizer keeps its shape. Try not to use high heat, especially if your yarn is acrylic or a delicate blend. If the pocket stretches a little after use, reshaping it while damp can help it look neat again.
Time Needed
This may take a few hours depending on your speed, yarn choice, size, and how many pockets or sections you decide to make. Since it is a smaller home project, it can be a satisfying afternoon or evening crochet piece.
Conclusion
A crochet remote holder is such a smart little project when you want something useful, tidy, and handmade. It helps keep everyday items close by, adds a cozy touch to your living space, and feels satisfying because it solves a real problem in such a simple way. The selected tutorial teaches it as an easy couch caddy style piece, which makes it a great option for beginners and for anyone who enjoys practical crochet. You can keep it simple or customize it to suit your home, and either way you end up with a project that is both charming and genuinely helpful.
FAQs
Is this beginner-friendly?
Yes. The selected tutorial presents it as an easy, step-by-step crochet project, so it should be approachable for confident beginners.
Can I use it for more than remotes?
Yes. The tutorial description says it can hold remotes or other items and accessories, so it should work for a few small everyday things too.
Do I need exact stitch counts?
Not necessarily. Since furniture and remotes vary, checking the fit as you go is the most practical approach.
Is it sewn together?
The available YouTube search snippet indicates there is some sewing together in the final step, and it is described as simple.
What yarn is best for this project?
A yarn with some structure and good stitch definition is usually a good choice so the holder stays neat and practical.