
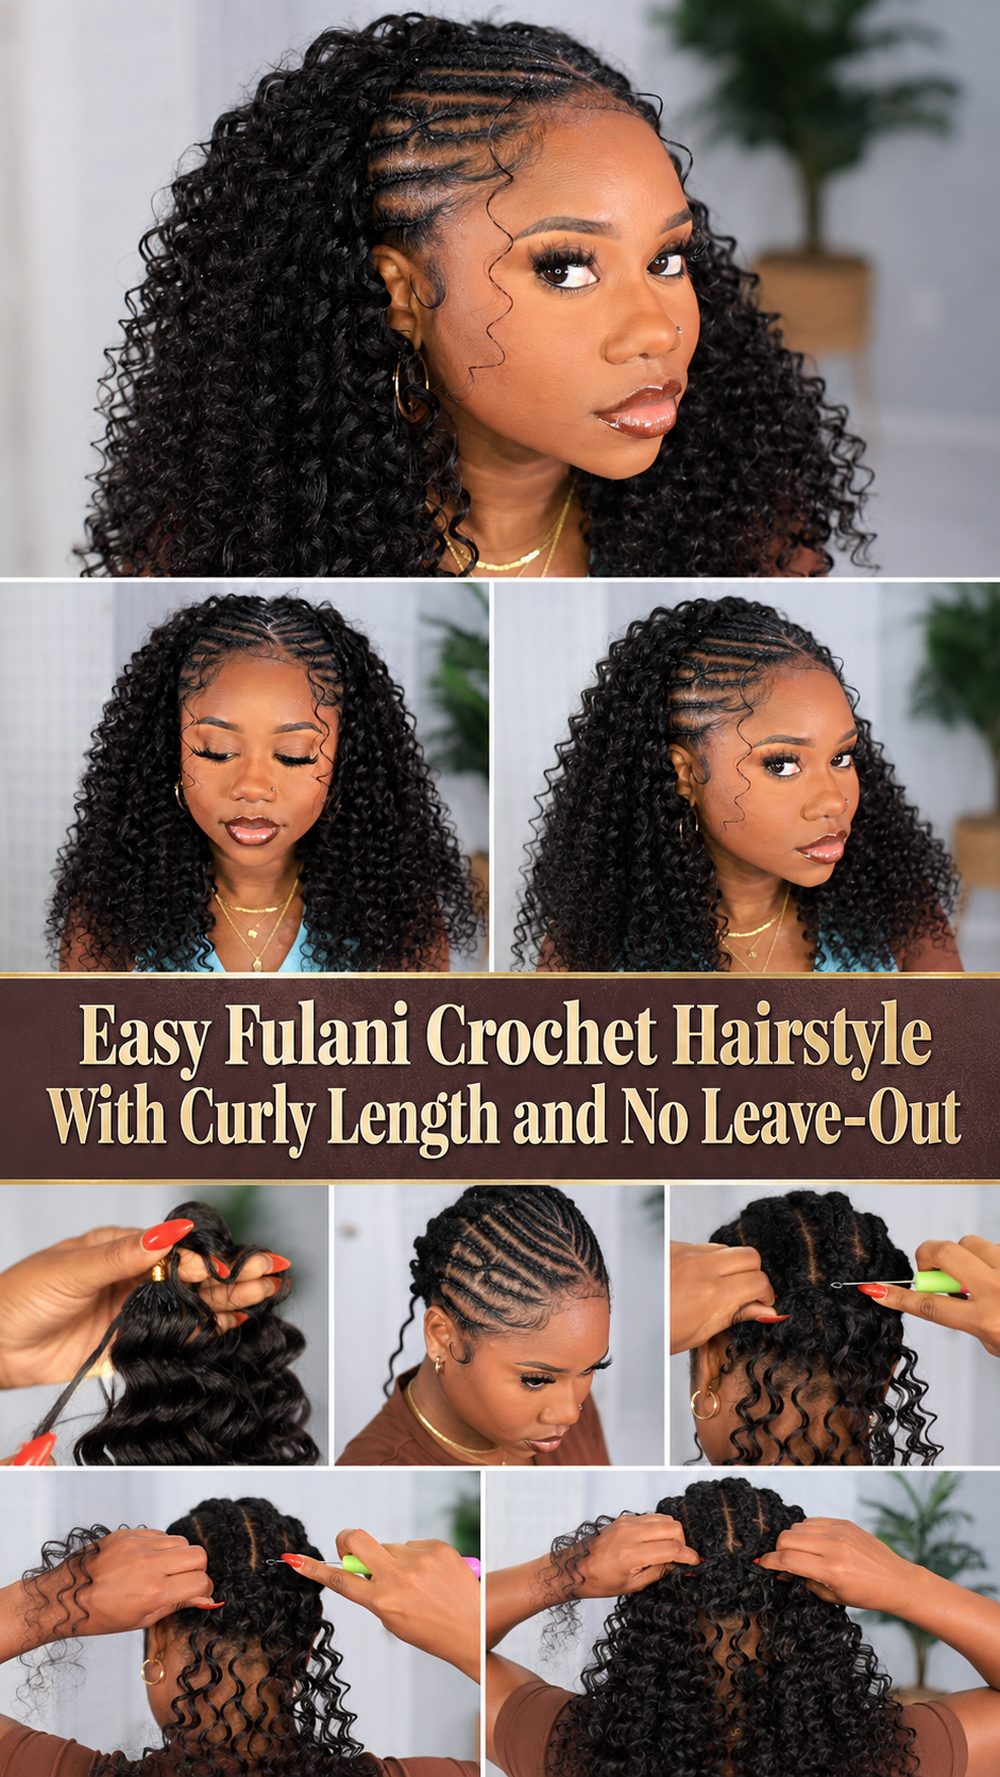
Fulani crochet hairstyles are such a pretty way to get that neat braided look in the front while keeping the rest of the style soft, full, and easy to wear. This type of hairstyle gives you the beauty of patterned braids around the top and face, then blends into crochet hair for extra length and texture without needing a full head of individual braids. It is a great choice if you want something protective, stylish, and a little lighter on time than a traditional full braided install. This look is especially nice for anyone who loves a polished front section with loose curls or textured length in the back. It feels dressy enough for going out, but still practical for everyday wear. The tutorial I selected shows a no-leave-out version, which makes it even more beginner-friendly for home styling.
Why You’ll Love This Project
This hairstyle gives you the best of both worlds: the clean shape and beauty of Fulani braids at the front, plus the fullness and convenience of crochet hair through the rest of the style. The no-leave-out finish makes it easier to blend, easier to maintain, and great for anyone who wants a protective look without doing a fully braided install. The selected tutorial specifically presents it as a no-leave-out protective style with crochet hair.
Materials Needed
- Crochet hair or curly braid hair
- Braiding hair or attachment for the Fulani braid sections
- Crochet needle
- Rat-tail comb
- Edge control or styling gel
- Hair clips
- Rubber bands if you like sectioning that way
- Scissors
- Mousse or light styling foam
- Optional beads or braid accessories
Best Hair for This Project
Hair with a soft curly or lightly textured finish works especially well for this style because it gives the back a full, natural look while still contrasting nicely with the neat braided front. If you want a more polished finish, use smoother crochet hair. If you want a softer boho feel, choose curls with a little movement and fluff. Since the selected tutorial highlights a no-leave-out crochet finish, hair that blends neatly without needing your natural hair left out is ideal.
Skill Level
Easy to intermediate.
The crochet part is beginner-friendly, but the front Fulani-style braid pattern takes a little patience, especially if you want clean parts and a balanced look on both sides. If you are comfortable sectioning hair and doing basic cornrows or feed-in style braids, this will feel much easier.
Size and Fit Guide
This hairstyle is very flexible. You can part the front based on the look you want, make the braided section wider or smaller, and control the fullness of the back by adding more or fewer crochet pieces. Keep checking the shape in the mirror as you work. If you like a lighter style, use fewer pieces in the back. If you want more drama, add extra crochet hair for volume and length.
Techniques Used
- Clean parting
- Sectioning
- Front Fulani-style braiding
- Crochet install
- Blending the braided section into curly length
- Edge smoothing
- Finishing and shaping
How to Make It
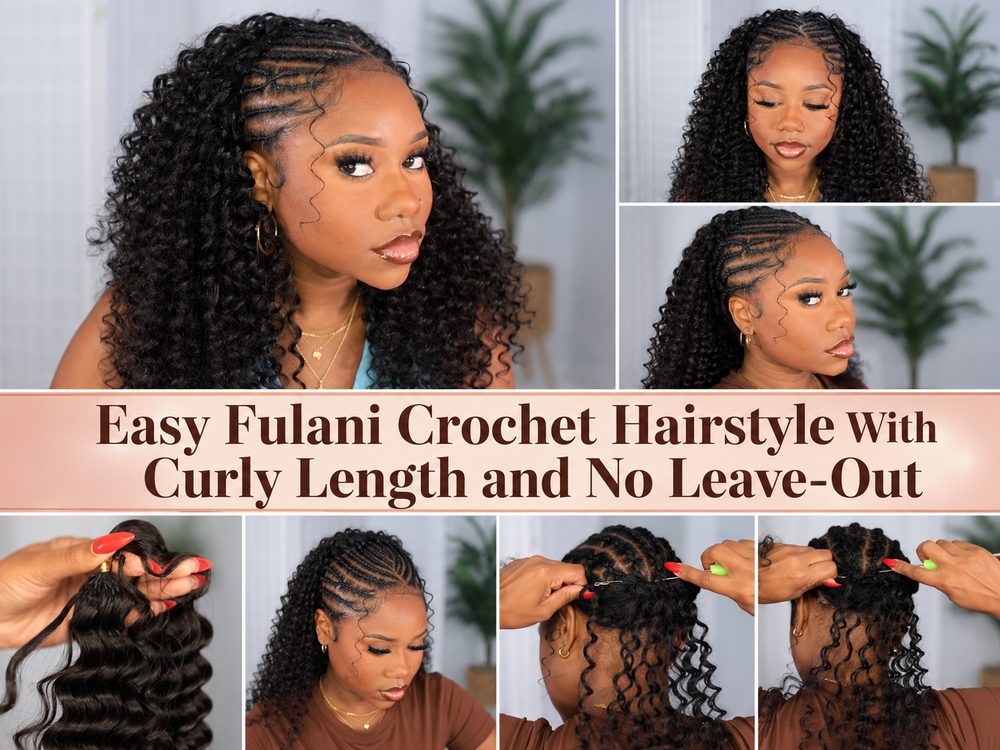
Step 1: Section the Hair
Start by deciding where you want the Fulani braid section to sit. Most versions of this style look best with a center part or a structured front pattern that frames the face. Section the front carefully, because this is the part that gives the style its signature look. The back can be prepared for crochet installation while the front stays reserved for the braid design.
Step 2: Create the Front Fulani Pattern
The front is what makes this hairstyle stand out. Work neat braids going back from the hairline, keeping the parting clean and balanced. You can add one center braid, side braids, or a face-framing combination depending on the look you prefer. The main goal is to keep the front sleek and decorative while leaving enough room in the back for the crochet hair to do the rest of the styling work.
Try not to braid too tightly. A firm but comfortable grip gives a neater result and makes the style easier to wear for days or weeks. If you plan to add beads or accessories, leave space for that in your design.
Step 3: Prepare the Back for Crochet Hair
Once the front braid area is done, the back can be kept simple. This is where the style becomes much more convenient than a full braided install. Instead of braiding every section individually, you create a base that lets you crochet in the hair. This helps save time and gives the hairstyle its fuller finish.
Because the selected tutorial focuses on a no-leave-out method, the idea is to place the crochet hair in a way that covers the base well and creates a natural-looking finish without needing your own hair exposed on top.
Step 4: Crochet the Hair Into Place
Using a crochet needle, pull the hair through the braided base in the back section. Space the pieces in a way that gives even coverage. Start modestly and build fullness gradually. This makes it easier to control the final shape and prevents the style from becoming too bulky too quickly.
If your crochet hair is curly, fluff it gently rather than pulling too hard. That helps keep the curl pattern pretty and gives the back of the style more softness. Place the pieces closer together near visible areas and a little farther apart where the hair naturally layers over itself.
Step 5: Blend the Braided Front With the Crochet Back
This step is what makes the style look intentional and polished. The front braids should flow naturally into the fuller crochet section. Arrange the curls so they fall around and behind the braided area without hiding the Fulani design too much. You want the braids to remain visible at the front while the crochet hair adds body and movement through the rest of the style.
If needed, trim lightly for shape. A little shaping around the ends or sides can help the hairstyle look softer and more balanced.
Step 6: Refine the Hairline and Finish
Smooth the edges, adjust the parting, and separate curls only as much as needed. A small amount of mousse can help calm flyaways and give the style a finished look. This is also the time to add beads, cuffs, or other braid decorations if you want a more traditional or dressed-up Fulani feel.
The finished hairstyle should have a neat, braided front with a full curly or textured crochet body behind it. It should feel protective, stylish, and easy to wear with no leave-out required. That no-leave-out finish is one of the main reasons this tutorial stands out.
Helpful Tips
- Take your time with the front parting because that is the focal point.
- Do not overfill the back at first; you can always add more crochet hair.
- Keep the front braids neat and even for the prettiest result.
- Use mousse lightly to keep the style smooth without making curls stiff.
- Separate curls gently if you want more volume.
- Check the front and side view in the mirror before finishing.
Common Mistakes to Avoid
- Making the front braids too tight
- Crocheting too much hair into one area
- Covering the braid design with too much volume in front
- Using hair that is too heavy for the base
- Skipping shape checks as you go
- Pulling curls apart too roughly and creating frizz
Customization Ideas
You can make this look softer with loose curls, dressier with beads, or more natural with a less shiny hair texture. A longer version feels more glamorous, while a shoulder-length version is lighter and easier for everyday wear. You can also change the front braid pattern to make the hairstyle feel more classic, more trendy, or more personal.
Style Ideas
This hairstyle looks beautiful with hoop earrings, a sleek makeup look, casual outfits, or dressy evening wear. It works well for vacations, busy weeks, special occasions, and protective styling seasons when you want something pretty without daily hair stress. It is also a lovely choice when you want a braided look that still feels soft and full.
Care Instructions
Wrap the hair at night with a scarf or bonnet, especially around the braided front. Refresh the curls gently with mousse or light product when needed. Avoid heavy oils that can make the crochet hair look weighed down. If the curls start tangling, separate them slowly with your fingers instead of using a fine comb.
Time Needed
This may take a few hours depending on your braiding speed, sectioning, and how full you want the crochet install to be.
Conclusion
A Fulani crochet hairstyle is such a smart way to get a detailed braided look without committing to a full head of individual braids. The braided front keeps the style sharp and eye-catching, while the crochet hair in the back adds softness, fullness, and easier styling. If you want something protective, pretty, and easier to manage, this is a lovely hairstyle to try.
FAQs
Is this style beginner-friendly?
The crochet part is fairly beginner-friendly, but the front braid design may take a little practice.
Do I need leave-out for this hairstyle?
No. The tutorial I selected is specifically a no-leave-out style.
Can I use curly hair for the back?
Yes. Curly crochet hair works especially well for this look and gives it softness and movement.
Can I make it fuller?
Yes. Just add more crochet pieces gradually until you like the volume.
How long can I wear it?
That depends on how neatly it is installed and how well you maintain it, especially at night and around the front braids.