
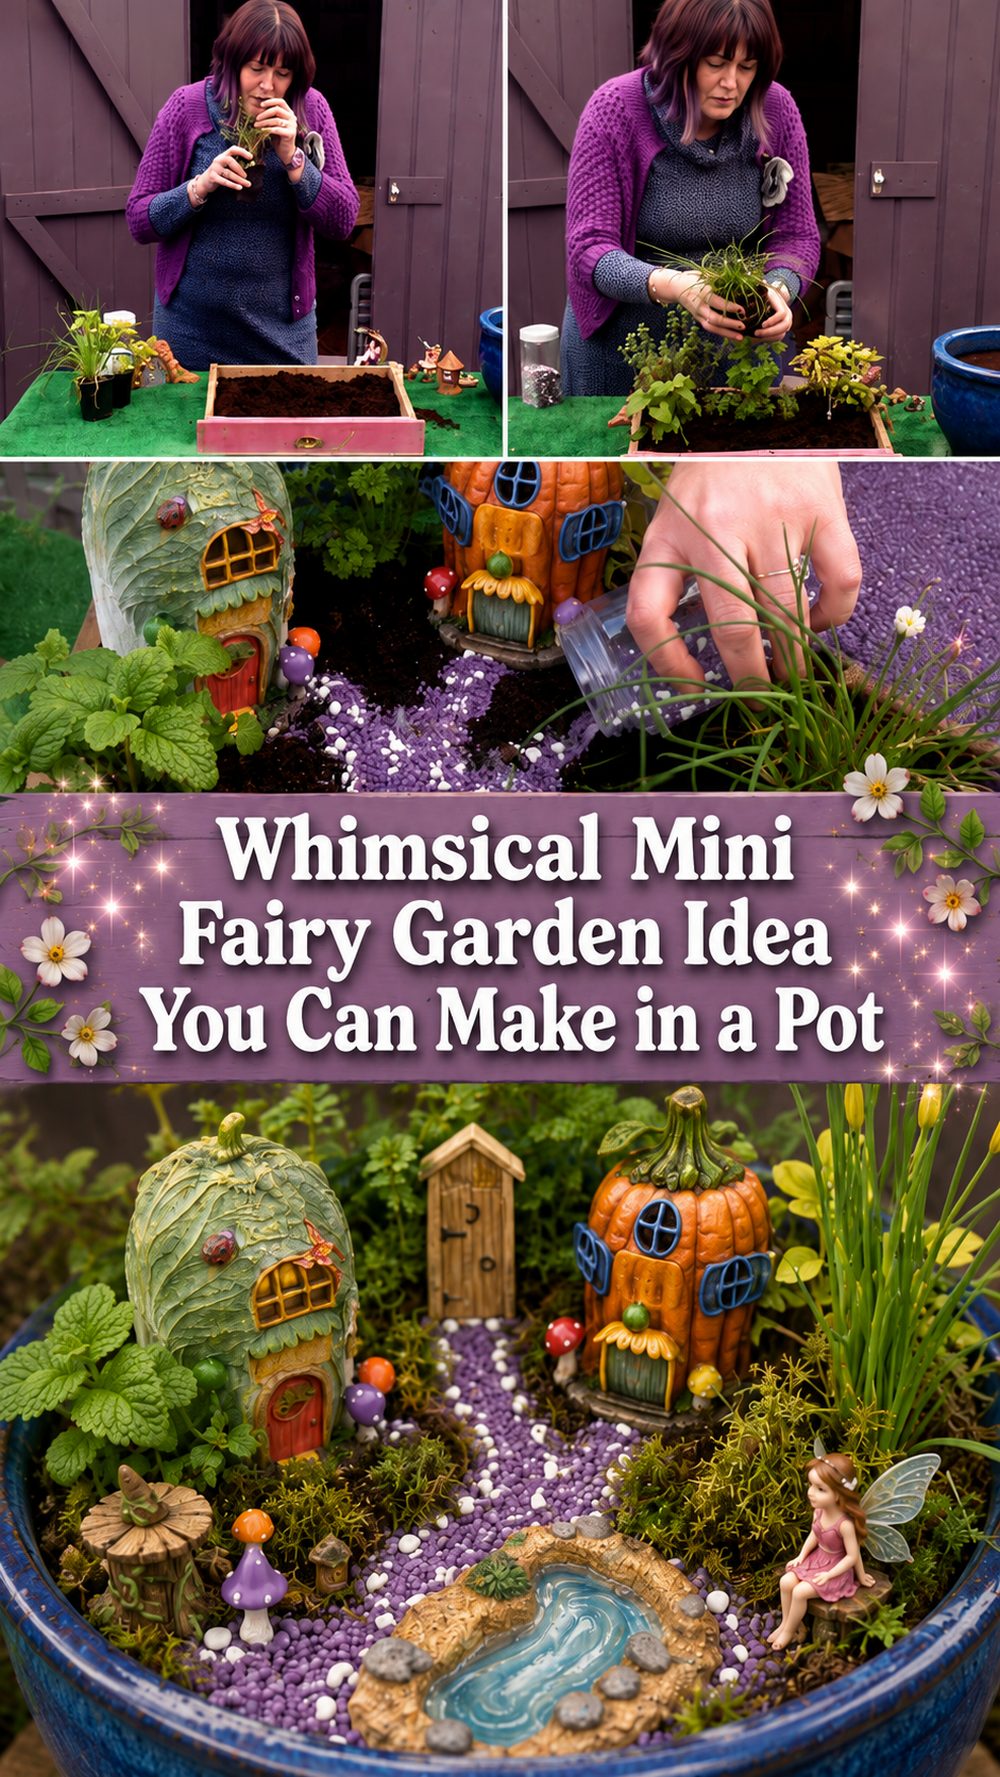
A mini fairy garden is one of those lovely little projects that instantly makes a space feel more magical. It combines gardening, decorating, and a bit of imagination, all in one small display that can sit on a patio, windowsill, porch, or garden table. This tutorial-style project uses herbs, fairy houses, and miniature accessories to create a tiny world that feels charming and alive. It is a great idea for anyone who enjoys simple garden crafts, wants to dress up a small outdoor space, or loves adding playful details to planters. Because the design is small and flexible, it also works well for beginners who want a creative project without needing a huge garden bed. You can keep it sweet and natural or make it more decorative depending on your style.
Why You’ll Love This Project:
This fairy garden is small enough for compact spaces but detailed enough to feel special. It mixes real plants with miniature decor, so the finished piece feels both decorative and alive. Since the layout is flexible, you can easily make it rustic, colorful, soft, natural, playful, or cottage-inspired.
Materials Needed:
- A planter, shallow pot, or container
- Potting soil
- Small herb plants
- Mini fairy house
- Fairy garden accessories
- Pebbles, moss, or similar decorative fillers
- Optional small decorative pieces for paths or borders
Use similar materials that match the look, size, and style you want.
Tools Needed:
- Small hand trowel or scoop
- Gardening gloves if desired
- Basic household or craft tools are enough
Best Materials for This Project:
For a fairy garden like this, sturdy outdoor-safe containers work best, especially if you plan to keep it outside. Herbs are a smart choice because they stay useful while also adding texture and a fresh, natural look. Choose compact plants that will not quickly overwhelm the miniature scene. For decorative pieces, lightweight fairy houses and accessories are easy to arrange, but it helps if they are made from materials that can handle a bit of weather. Natural extras like moss, bark, pebbles, and small stones also help the whole garden feel more blended and realistic.
Skill Level:
Beginner-friendly. The project is mostly about arranging, planting, and styling rather than using difficult techniques.
Size and Placement Guide:
You can make this design in a small tabletop planter or scale it up into a larger tub or bowl. For a kitchen-adjacent patio, herbs are especially nice because they are both pretty and practical. Keep the overall layout balanced so the fairy house and accessories do not get lost among the plants. If your style is soft and natural, use earthy colors and mossy textures. If you want something brighter, add more colorful miniature details. Place it where it gets the right light for your chosen herbs and where the little details can still be seen and enjoyed.
How to Make It:
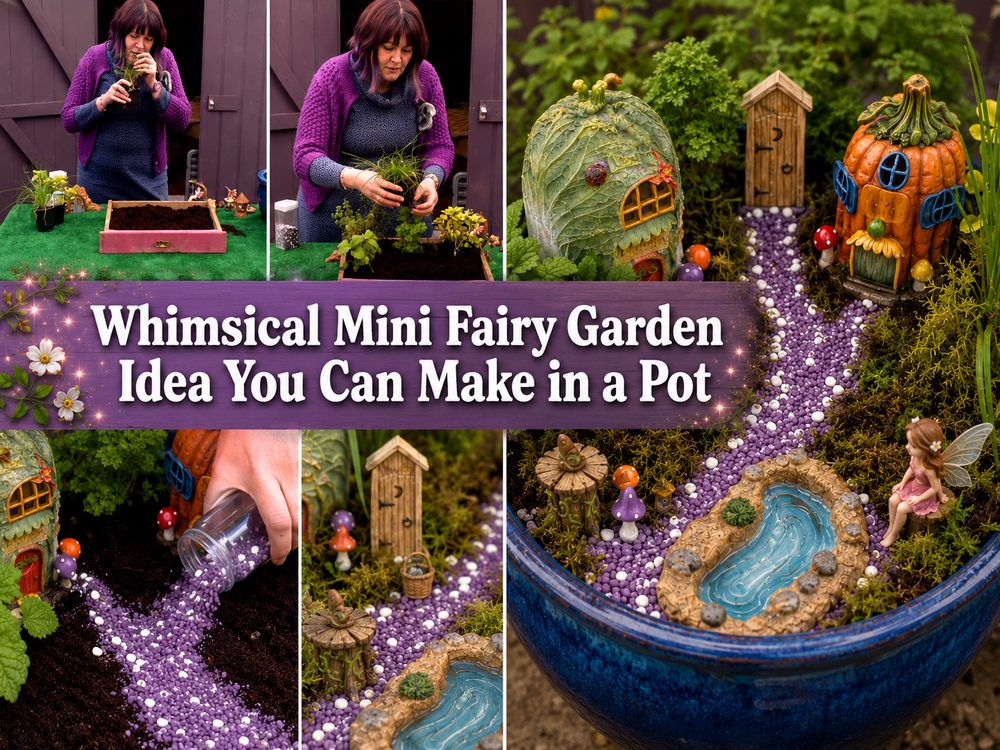
Step 1: Prepare the Base
Start by choosing a container that gives you enough room for both planting and decorating. Fill it with potting mix, leaving enough space near the top so you can add plants and small accessories without crowding the rim. Smooth the surface lightly so you have a clean base to work from.
Step 2: Arrange the Main Pieces
Before planting everything permanently, place the fairy house and a few larger accessories into the container to get a feel for the layout. This helps you decide where the main focal point should go. Try to leave open space around the decorative pieces so the garden does not feel too packed.
Step 3: Build the Shape
Add the herb plants around the fairy house and main features. Group them in a way that feels natural, almost like a tiny landscape. You can place taller plants toward the back or one side and keep lower growth near the front so the miniature details stay visible. Adjust the spacing as needed until the garden looks balanced.
Step 4: Attach or Layer the Details
Once the plants are in place, tuck in small accessories, stones, moss, or similar fillers. These little additions help define walkways, edges, and tiny garden areas. If you want a path effect, use pebbles or small stones in a curved line leading toward the fairy house. Layering textures is what gives a fairy garden its finished look.
Step 5: Add Color or Texture
Now refine the surface. Cover any bare soil that looks too exposed, and add natural-looking texture where needed. Herbs already bring lovely color and softness, so it helps to keep the extra details gentle and not overly busy. A simple combination of greenery, miniature accents, and earthy materials usually looks best.
Step 6: Decorate
Add the final fairy garden accessories where they feel most natural. Keep the arrangement playful but neat. A few carefully placed pieces often look more charming than filling every corner. Step back often and check the overall design from a distance.
Step 7: Finish and Style
Give the container a final tidy-up, brush away loose soil from the rim, and make any small adjustments to the placement. Once it looks balanced, set it in its chosen spot and enjoy the finished miniature garden. Because it uses living plants, the display may continue to change and settle in over time, which adds to its charm.
Helpful Tips:
- Test the layout before planting everything fully.
- Keep the fairy house visible by avoiding overly tall plants in front.
- Use small stones or moss to make the design feel finished.
- Choose herbs and plants that suit the light in your space.
- Let the decorative side stay simple so the garden still feels natural.
- Check the planter regularly and trim plants if they start to overtake the miniature scene.
Common Mistakes to Avoid:
- Using a container that is too small for both plants and decor
- Packing in too many accessories
- Choosing plants that grow too large too quickly
- Hiding the focal point behind taller greenery
- Leaving the soil surface messy and unfinished
- Ignoring sunlight and watering needs for the herbs
Customization Ideas:
You can give this project a cottage-style look with moss and soft greenery, or make it brighter with colorful miniature accents. Try different container shapes, swap herbs for other small plants that suit your climate, or add tiny pathways, fences, benches, or seasonal touches. Recycled containers can also give the whole project more personality.
Style Ideas:
Display the finished fairy garden on a patio table, porch step, windowsill, balcony, or near your main garden as a whimsical accent. It also makes a sweet handmade gift for anyone who likes miniatures, herbs, or garden decor. For a more polished look, pair it with neutral pots and natural textures nearby.
Care Instructions:
Water according to the needs of your herbs, being careful not to wash away small decorative details. Trim growth when needed so the miniature pieces stay visible. Wipe or gently clean accessories if they collect dirt, and use outdoor-safe items if the planter will stay outside full-time.
Time Needed:
This project may take a short afternoon or a few hours depending on your materials, planter size, planting choices, and how detailed you want the styling to be.
Budget Guide:
This can be done on a modest budget, especially if you already have a planter, spare soil, small herbs, or leftover decorative pieces. It is easy to make it feel charming without using expensive materials.
Conclusion:
This fairy garden idea is a lovely way to turn a simple planter into something magical and personal. With a few small plants, a miniature house, and some creative styling, you can build a tiny scene that feels fresh, playful, and full of charm. It is easy to adapt to your own space, taste, and budget, which makes it a fun project to try in your own style.
FAQs:
1. Is this beginner-friendly?
Yes, it is a very approachable project for beginners because it focuses on simple planting and arranging.
2. What materials are best for a fairy garden like this?
A sturdy container, quality potting mix, compact herbs, and weather-friendly miniature decor work especially well.
3. Can I make it bigger or smaller?
Yes, you can scale it to fit anything from a small planter to a larger decorative container.
4. Can I use recycled materials?
Yes, repurposed pots, bowls, tubs, and natural found materials can work beautifully.
5. Can I keep it outdoors?
Yes, as long as the plants suit your climate and the accessories can handle outdoor conditions.