
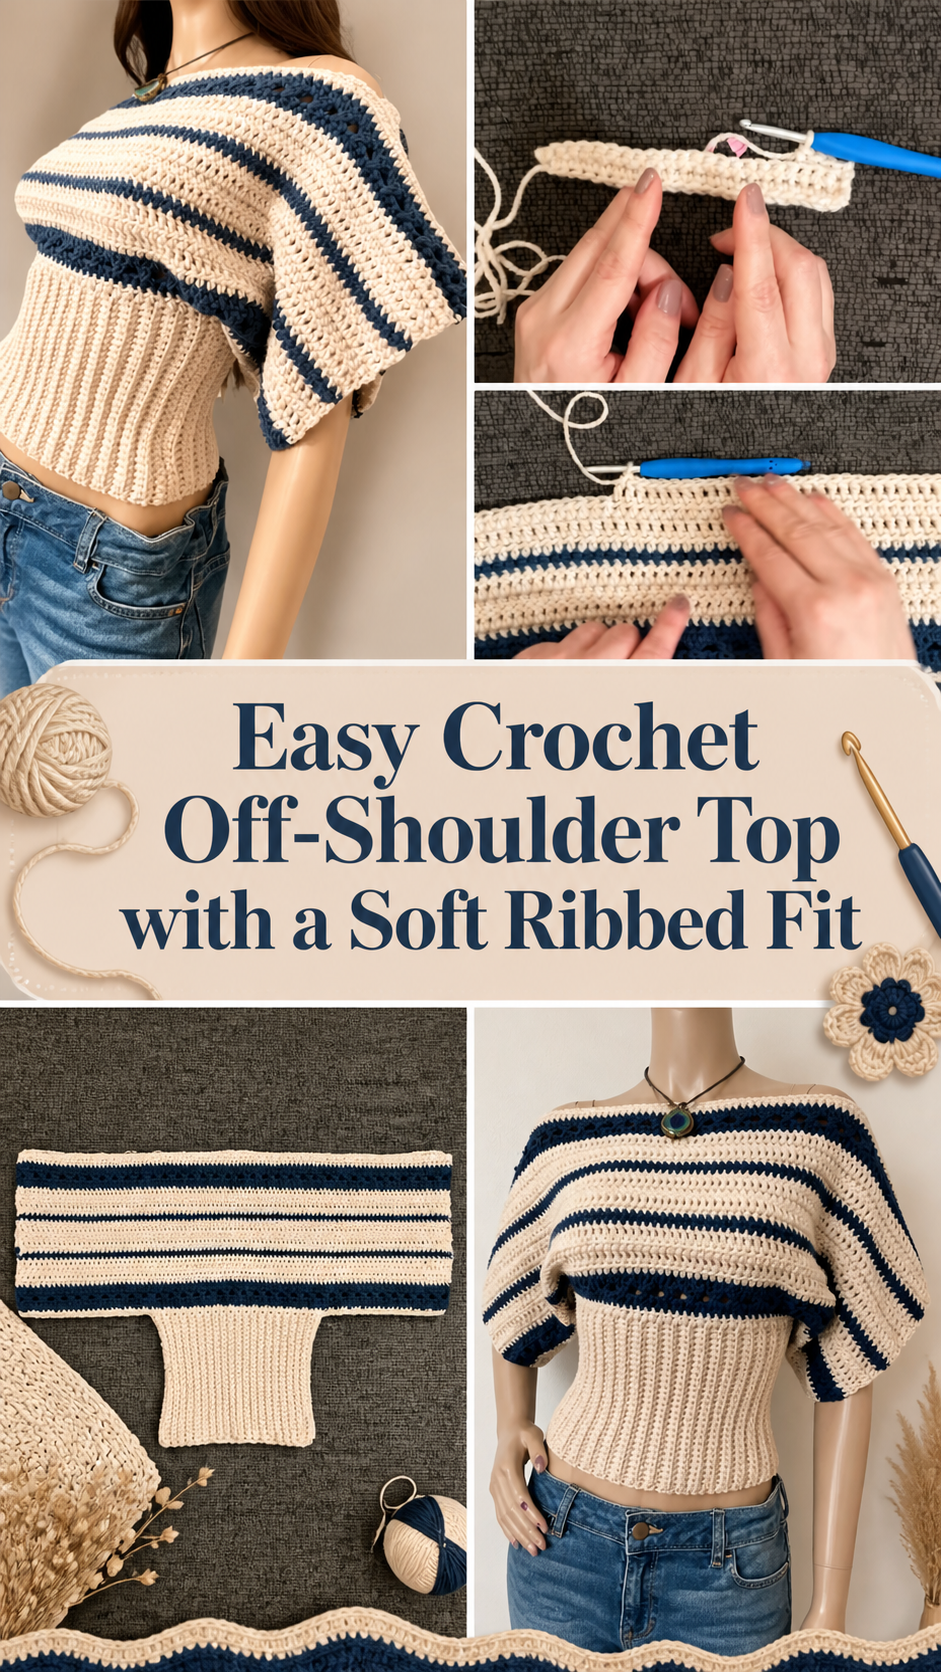
A crochet off-shoulder top has such a fun, relaxed feel to it. It is one of those pieces that can look dressed up or casual depending on how you wear it, and it has that stylish handmade touch that always feels special. The tutorial I picked teaches an easy off-shoulder top with a ribbed waist, so it gives you both a flattering shape and a comfortable fit. That combination makes it a lovely project for anyone who wants a wearable crochet piece that feels modern without being overly complicated. It is especially nice for warm weather, vacations, layering over simple basics, or just making something pretty for yourself. The overall design feels feminine and easy to wear, and because it is handmade, you can adjust it to suit your own body, your own yarn choice, and the exact look you want.
Why You’ll Love This Project:
This top is a satisfying mix of simple crochet and stylish shaping. The off-shoulder neckline gives it a fashionable look, while the ribbed waist helps it sit nicely on the body. It feels like a project that gives you a polished result without needing a complicated written pattern.
Materials Needed:
- Yarn
- Crochet hook
- Scissors
- Yarn needle
- Stitch markers
- Measuring tape
Use a yarn and hook size that matches your desired fit and texture.
Best Yarn for This Project:
For an off-shoulder top like this, a yarn with good drape usually gives the nicest result. If you want a lighter summer version, cotton or a soft bamboo blend works beautifully because it helps the fabric stay breathable and comfortable. If you want a slightly cozier feel, a soft acrylic can also work well, especially if you want the ribbed section to feel stretchy and easy to wear. Try to avoid anything too stiff or too bulky, since that can make the neckline sit less smoothly across the shoulders.
Skill Level:
This project feels best for confident beginners or easy intermediate crocheters. The stitches themselves are not described as complicated in the tutorial preview, but the fit and shaping matter, especially around the neckline and ribbed waist. It is a good project for someone who knows the basic stitches and wants to try a wearable piece with a little more style.
Size and Fit Guide:
This kind of top is easiest to make when you measure as you go. Check your bust measurement and compare the crochet fabric against your body or against a favorite fitted top. The ribbed waist should feel comfortable but not too tight, and the upper part should sit wide enough to create that off-shoulder look. You can add or reduce rows depending on how cropped or how long you want the top to be. If the neckline feels too loose, you can keep the shoulder area slightly firmer. If you want more drape, work with a softer tension and a yarn that flows nicely.
Stitches Used:
From the tutorial preview, this is presented as an easy off-shoulder top with a ribbed waist, so the project clearly involves basic crochet stitches, ribbing, and joining/finishing techniques. The exact stitch counts and full stitch list are not clear enough from the available YouTube preview text, so it is best to treat this as a made-to-fit project worked with simple repeated stitches rather than fixed numbers.
How to Make It:
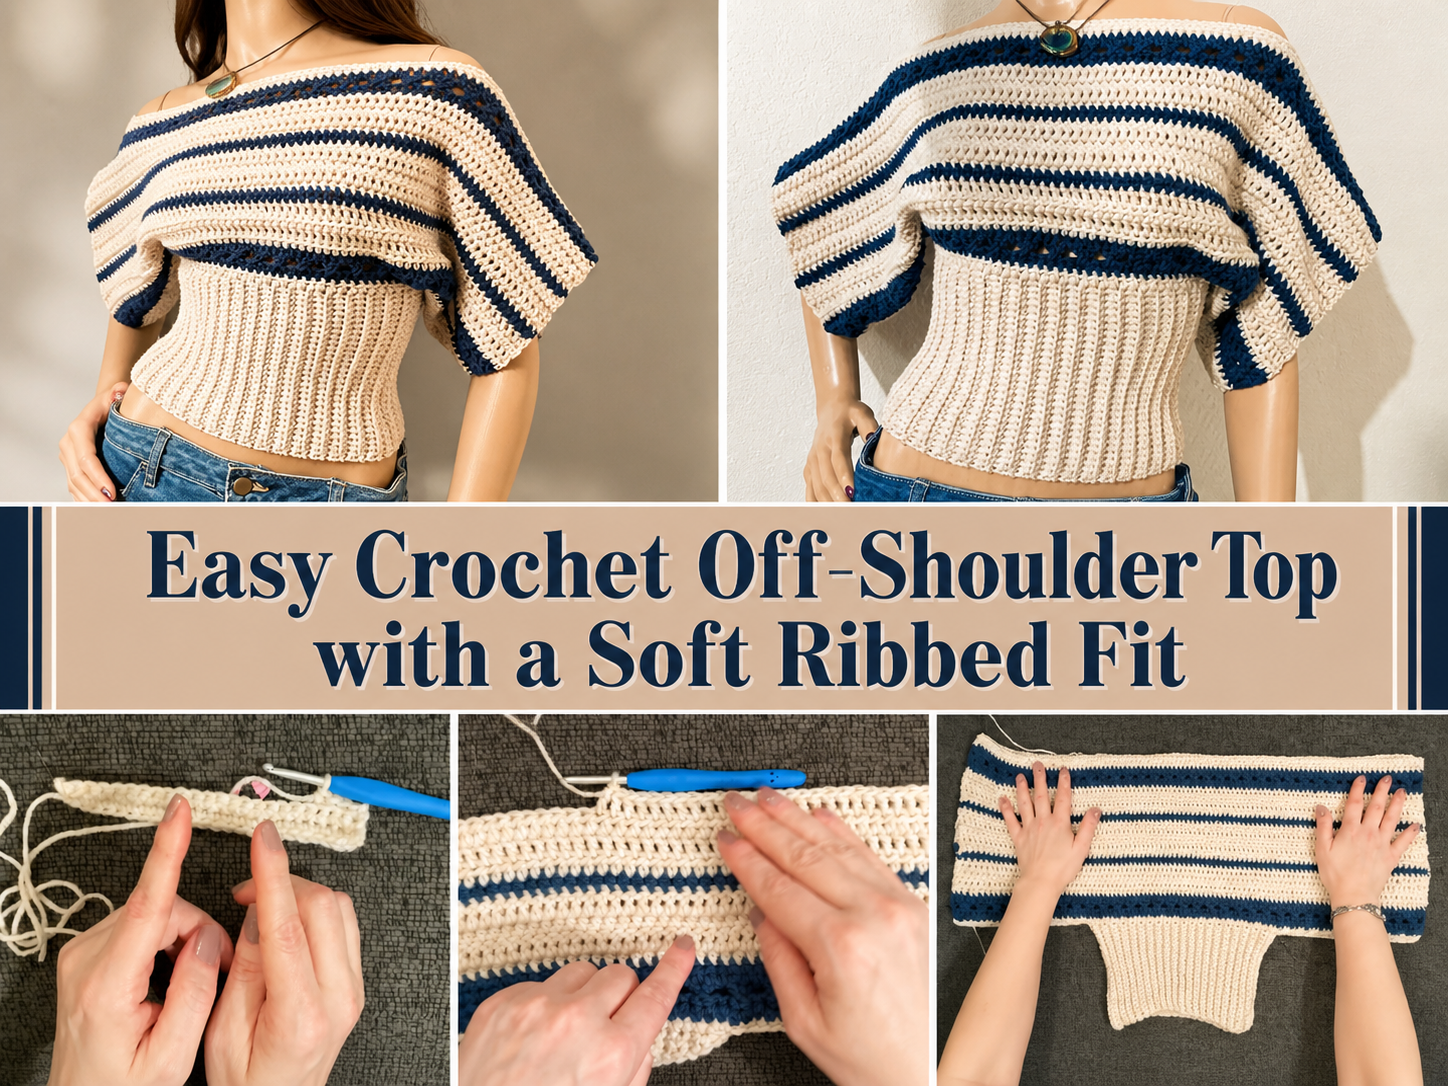
Step 1: Start with the Waist Section
This style is especially flattering because of the ribbed waist, so that part becomes an important base for the whole top. Begin by crocheting the ribbed section to fit comfortably around the waist or the area where you want the top to sit. Ribbing is helpful here because it gives structure and helps the garment hug the body a bit more gently. As you work, wrap it around yourself from time to time to check the fit. You want it to feel secure but still comfortable enough to wear for hours.
A ribbed section also gives the top a nice contrast in texture. Even if the upper part is simpler or more open, the waistband helps the whole piece look finished and shaped.
Step 2: Build Up from the Ribbed Base
Once the waist section is ready, start working upward to create the body of the top. This is where the piece begins to take on that soft off-shoulder look. Work steadily and keep your edges neat, since wearable pieces always look better when the sides stay even. Depending on the exact method shown in the tutorial, the body is worked so it can sit above the ribbed waist while still allowing that wider neckline to form. Because the project is meant to be easy, the shaping is more about measuring and checking the fit than following complicated stitch math.
As the fabric grows, hold it against yourself. Check whether it gives enough width across the upper chest and shoulder line. An off-shoulder top needs that little bit of openness so it can sit lower than a standard neckline without feeling stiff or tight.
Step 3: Shape the Off-Shoulder Upper Edge
This is the part that gives the top its signature style. The neckline needs enough width to sit gracefully across the shoulders. You do not want it pulling upward like a regular top, and you also do not want it slipping too low. The best way to manage this is to keep checking the width while you crochet. Use stitch markers if needed to help keep both sides balanced.
If the tutorial has you work a simple straight upper edge, then the off-shoulder shape comes mostly from the width and the way the piece is worn. If there is a little shaping or strategic joining, follow that overall structure while still relying on fit checks instead of exact invented numbers. This kind of garment often works best when you trust the measurement and drape of the fabric.
Step 4: Adjust the Length and Overall Fit
One of the nicest things about a crochet top like this is how easy it is to personalize. You can stop early for a cropped version, or continue longer for more coverage. The waist ribbing already helps create shape, so even a slightly longer body can still look flattering. If you prefer a relaxed fit, leave a little more room through the upper body. If you want it closer to the body, keep checking the width and make your adjustments early before finishing the last rows.
If you are making this for warm weather, lighter yarn and a slightly airy tension can make a big difference. The finished top will feel more breathable and sit more softly across the shoulders.
Step 5: Join and Refine the Shape
Once the main body is done, bring the sections together as shown in the tutorial and join neatly. This is where stitch markers are very helpful. Mark the places where you want side seams, the shoulder line, or any openings before you start joining. That makes it much easier to keep both sides even.
Take your time here. A neat join makes a huge difference in how a handmade top looks when worn. After the joining is done, try the top on again and see how the neckline sits. Since it is an off-shoulder style, the balance matters. You want it to feel secure but still relaxed and soft.
Step 6: Finish the Edges
The finishing touches help everything look cleaner. You may add a simple edging around the top edge, the lower edge, or any openings that need a tidier finish. Keep the finishing light, especially around the neckline, so it does not become bulky. The best off-shoulder tops usually look effortless, and that means the finishing should support the shape without making it too stiff.
Weave in all loose ends carefully, then lay the top flat and smooth it into shape. A light block can help even out the stitches and make the ribbing and body sit more neatly together.
Helpful Tips:
- Check the waist fit before building the upper body.
- Use stitch markers to keep both sides even.
- Try the top on as you go if possible.
- Choose a yarn with soft drape for a more comfortable neckline.
- Keep your ribbing tension steady so the waist sits neatly.
- Light blocking can help the top look more polished.
Common Mistakes to Avoid:
- Making the ribbed waist too tight
- Forgetting to check the neckline width as you work
- Using very stiff yarn that does not drape well
- Making one side longer than the other
- Joining too quickly without marking placement first
- Pulling the finishing edge too tightly
Customization Ideas:
You can make this top feel very personal with just a few simple changes. Try a cropped version for summer, or make it a bit longer for a more relaxed blouse feel. You can use soft neutral yarn for an elegant everyday piece, or pick a bright color for something more playful. A subtle edging around the neckline can make it look more delicate, while a cleaner plain finish gives it a modern style. You could also make the waist more fitted or slightly looser depending on how you want the silhouette to sit.
Style Ideas:
An off-shoulder crochet top looks lovely with high-waisted jeans, skirts, shorts, or relaxed linen trousers. It also works nicely layered over a simple camisole or bralette if you want a little extra coverage. For vacations or summer outings, it can be one of those easy handmade pieces that still feels special.
Care Instructions:
Hand wash gently when possible, especially if you used a lightweight yarn. Avoid twisting or pulling the fabric too hard. Press out the water with a towel and lay the top flat to dry. Keep it away from high heat so the shape and stitch definition stay nice.
Time Needed:
This may take a few hours depending on your speed, yarn, size, and stitch pattern.
Conclusion:
If you are in the mood to make something wearable, stylish, and still approachable, a crochet off-shoulder top is such a fun project to try. The ribbed waist gives it shape, the neckline gives it personality, and the handmade finish makes it feel extra special. It is easy to adapt to your own size and style, so you can make it as fitted, soft, cropped, or relaxed as you like. That kind of flexibility makes it the sort of project you will enjoy both while making it and while wearing it.
FAQs:
Is this beginner-friendly?
Yes, it looks suitable for confident beginners who are comfortable with basic stitches and measuring for fit.
What yarn is best for this top?
Soft cotton, bamboo blends, or a drapey acrylic are all good choices depending on the look you want.
Can I adjust the size?
Yes. This type of top is easiest to adjust by measuring your body and checking the fit while you work.
How do I make the neckline comfortable?
Use a soft yarn, avoid making the upper edge too tight, and check the fit before finishing.
Can I make it longer or less cropped?
Yes. You can simply keep working until you reach the length you prefer.