

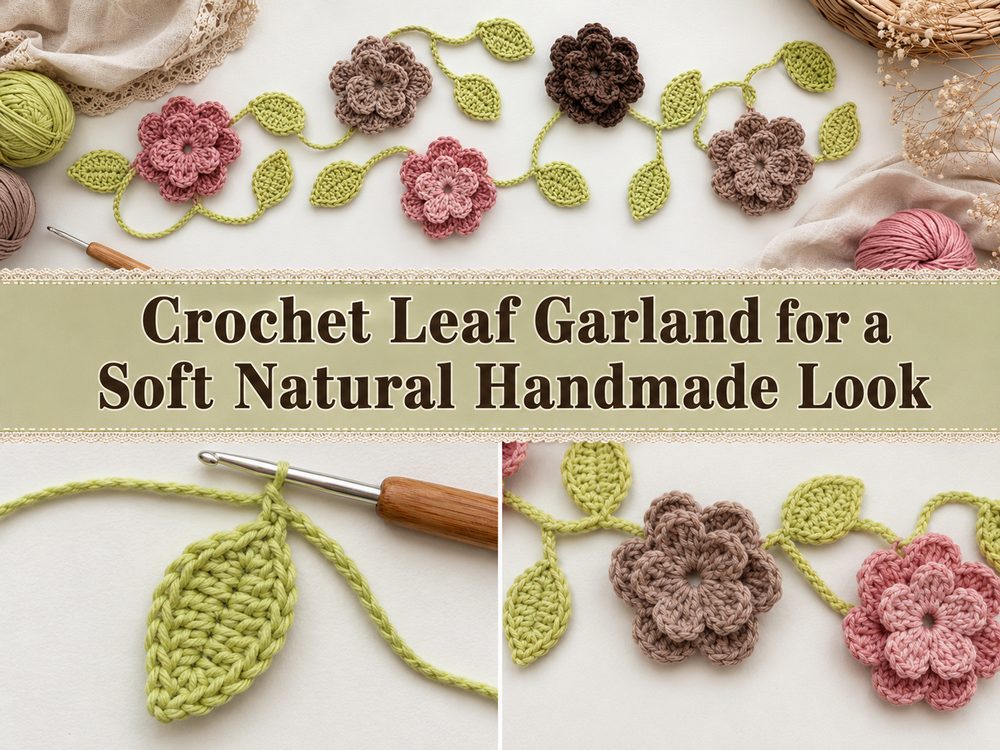
A crochet leaf garland is one of those simple little projects that can make a room feel instantly warmer and more inviting. It has that lovely handmade look, but it still feels light and easy to use in everyday decor. The YouTube tutorial I selected teaches a simple leaf garland worked as one continuous piece, so you do not have to crochet a pile of separate leaves and sew them on later. That alone makes the project feel much more relaxing and beginner-friendly. The video also presents it as a no-sew design and mentions that it can be wrapped around a wreath, which gives you a nice idea of how flexible the finished garland can be. It works beautifully for seasonal decorating, shelves, windows, mantels, wall hooks, and cozy corners that need a little softness.
Why You’ll Love This Project
This project is especially satisfying because it gives you a finished leafy strand as you crochet, instead of making lots of separate pieces first. That makes it feel smooth, practical, and a little less fussy. The selected tutorial clearly describes it as a simple leaf garland with no sewing involved, which is a big part of its appeal.
Materials Needed
- Yarn in leafy green or any color you like
- Crochet hook
- Scissors
- Yarn needle for weaving in the ends
- Stitch markers if you like using them for repeats
- Measuring tape if you want to plan the finished length
If the exact yarn weight or hook size is unclear, use a yarn and hook size that matches your desired fit and texture.
Best Yarn for This Project:
A smooth yarn works especially well for a leaf garland because it helps the leaf shape show clearly. Cotton or a cotton blend can give you a neat, tidy vine with nice stitch definition. Soft acrylic also works well if you want something lightweight and easy to drape. If you want a more natural botanical feel, muted greens, sage, olive, dusty eucalyptus, or earthy tones all look beautiful.
Skill Level:
Beginner-friendly to easy. Since the selected tutorial presents the project as a simple crochet leaf garland worked in one piece, it is a nice choice for crocheters who want a decorative project without lots of separate assembly.
Size and Fit Guide:
This project is very easy to adjust. Since the garland is worked as a continuous strand, you can simply keep going until it reaches the length you want. A shorter length looks lovely around a small wreath, mirror, or shelf, while a longer strand can be draped across a mantel, window, wall, or table setup. The selected video specifically notes that the garland can be wrapped around a wreath, which shows how flexible the finished piece can be.
Stitches Used:
- Slip knot
- Chain
- Slip stitch
- Basic shaping stitches used to form leaves along the strand
The tutorial description makes it clear that the chain and leaves are crocheted together in one continuous design rather than made separately and sewn on.
How to Make It
Step 1: Start the Vine
Begin with your slip knot and crochet the starting chain for the vine. Since this project is built as one continuous garland, that first chain is the base that everything grows from. Try to keep your tension relaxed and even here. If the chain is pulled too tightly, the finished garland may feel stiff instead of soft and flowing.
This is also the moment to think about the overall look you want. A rich green yarn makes it feel botanical and natural, while warm rust, gold, or brown tones can give it more of an autumn mood. You could even use cream or pastel shades if you want something decorative rather than realistic.
Step 2: Form the First Leaf Along the Chain
As you continue along the foundation, begin shaping the first leaf directly onto the strand. This is what makes the project feel so nice and efficient. Instead of stopping to create separate pieces, the leaves grow right from the vine as you work. The selected tutorial specifically presents the garland this way, as a no-sew design where the chain and leaves are crocheted in one.
When shaping the first leaf, focus on the outline rather than speed. You want it to look soft and balanced. If one side feels tighter than the other, slow down a little and let your hands settle into the motion. Small decorative projects often become much easier after the first repeat.
Step 3: Repeat the Leaf Pattern
Once the first leaf looks right, continue repeating the same leaf-making rhythm along the strand. This is the relaxing part of the project. You work a stretch of vine, make a leaf, then continue on. Because the leaves are built into the garland as you crochet, the project grows quickly and feels very satisfying.
It helps to pause now and then and lay the work flat. That gives you a chance to check the spacing and make sure the leaves are sitting nicely along the vine. If you want a fuller garland, keep the leaves a little closer together. If you want something lighter and more delicate, leave a bit more space between them.
Step 4: Keep the Garland Flowing
Continue working until the garland reaches your desired length. One of the nicest things about this project is how easy it is to customize. You are not limited to one exact size. You can make a short piece for a wreath, a medium one for a shelf, or a long trailing strand for a wall or window area. The selected tutorial even points out that the garland is ideal for wrapping around a wreath, which suggests a flexible, drapey finish rather than a stiff fixed shape.
As you go, try to keep the leaf size fairly consistent. Decorative garlands always look more polished when the repeated shapes match one another reasonably well. They do not have to be perfect, just close enough that the eye reads the whole strand as balanced.
Step 5: Check the Overall Look
Before fastening off, hold the garland up and look at how it hangs. This is a small step, but it matters. A leaf garland should have a nice gentle flow, with the leaves sitting clearly along the strand rather than bunching up awkwardly. If the spacing feels too crowded, make a mental note for your next one. If it looks too sparse, keep crocheting a little longer and add a few more leaves.
This sort of project is wonderfully forgiving. Since it is decorative rather than fitted, the main goal is simply to get a length and fullness that feels nice in your space.
Step 6: Finish the Ends
Once you are happy with the length, fasten off and weave in the ends neatly. Since the selected tutorial emphasizes the no-sew construction, this finishing stage stays simple. You are mainly tidying the beginning and ending points rather than attaching lots of separate motifs.
If the garland curls a little, a gentle block can help it relax. Straighten the leaves with your fingers and let the strand settle into shape. After that, it should be ready to drape, wrap, or hang wherever you want it.
Step 7: Style the Finished Garland
The finished garland should look soft, leafy, and gently natural. Because it is worked as one continuous piece, it tends to have a nice flowing feel that suits all kinds of home decor. You can loop it around a wreath, drape it over a shelf edge, wind it around a mirror, or use it as part of a seasonal display. The selected tutorial specifically notes wreath use, but the same style also works beautifully in everyday decor.
Helpful Tips
- Keep the starting chain relaxed so the vine stays flexible
- Use smooth yarn if you want the leaf shape to show clearly
- Check your spacing every few leaves so the garland stays balanced
- Try muted greens for a natural look or autumn shades for seasonal decor
- Hold the garland up before fastening off to check the drape
- Block lightly if the vine or leaves need help settling flat
Common Mistakes to Avoid
- Pulling the foundation chain too tightly
- Making some leaves much larger than others
- Placing the leaves too close together if you want a lighter look
- Using very fuzzy yarn if you want crisp leaf definition
- Forgetting to check how the garland hangs before finishing
- Leaving ends unwoven on a decorative project
Customization Ideas
There is a lot of room to make this project your own. You can use soft sage for a calm botanical look, deep green for a classic vine effect, or warm gold and rust for autumn decorating. You can also make the garland shorter and fuller for wreath wrapping, or longer and more airy for shelf and wall styling. Tiny berries, flowers, or bows added between sections could make it feel even more seasonal.
Style Ideas
A crochet leaf garland looks beautiful wrapped around a wreath, draped over a mantel, hung along a shelf, placed around a mirror, or used as soft nature-inspired party decor. It also works nicely in a nursery or reading nook if you want something gentle and handmade without being too bright or busy.
Care Instructions
Gently hand wash if needed and lay flat to dry. Reshape the leaves while damp so they hold a neat outline. Avoid high heat, especially if you used acrylic yarn. Store it loosely coiled or laid flat so the vine keeps its shape.
Time Needed
This may take a few hours depending on your speed, yarn, length, and leaf spacing. Since the garland is worked continuously, it often feels quicker than projects that require lots of separate motifs and assembly.
Conclusion
A crochet leaf garland is such a calming little project. It is simple, decorative, and easy to customize, and the continuous no-sew style makes it feel especially satisfying to work on. Once you settle into the rhythm of the vine and leaves, it becomes the kind of crochet you can really relax with. Whether you wrap it around a wreath or drape it across a cozy corner of your home, it adds a soft handmade touch that always feels welcoming.
FAQs
Is this beginner-friendly?
Yes. The selected tutorial presents it as a simple leaf garland, which makes it a nice beginner-friendly decorative project.
Do I need to sew separate leaves onto the vine?
No. The selected video specifically describes it as a no-sew design where the chain and leaves are crocheted in one.
Can I make it longer or shorter?
Yes. Because it is a continuous garland, you can keep working until it suits the space where you want to use it.
What yarn works best?
Smooth cotton, cotton blends, or soft acrylic all work nicely, depending on whether you want a crisp or softer finish.
Where can I use a crochet leaf garland?
It works beautifully on a wreath, shelf, mantel, wall hook, mirror, or as part of seasonal decor. The selected tutorial specifically mentions wreath use.