
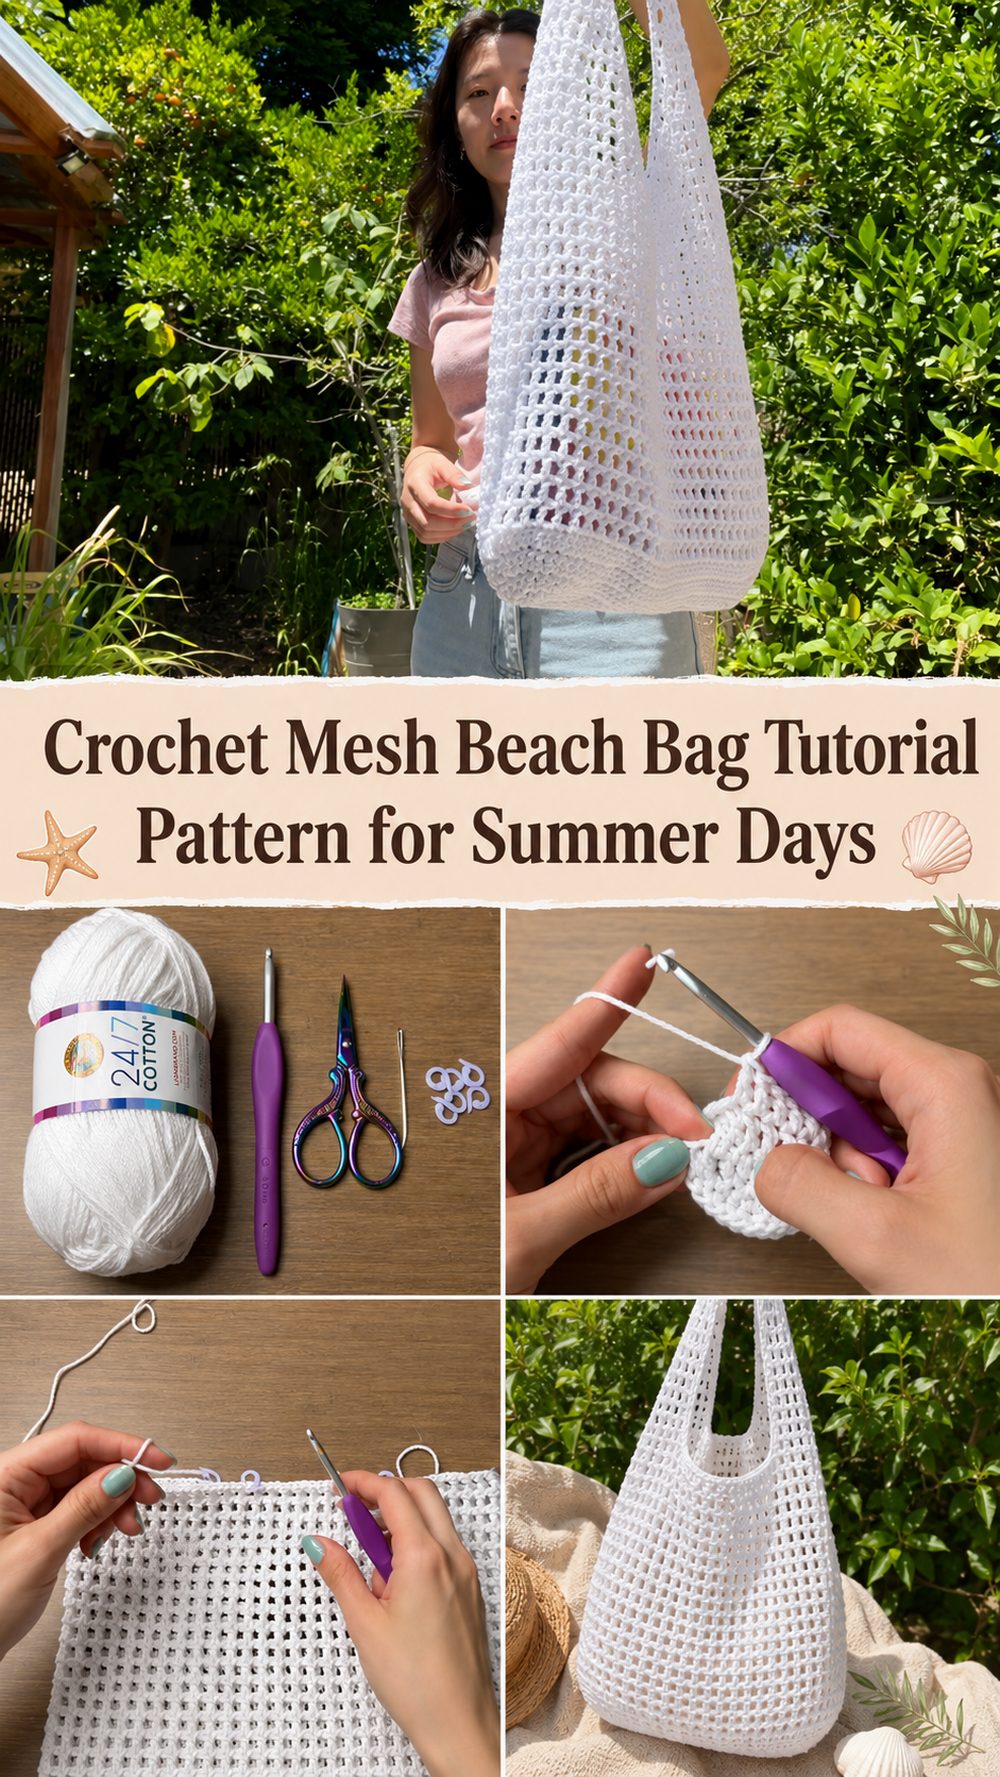
A crochet beach bag is one of those projects that feels useful right from the first stitch. You’re not just making something pretty to look at. This is a roomy, breathable bag that works for towels, sunblock, a book, sunglasses, or those little extras that always seem to accompany a day at the beach. This tutorial makes a mesh-style tote with a solid oval base, an airy body and shaped straps for a nice balance of structure and lightness. The mesh makes it a great choice for warm weather, as it feels open and easy to carry, but the solid bottom gives it a more practical everyday shape. This is a satisfying project to make if you like your crochet projects to be wearable, functional and easy to personalize.
Why You’ll Love This Project
This beach bag has that laid-back summer look, but it’s practical too. The solid bottom allows it to sit nicely, the mesh body keeps it light and the shaped straps make it feel more finished than a super basic tote. It’s also easy to adjust, so you can make it shorter, taller, wider or deeper depending on how you want to use it.
Needed Supplies
Yarn of cotton or other strong yarn, e. g. for bags
Crochet hook
Scissors.
Needle for yarn
Stitch markers .
Tape measure
Use a yarn and hook size that will give you the fit and texture you want.
The Best Yarn for the Project
Cotton is usually the nicest option for a beach bag like this. It gives the bag a bit of structure, stands up well with regular use and feels right for warmer weather. Mercerized cotton or a smooth cotton blend work especially well if you need clean stitch definition and less stretch. If you want a softer, slouchier look, you can use another fiber, but be aware that a softer yarn may stretch more when the bag is filled. For beach days, picnics and everyday summer errands, the most reliable choice is a breathable yarn with a little bit of give.
Skill Level
This project is ideal for the confident beginner or advanced beginner. The stitches themselves are not complicated, but you do need to be comfortable working in rounds, building an oval base, keeping a mesh pattern even and shaping the straps so both sides match. If you’ve made a few simple crochet items and are ready for a bag with a little more structure, this is very doable.
Size & Fit Guide:
Easy to adjust as you go. For more width, start with a longer foundation. If you want a bigger bottom and more depth keep adding rounds to the base . If you want a taller bag, continue working the mesh body for more rounds. If you want the straps shorter or longer, you can adjust the strap section before you finish.
A good way to customize the size is to think about what you want to carry. For a beach bag that’s lighter, keep the body moderate and the straps comfortable on the shoulder. If you want a larger carryall, make the base a little larger and work more body rounds before fashioning the handles. Fold the bag to see where it will sit before deciding on strap placement, it’s helpful.
Chain Stitches Used
Slip stitch
Single crochet
DC (double crochet)
Upgrades
Drops
Mesh Stitch Pattern with Chain Stitches
How to Make It
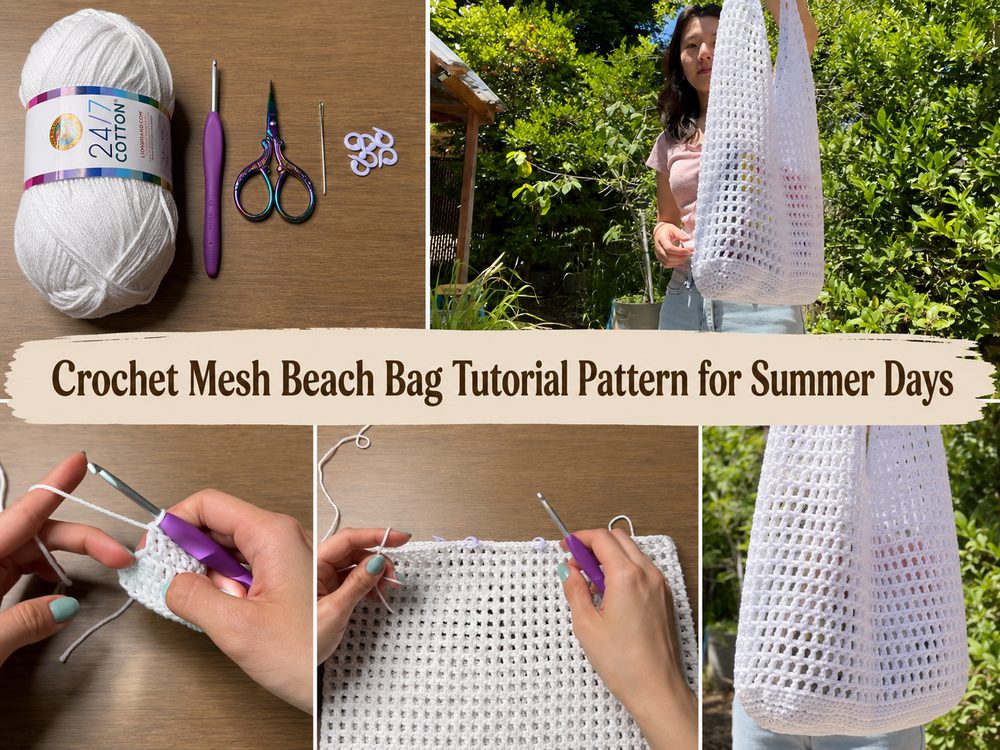
Initiate the Foundation
This bag begins with a foundation chain to make the center of the oval base. The base is worked around both sides of that starting chain, and the shape doesn’t stay a flat rectangle, but grows evenly and becomes a smooth oval. This gives the finished bag a nicer bottom and a little more polish.
When you start, try not to make the foundation too tight. If the chain is too tight, the base may curl or feel stiff. The whole shape is built from here, so it’s worth taking a moment to make those first stitches relaxed and even. Once the first round is done the bag starts to shape up quickly.
Make the Solid Oval Base
The base is worked in rounds of double crochet, with each round increasing the width and depth. The long sides are worked more evenly, and the increases are worked at the curved ends of the oval. This is what keeps the shape smooth and not rumpled.
As the base gets bigger, place a stitch marker at the start of the round to keep track of where each new round begins. That little habit makes a big difference especially when you are working around a long oval and don’t want to lose your place.
The base is the part that gives the bag its strength so it is well worth checking it often. Lay it flat, and ensure it is lying even. If it starts waving, your raises might be too loose, or too often. If it cups a little too much you might need a slightly looser hand. When the bottom looks balanced and is about the size you want you can move onto the body.
Mesh Body Treatment
Once the base is finished, the bag becomes a mesh body. This gives the beach bag its airy, open appearance. The mesh is made by joining double crochet stitches with chain spaces in rounds. The rest of the body is repetitive and relaxing once the first mesh round is made.
This is the section where the bag starts to feel airy and useful for summer. The open weave makes it lighter than a thick tote and also gives the bag that relaxed beach look. The mesh of this design is still tight enough to contain everyday objects in a more organized manner than a very loose net bag.
Keep your tension even here, if you can. If one round is much tighter than the other, the body can pull in or flare out more than you want. It’s helpful to step back every few rounds and look at the shape from a distance. The sides are supposed to grow evenly and look even.
Adjust the Size
This is the most customizable part. If you want a shorter tote, stop mesh body sooner. If you want a deeper beach bag that can hold a rolled towel or larger items then add more rounds before you start the straps.
You can also change the overall proportions, adding a bigger bottom with a shorter body or a smaller bottom with a taller body. A bag with a wider bottom and lower height feels more open and spacious. A bag with a more moderate base and taller mesh body feels more like a classic shoulder tote.
Mold the Straps
When the body is at the desired height, the strap positions are marked. The bag is folded so the sides match up and the placement of the strap is measured from the left and right edges. This step is important as it ensures the handles stay centered and balanced when the bag is worn.
Each strap is worked in rows, separately. First, the strap section is tapered, so it narrows as it rises from the body. That shaping makes the handle look more refined and sit better on the shoulder. After the narrowing, the strap is worked more evenly, to form the long section that becomes the handle.
Finish the first strap and then do the second strap the same way. It’s one of those places where you have to count the rows carefully and compare the two sides before proceeding. The matching straps make the whole project look so much better.
Join or Make the Part
When both straps are finished, the edges are outlined and the top ends are attached. The outlining helps to tidy the edges of the strap and gives them a cleaner finish. Then the ends of the strap are sewn together so that the bag can be carried on the shoulder.
This part, take your time. A well joined handle makes a big difference to the finished look and how comfortable the bag feels in use. A flat, secure seam will make the bag look more professional and stand up better when filled.
Trimming the Edges
The last step is to weave in the ends and check over the whole bag. Make sure the mesh body is even, the base is nice, and the straps are even in width and length. If necessary, gently shape the bag with your hands into its final shape.
It should finish with a solid oval base, an open mesh body and long shaped straps that feel sturdy enough for daily use. It has a laid-back summer look, but it still feels deliberate and practical.
Helpful Hints
Keep the foundation chain loose so the base can form nice and smooth.
Now place a stitch marker for the start of the round and where the straps go.
Before lifting the base into the mesh body, make sure it is flat.
When the bag is folded, mark the handles so the straps are lined up evenly.
Count the rows on the first strap and repeat them on the second strap exactly.
If you want the bag to feel stronger and less stretchy, cotton yarn is particularly good.
Weave in ends securely, especially around straps and join points.
Common Mistakes to Avoid
Tightening the foundation chain And forcing the base to curl
Dropping the first stitch marker, skipping stitch markers
varying the tension halfway through the mesh body
Starting the straps without checking that they are even on both sides.
lengthening or shortening one strap from the other
Screwing up the top part and hurrying the finishing edge
Ideas for Personalization
This is a DIY beach bag that is easy to make. You can crochet it in a sandy neutral, a crisp white, an ocean blue or in striped summer shades for a brighter look. You can make the body taller for travel days or keep it smaller for a quick throw on tote. If you want it to have more structure use a firmer yarn. If you want it to drape a bit more relaxed use a softer yarn. For smaller items, you can add a simple lining for more coverage, or sew in a small inner pocket for keys and lip balm.
Ideas on Style
This bag is ideal for beach days, pool days, picnics, trips to the market and everyday summer errands. It looks great with linen, denim, swimsuits, cover-ups and flowy warm weather pieces. It also makes a lightweight vacation tote or gift for a person who likes handmade accessories they will actually use.
Care Instructions
If the bag is made of cotton or another natural fiber, hand wash gently in cool water if necessary. Flatten damp and dry. Don’t use high heat which can damage the yarn and the shape of the straps. If the bag gets a little stretched, a gentle wash and reshape can help it settle.
Time Required
This will take a few hours depending on your speed, yarn, size and stitch pattern.
Conclusion
If you want a crochet project that feels useful, seasonal, and satisfying, this beach bag is a lovely one to make. The solid base gives it structure, the mesh body keeps it light, and the shaped straps make it feel finished and wearable. You can keep it simple in one soft shade or adjust the size and look to fit your own summer style.
FAQs
Is this beach bag beginner-friendly?
It is a good project for a confident beginner. The stitches are manageable, but the shaping, rounds, and strap placement are easier if you have already made a few crochet projects.
What yarn works best for a crochet beach bag?
Cotton is a strong choice because it is breathable, durable, and less likely to stretch too much. A smooth cotton or cotton blend works especially well.
Can I make the bag bigger?
Yes. You can lengthen the foundation, add more base rounds, or continue the mesh body for more rounds until the bag is the size you want.
Will the mesh be too open for small items?
A mesh bag is more open than a solid tote, so very small items may need a pouch inside. For towels, books, sunscreen, and similar things, it works very well.
Do both straps need to be worked exactly the same way?
Yes. Matching the rows, width, and shaping on both straps helps the bag hang evenly and look much cleaner.