12 DIY T-Shirt Cutting Ideas

Looking to breathe new life into your old t-shirts? These 12 DIY T-Shirt Cutting Ideas are fun, stylish, and incredibly easy to try at home. Whether you’re aiming for a casual cropped look, edgy back designs, or flirty off-the-shoulder styles, these creative t-shirt cuts will instantly update your wardrobe without spending a dime. No sewing skills? No problem! Most of these DIYs only require a pair of scissors and a few minutes of your time. From ladder-back and braided details to cold-shoulder and twist-front crops, each idea is unique and beginner-friendly. Perfect for teens, fashion lovers, or anyone who enjoys personalizing their style, these projects are great for upcycling old tees into trendy pieces. You can even use these ideas to host a DIY party or make custom gifts for friends. Plus, they work on almost any type of shirt—oversized, fitted, plain, or graphic.
Add your own touches like beads, knots, or fabric paint to take your creations to the next level. Whether you’re crafting something comfy for lounging or chic for a night out, these t-shirt cutting hacks deliver style and sustainability. Don’t toss your old shirts—transform them with these creative cuts. Ideal for back-to-school fashion, seasonal updates, or social media-worthy DIYs, these ideas turn basic into bold. Try one today and see how a simple t-shirt can become a statement piece. Start cutting and styling—your closet will thank you!
1. No Sew Fringe Tank Top

Turn your old tee into a trendy fringe tank top without any sewing! Just cut off the sleeves and neckline, then make vertical cuts along the bottom hem to create fringe strips. You can leave them loose or knot them for a fun twist. This design works great for beachwear or summer layering. Use a bright or graphic tee to make the fringe pop. It’s quick, stylish, and perfect for a wardrobe refresh. No special tools needed—just scissors and your hands. A fun DIY for beginners that gives instant results and personal flair!
Supplies
- Old t-shirt
- Sharp fabric scissors
- Ruler or tape measure (optional)
- Chalk or washable marker (optional)
2. Off the Shoulder Cutout Tee

Give your t-shirt a flirty upgrade with an off-the-shoulder cut. Simply cut a wide scoop neckline that stretches from shoulder to shoulder, letting the tee drape beautifully across your collarbone. You can trim the sleeves shorter for a relaxed fit or leave them long. Great for casual hangouts or pairing with layered necklaces. Choose a slightly oversized tee for a comfy drape. This DIY is beginner-friendly and perfect for reviving plain shirts in your closet. Style it with jeans or shorts for an effortlessly cool look with a touch of DIY charm.
Supplies
- T-shirt (1–2 sizes larger than your fit)
- Fabric scissors
- Chalk or pencil for marking
- Ruler (optional)
3. Ladder Back Cut Tee

Create a stunning ladder-back design using just scissors and a little patience! Start by cutting horizontal strips down the back of your tee. Then, twist and loop them through each other to form a “ladder” look. This design is great for summer or workouts and looks amazing over a sports bra. Choose a stretchy tee for best results. You can add beads or knots for extra flair. It’s a creative way to turn a basic shirt into something edgy and chic. A great project if you love unique backs and a DIY twist.
Supplies
- Stretchy t-shirt
- Sharp fabric scissors
- Chalk or washable marker
- Ruler (optional)
4. Side Tie Crop Top

Turn a loose tee into a cute crop top with tied sides! Simply cut the bottom hem off and make vertical slits on each side. Tie the strips into knots for a playful, adjustable fit. You can crop it as short as you like. This idea works great for festival wear or lounging and gives an old shirt a whole new vibe. Use a bold-printed or bright-colored tee to make it pop. It’s easy, fast, and flattering—no sewing required. Pair with high-waisted jeans or shorts for a comfy, stylish outfit on a budget.
Supplies
- Oversized t-shirt
- Fabric scissors
- Ruler or tape measure (optional)
- Chalk or fabric marker (optional)
5. Heart Cutout Back Tee

Add a sweet twist to your shirt with a heart cutout on the back. Fold the shirt in half vertically and sketch half of a heart near the upper back. Cut carefully and unfold to reveal a symmetrical heart. You can layer it over a contrasting tank or bralette for a peek-through look. This design adds a romantic, handmade feel to basic tees and is perfect for gifting or personalizing. Use fabric chalk for clean lines and sharp scissors for neat edges. It’s an adorable way to bring love (literally!) into your DIY fashion.
Supplies
- T-shirt
- Chalk or fabric marker
- Fabric scissors
- Printed heart stencil (optional)
6. Twist Front T Shirt Crop

Add a stylish twist to your wardrobe with this twist-front crop top made from a basic tee. Cut the shirt horizontally a few inches above the hem, then make a vertical slit in the center and tie the two sides into a knot. It creates a flattering drape and gathered front that elevates any plain shirt. Ideal for high-waisted jeans or skirts, this cut gives you a boutique look on a budget. Pick a fitted shirt for the best result. A great no-sew fashion upgrade that’s cute, comfy, and super quick to make.
Supplies
- Fitted t-shirt
- Sharp scissors
- Chalk or ruler (optional)
7. Slashed Sleeves Rocker Tee
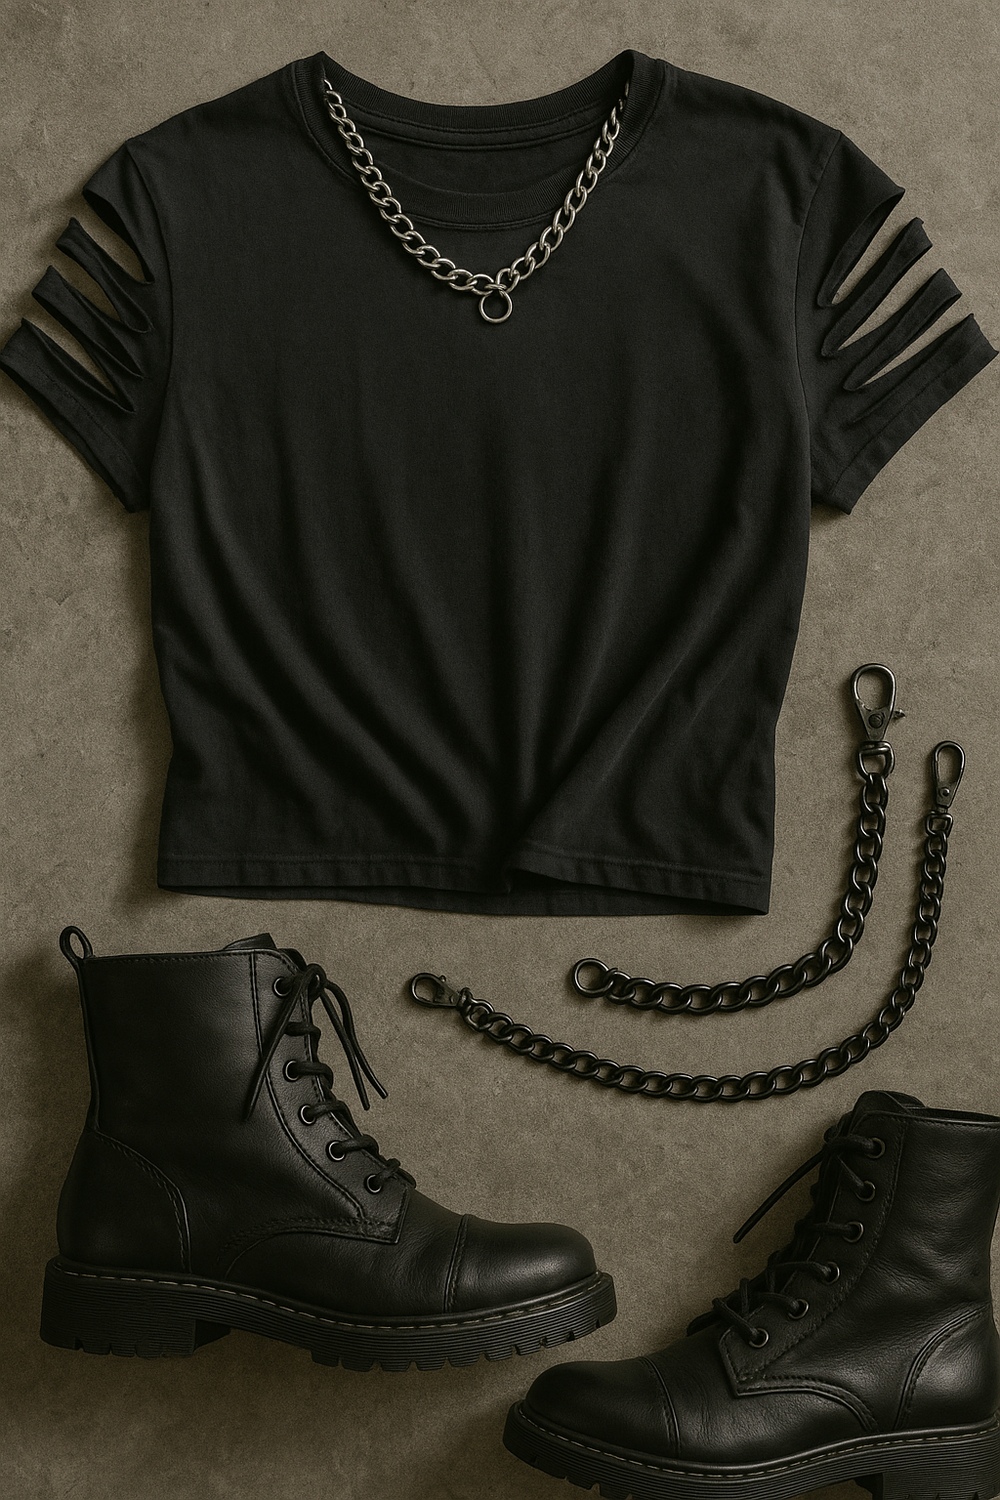
Channel edgy, rocker vibes by slashing the sleeves of your t-shirt! Cut several horizontal slits from shoulder to sleeve hem, then tug the fabric slightly to curl the edges. You’ll get a grunge-inspired, open-sleeve look that’s great for concerts or casual days. This works best with black or graphic tees and can be styled with ripped jeans or combat boots. The result looks store-bought but is totally DIY. It’s a fast way to upgrade old shirts into something with attitude and flair—no sewing or tricky steps needed!
Supplies
- T-shirt
- Fabric scissors
- Chalk or marker
- Ruler (optional)
8. Braided Back Tee

A braided-back tee adds texture and charm to any plain shirt! Cut three long vertical strips down the back of the shirt, then braid them together and secure at the bottom. You’ll need to snip and stretch the fabric first so it rolls inward for a polished look. This is ideal for lightweight or slightly stretchy shirts. Wear it over a contrasting tank to make the braid pop. It’s a subtle but beautiful twist that turns any shirt into a standout piece. Great for layering or summer wear—simple, creative, and totally chic!
Supplies
- Lightweight t-shirt
- Fabric scissors
- Chalk for marking lines
- Needle and thread or fabric glue (optional)
9. Braided Back Tee

For a bold, fashion-forward DIY, try a one-shoulder t-shirt cut! Just trim one sleeve and diagonally slice across the neckline to create a sleek asymmetrical look. You can leave the hem raw or fold it for a cleaner edge. This design works especially well with bold or graphic shirts and adds drama to your outfit. Pair it with statement earrings or a high bun to show off the neckline. It’s a fast, fun DIY that turns any oversized tee into a chic, going-out top—perfect for date nights, parties, or selfies!
Supplies
- Oversized or loose t-shirt
- Fabric scissors
- Chalk or pencil for marking
10. Side Slit Tunic Tee

Upgrade a long or oversized t-shirt into a breezy side-slit tunic! Cut slits from the hem upward on both sides, stopping just below the armpit. The result is a flowy, layered look that’s ideal for pairing with leggings or bike shorts. This simple cut adds movement and style while keeping things comfy and casual. Use a soft, drapey tee for the best effect. Optional: knot the sides or add grommets for flair. This is a great beginner project that’s versatile enough for loungewear, casual errands, or beach cover-ups.
Supplies
- Long or oversized t-shirt
- Fabric scissors
- Chalk or ruler for even slits
11. Cutout Shoulder Tee (Cold Shoulder)

Give your t-shirt a trendy cold-shoulder makeover! Cut oval or rounded holes at the shoulder area of each sleeve to create a peek-a-boo effect. It’s flattering, modern, and easy to do in minutes. Great for spring or summer outfits, especially when you want a touch of style without showing too much skin. Choose a fitted or structured tee for a polished look. Add embellishments like grommets or trim if you want to go glam. This DIY is quick, stylish, and endlessly wearable—perfect for fashion lovers on a budget.
Supplies
- T-shirt
- Fabric scissors
- Chalk or circular stencil (optional)
12. X Back Yoga Tee

Perfect for workouts or weekend wear, the X-back tee offers a stylish, breathable design. Cut an X-shape on the back of the tee, leaving intersecting strips. You can stitch the ends or tie them for a relaxed fit. This design looks best with stretchy fabric or athletic-style tees. Wear it over a sports bra to highlight the cutout detail. It keeps you cool during yoga, walks, or errands while adding a trendy edge. Plus, it’s easy to make and doesn’t require sewing if you like the raw look.
Supplies
- Stretchy t-shirt
- Sharp fabric scissors
- Chalk or ruler for precise lines