
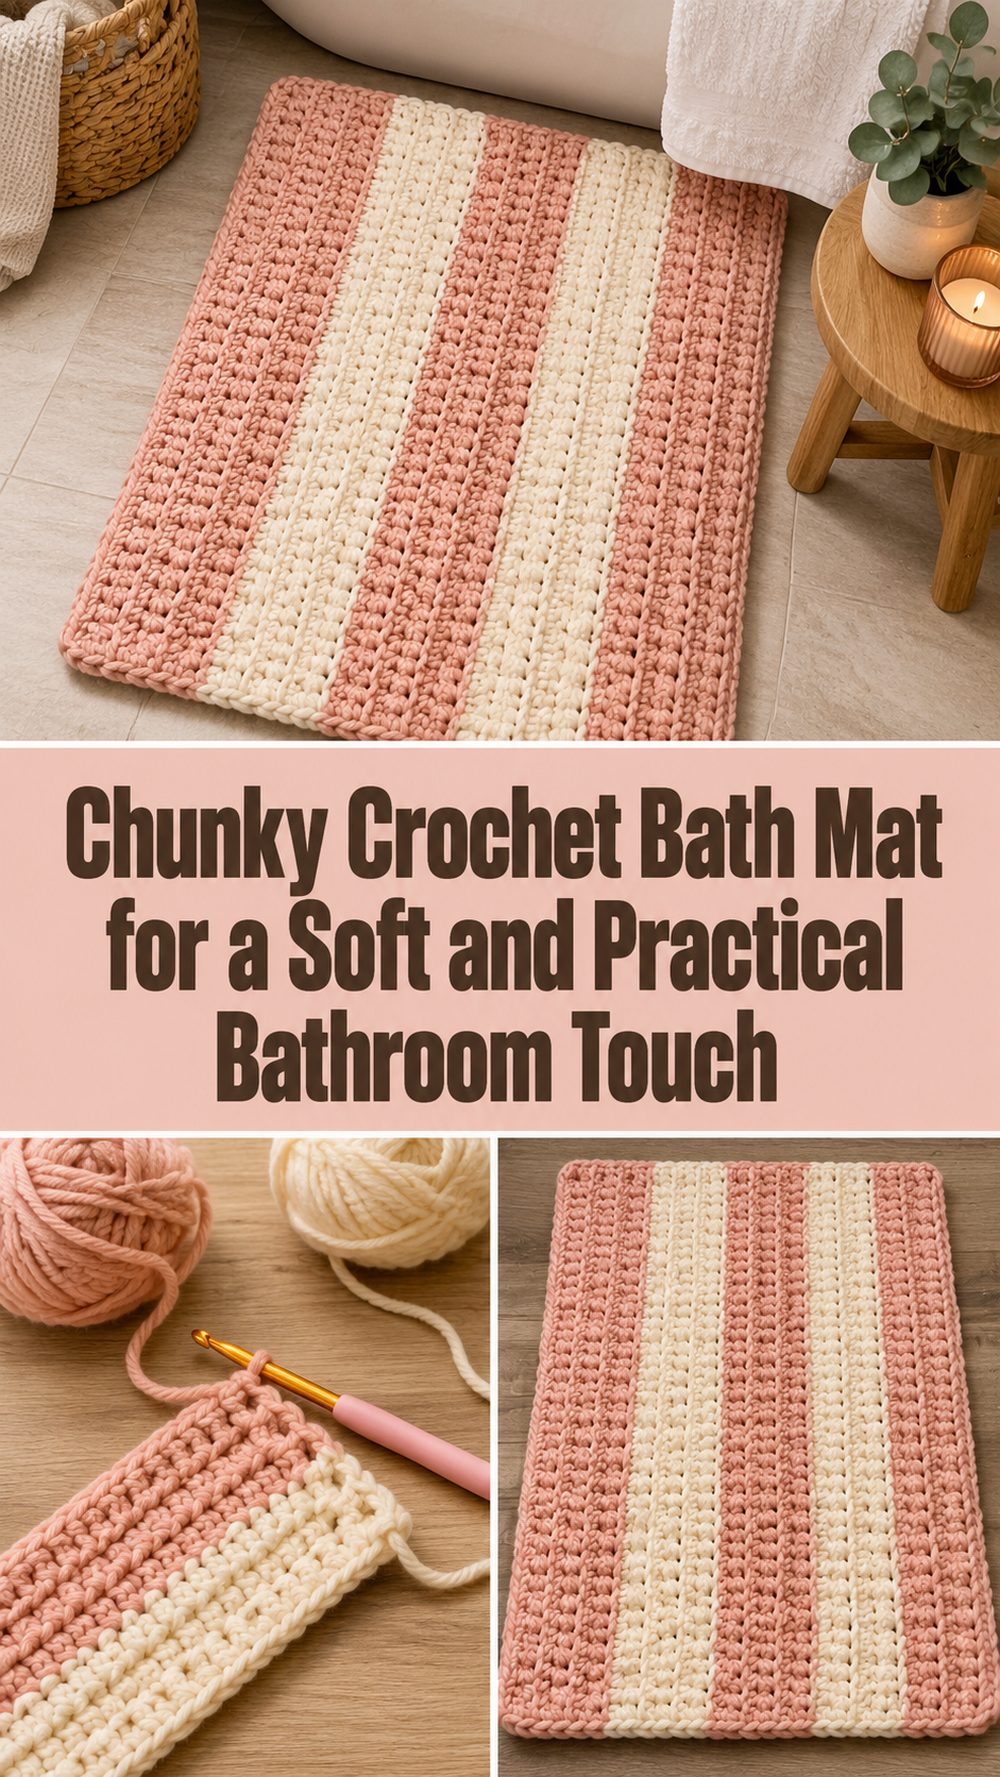
A crochet bath mat is such a lovely way to make your bathroom feel warmer, softer, and a little more personal. Instead of buying something plain from a store, you can make a thick handmade mat that feels cozy under your feet and adds texture to the room at the same time. The tutorial I chose teaches an easy chunky crochet bath mat worked in a simple 2-row repeat, which makes it a very comfortable project to settle into. It looks soft, useful, and beginner-friendly without feeling boring. Because it is made as a bath mat, the fabric comes out thick and nicely cushioned, which is exactly what most people want for a bathroom project like this. It is a great choice for anyone who enjoys practical crochet and wants something beautiful that can be used every day.
Why You’ll Love This Project:
This bath mat is easy to enjoy because it gives you quick visible progress, uses a simple repeat, and turns into something genuinely useful for your home. The chunky cotton texture makes it look soft and substantial, while the repetitive pattern keeps the project relaxing to work on.
Materials Needed:
- Premier Chunky 100% Cotton yarn
- 10 mm crochet hook
- Scissors
- Yarn needle
- Stitch markers if you like marking edges or row starts
- Measuring tape
Best Yarn for This Project:
For a bath mat, a thick cotton yarn is a very smart choice. Cotton feels sturdy, absorbs a bit of moisture better than many slippery fibers, and helps the mat keep a nice shape. Since the selected tutorial specifically uses chunky 100% cotton yarn, that style of yarn is clearly a good fit for this project. If you want a similar result, choose a bulky or super bulky cotton yarn that gives you a firm but soft fabric.
Skill Level:
Beginner-friendly to easy.
This project is a good choice for newer crocheters because the pattern is built around an easy 2-row repeat. That means once you understand the rhythm, you can keep going without needing to memorize anything complicated. It is especially nice for confident beginners who want to make a useful home item.
Size and Fit Guide:
A bath mat is easy to adjust as long as you keep your starting width and total length in mind. Measure the space where you want to place it, then crochet until the mat reaches the size that feels right for your bathroom. If you want it narrower or wider, adjust the starting chain as needed. If you want it longer, simply keep repeating the main rows until you are happy with the length.
It helps to lay the mat on the floor now and then while you work. That way you can check the proportions before finishing. For a bath mat, comfort matters too, so think not only about floor space but also about where your feet will naturally land when stepping out of the shower or bath.
Stitches Used:
Based on the selected tutorial and its simple repeat structure, the project clearly uses easy foundational stitches rather than decorative shaping. The main stitches are likely:
- Chain
- Slip stitch
- Basic row stitches for the 2-row repeat
- Turning chain
Because the video title confirms a 2-row repeat chunky cotton rug or bath mat, it is safest to describe the construction as a simple repeating row pattern without inventing exact stitch counts or stitch placement details beyond what is clearly supported.
How to Make It:

Step 1: Start the Foundation
Begin by making a foundation chain that matches the width you want for your bath mat. Since this is a rectangular rug-style project, the width is decided right at the beginning. Keep your chain loose enough that the first edge will not pull in. If your chains tend to be tight, going up a hook size just for the foundation can help.
This is a good moment to think about placement. A bath mat usually looks best when it fits the space comfortably without crowding the room, so aim for a width that feels balanced in front of the tub, sink, or shower.
Step 2: Work the First Row
After the starting chain is complete, work your first row into the foundation. This row helps set the shape and gives you a base for the repeating pattern that follows. Take your time here and keep your stitches even, because clean edges at the beginning make the whole mat look neater later on.
With chunky cotton yarn, the stitches build up quickly, which is part of what makes this project feel satisfying. You do not have to wait long before the mat starts looking substantial.
Step 3: Begin the 2-Row Repeat
The selected tutorial is built around an easy 2-row repeat, which is the heart of the whole project. Once you complete the setup, you continue alternating those same two rows over and over until the mat reaches your desired length. That kind of repeat is wonderful for a home project because it keeps the process simple and calming.
As you work, pay attention to the texture being created. A bath mat should feel thick enough to be comfortable underfoot, and the chunky cotton yarn helps create that plush, practical finish. Even if the stitch pattern is simple, the thickness of the yarn gives it a cozy look.
Step 4: Keep the Edges Straight
One of the most important parts of making a rectangular bath mat is keeping the side edges straight. Count your stitches if needed, especially in the first several rows, so you do not accidentally add or lose stitches at the ends. A clean rectangle always looks more polished in the finished piece.
If you notice the sides starting to slant, check whether you are placing the first and last stitch of each row correctly. Stitch markers can help if row ends are hard to spot in thick yarn.
Step 5: Continue Until the Length Feels Right
Keep repeating the two main rows until the mat is as long as you want. This project is very flexible, which makes it useful for different bathroom layouts. You might want a compact mat for in front of the sink, or a longer one for outside a shower or tub. Just keep going until it suits your space.
Try placing it on the floor during the process so you can judge the size in real life. This is better than guessing, especially for practical home pieces.
Step 6: Check the Feel and Thickness
Since this is meant to be soft and comfortable, pause occasionally and feel the fabric in your hands. A bath mat should have enough density to feel cushioned, but not so much stiffness that it becomes hard and board-like. The chunky cotton yarn mentioned in the tutorial is a nice balance for this kind of project because it creates body without making the mat feel overly rigid.
If your stitches seem too loose, the mat may feel floppy. If they are too tight, the mat may become stiff and harder to use. Adjusting your tension a little can make a big difference.
Step 7: Finish Neatly
When the bath mat reaches the length you want, fasten off and weave in the ends securely. Because a mat gets regular use, it is worth taking extra care with finishing so the ends stay tucked in nicely. You can smooth the mat flat with your hands after finishing and make sure the corners and edges sit evenly.
The final result should be a chunky, soft rectangular mat with a simple repeating texture and a practical everyday shape. The selected tutorial specifically presents it as both a rug and bath mat, which makes it a versatile home project with a sturdy but cozy finish.
Helpful Tips:
- Cotton yarn is a great choice for a bath mat because it feels sturdy and practical.
- Keep your starting chain loose so the first edge does not pull.
- Count stitches at the ends of rows to keep the shape neat.
- Lay the mat flat every so often to check the size.
- Keep your tension even for a smoother texture.
- Weave in ends very securely since bath mats get frequent use.
Common Mistakes to Avoid:
- Making the starting chain too tight
- Accidentally adding or dropping stitches at row ends
- Choosing a yarn that is too stretchy or too slippery
- Making the stitches too loose so the mat feels floppy
- Forgetting to check the size as you go
- Leaving ends loosely woven in on a project that will be used often
Customization Ideas:
You can easily make this bath mat your own by changing the color to match your bathroom. Soft neutrals feel calm and spa-like, while brighter shades can make the room feel cheerful. You can also make it longer, wider, or more compact depending on where you want to use it. If you enjoy texture, a striped version in two shades of cotton yarn would also look beautiful while keeping the same easy construction.
Style Ideas:
This crochet bath mat works beautifully in front of a sink, beside a bathtub, or just outside a shower. It can also be used as a soft little floor mat in a laundry room or bedroom corner. If you like handmade gifts, this would make a thoughtful housewarming present, especially in colors chosen to match someone’s home.
Care Instructions:
A cotton bath mat should be cleaned gently and dried carefully to help it keep its shape. If your yarn label allows machine washing, use a gentle cycle. Otherwise, hand wash it in cool or lukewarm water and press out the moisture without twisting. Lay it flat to dry and avoid high heat.
Time Needed:
This may take a few hours depending on your speed, yarn thickness, mat size, and how often you stop to check the fit.
Conclusion:
A crochet bath mat is the kind of project that feels rewarding from start to finish. It is simple enough to enjoy, practical enough to use every day, and flexible enough to make in the size and color that works for your space. The easy 2-row repeat makes it relaxing to crochet, while the chunky cotton gives it that soft, cozy finish that a bathroom mat really needs. If you want a handmade project that is useful, attractive, and easy to customize, this is a lovely one to try.
FAQs:
Is this project beginner-friendly?
Yes. The tutorial is presented as an easy 2-row repeat project, which makes it very approachable for beginners and confident beginners.
What yarn is best for this bath mat?
Chunky 100% cotton yarn is a great choice because it is sturdy, soft, and well suited to a bath mat. The selected tutorial specifically uses Premier Chunky 100% Cotton yarn.
Can I change the size?
Yes. You can adjust the starting chain for width and keep repeating rows until you reach the length you want.
Will this work only as a bath mat?
No. It can also work as a small floor rug in other parts of the home, especially in spaces where you want a soft, handmade touch. The selected video even frames it as a rug or bath mat.
How do I make it more comfortable?
Use a soft chunky cotton yarn, keep your stitches even, and make the mat large enough for your feet to land comfortably when stepping out of the bath or shower.